In this guide you will be shown how to setup and edit your Subjects on Databridge.
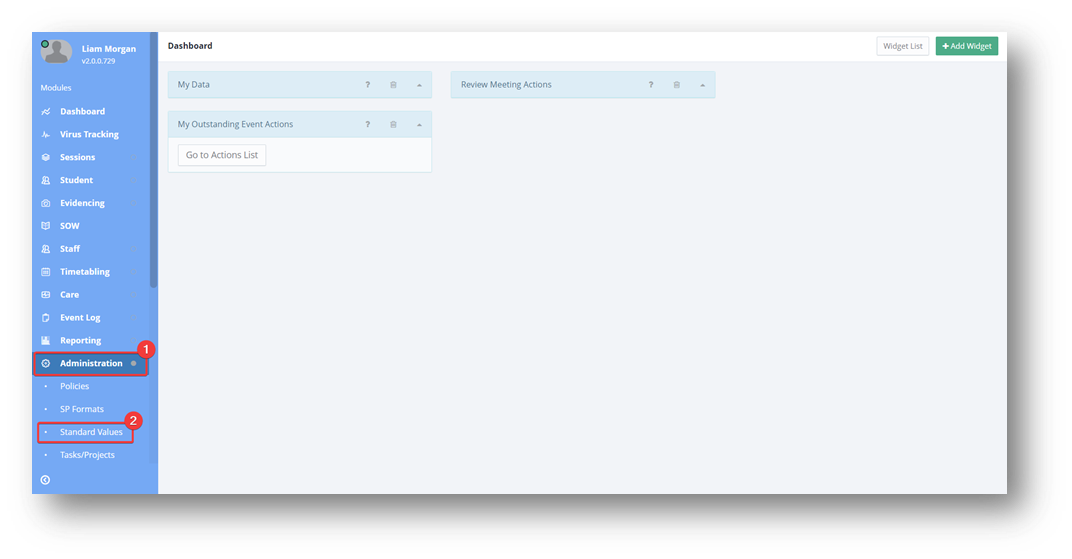
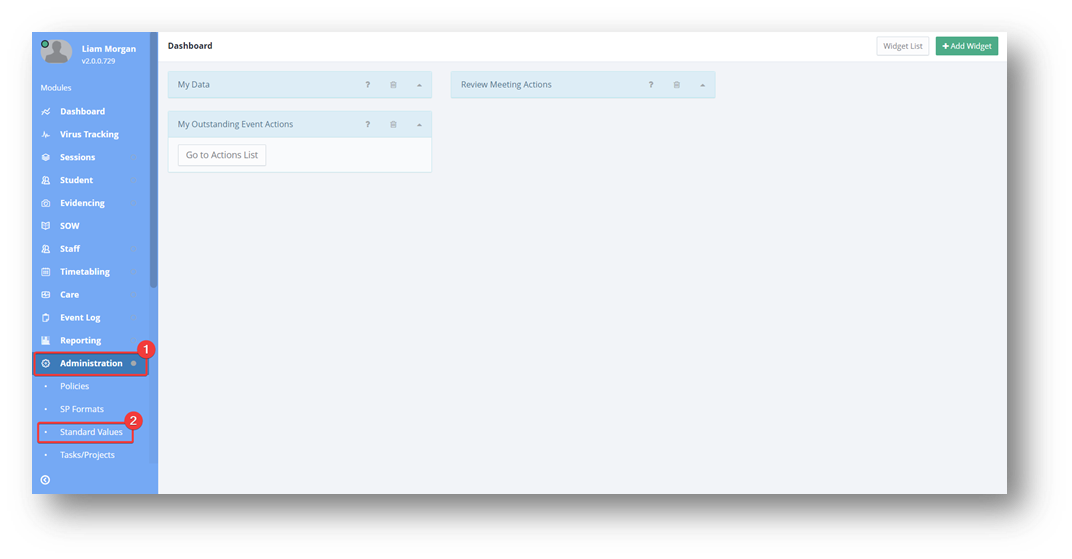
1. In order to set up / amend existing subjects, click on Administration > Standard Values
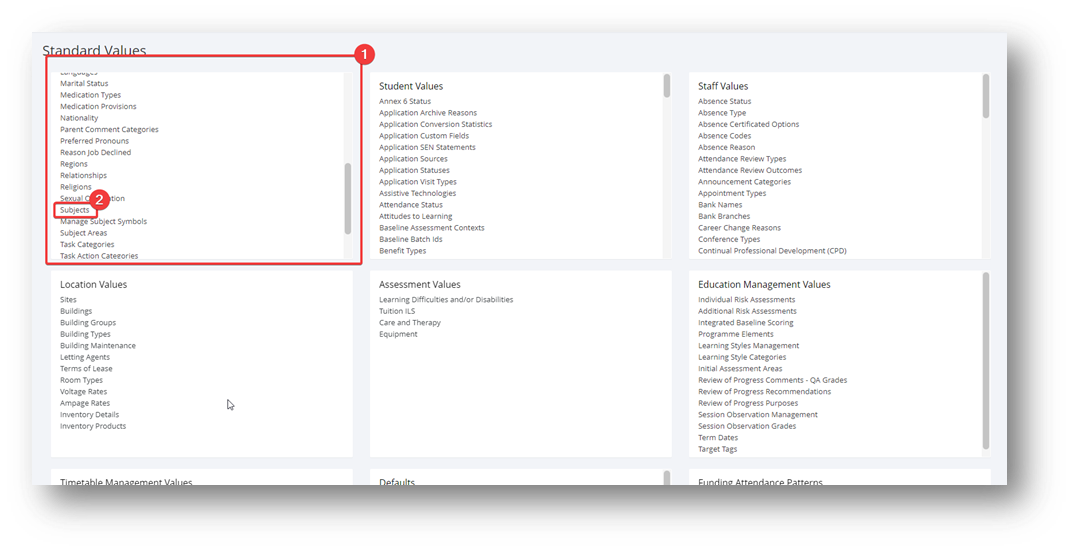
2. Within the General Values box, click on Subjects.
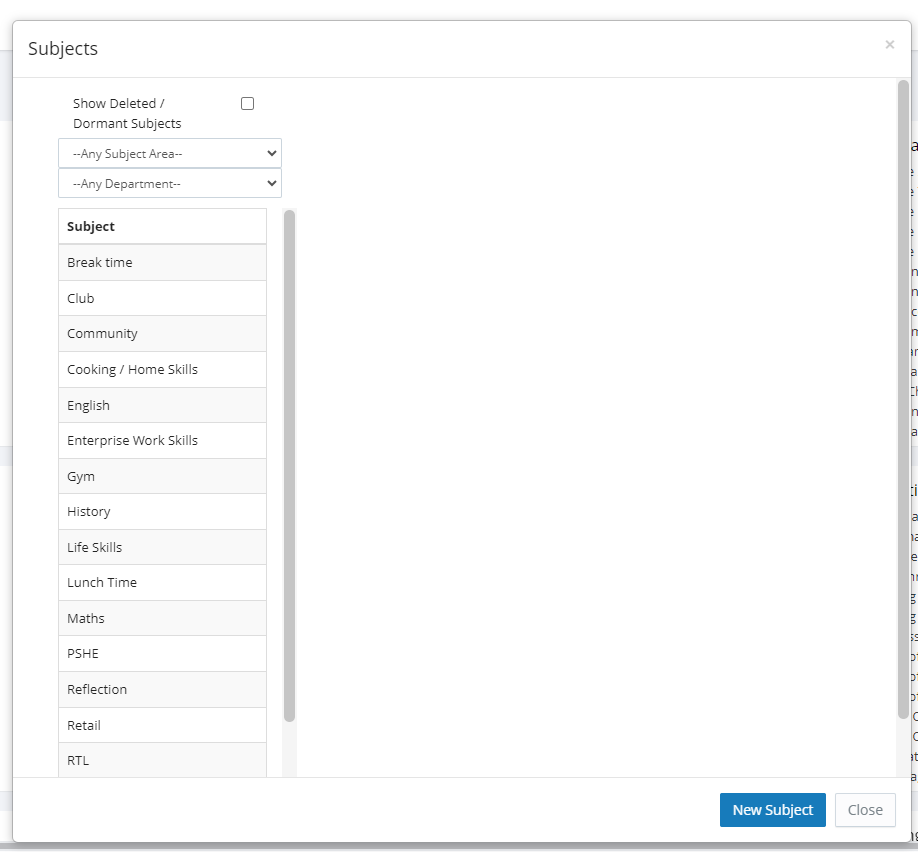
3. On the left, you will see a list of all subjects that have already been created. To create a new subject, click the blue New Subject button. To edit an existing subject, click on the Subject Name and proceed to Step 5.
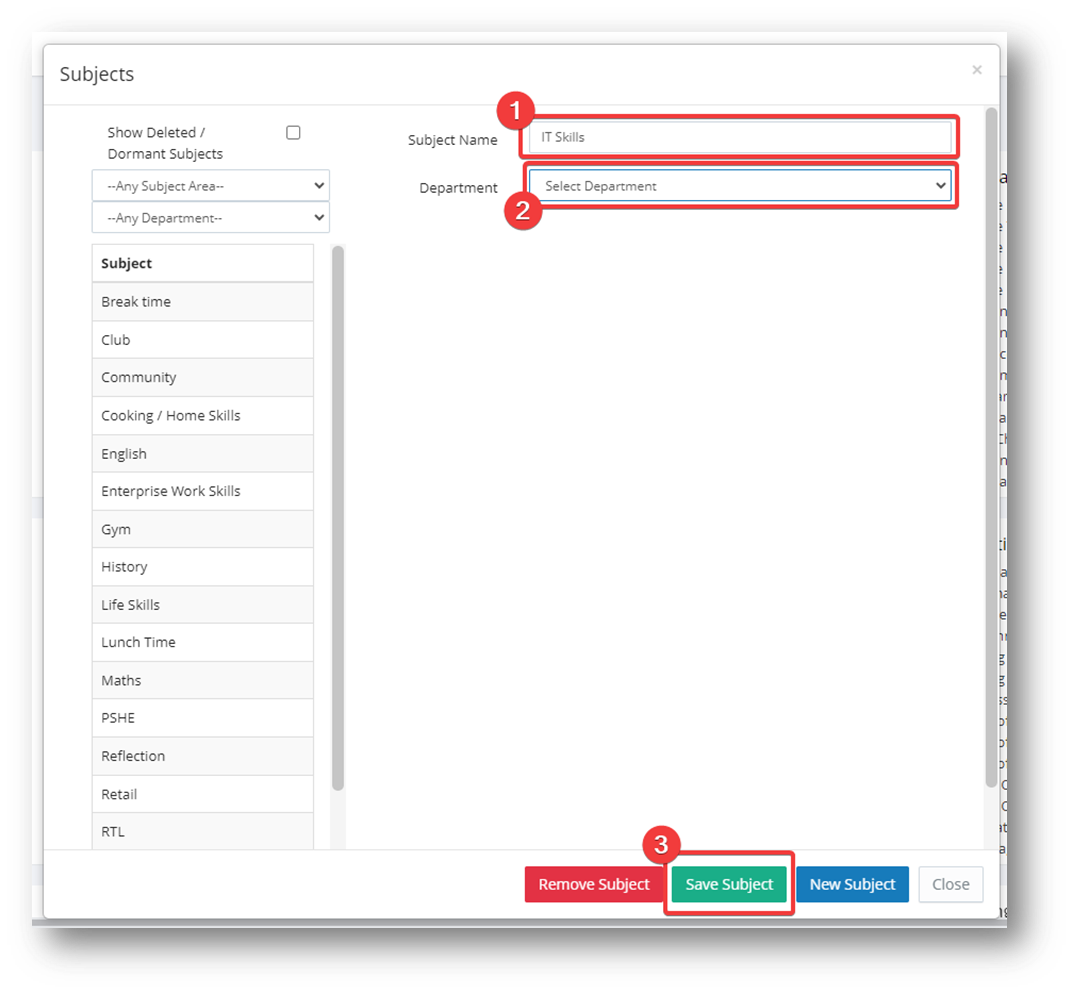
4. Type the name of the subject in the Subject Name textbox, and if relevant select a department that is related to the subject from the Department dropdown menu. Next, click Save Subject.
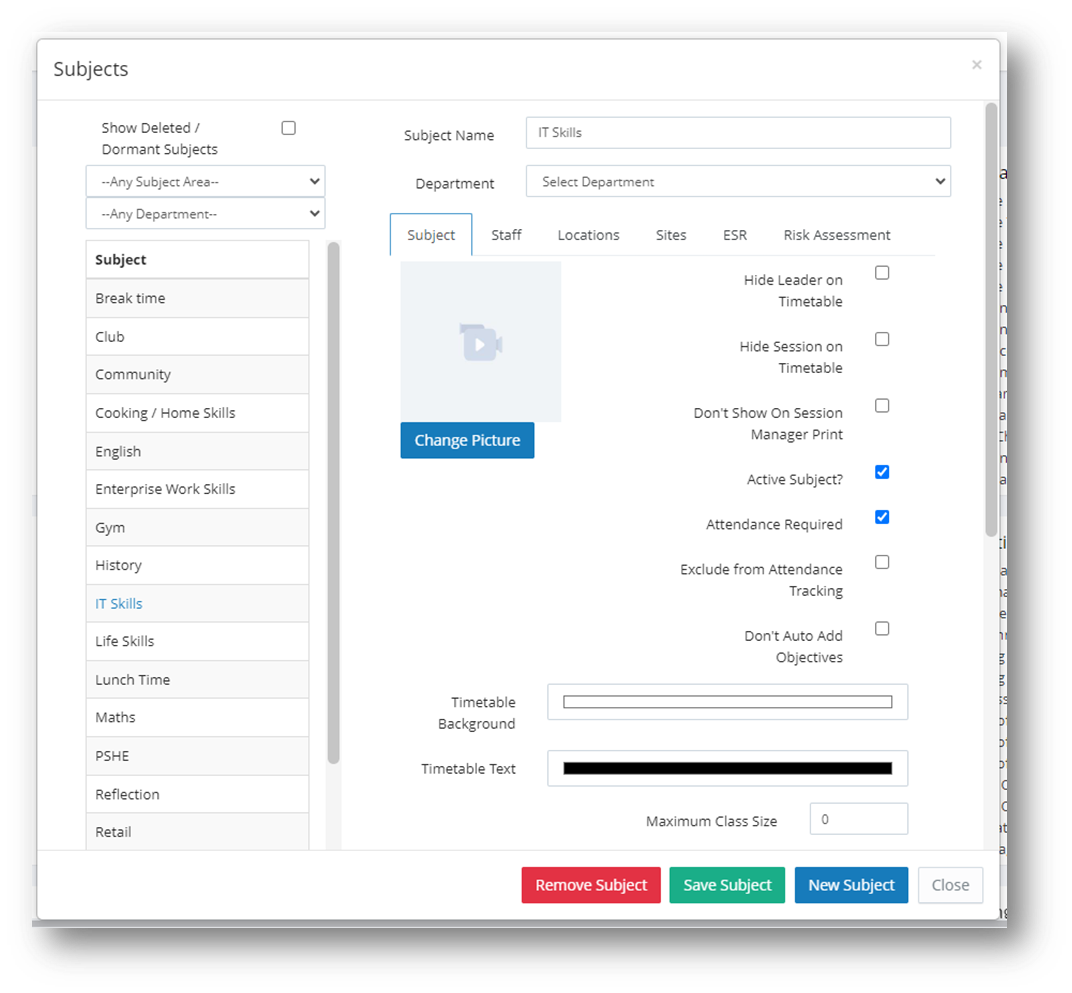
5. The subject now appears within the list on the left. You will be taken to the screen that allows you to edit details of the subject and there are a number of things that can be done from here such as:
- Change Picture allows you to assign an image or symbol that will appear on symbol styled timetables.
- Attendance Required can be unticked if you do not need to record Attendance for this Subject.
- Don't Auto Add Objectives can be ticked if you do not want objectives to be automatically added to the session.
- Timetable Background and Timetable Text change how the subject looks on timetables, which is useful for colour coordination / easily distinguishing between subjects.
For a full breakdown of all of the options, click here: https://databridgemis.freshdesk.com/a/solutions/articles/103000000609
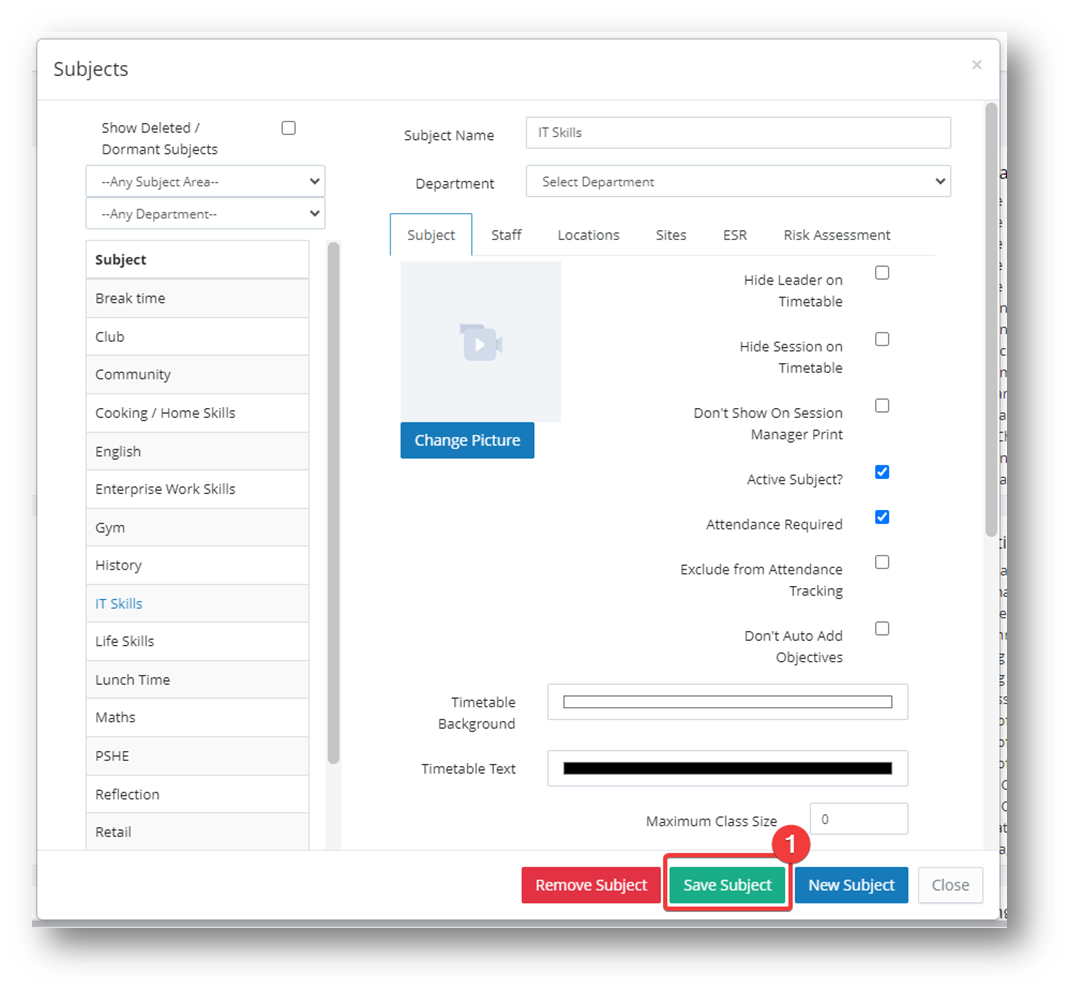
6. Once you have finished making any changes, press Save Subject at the bottom.
Was this article helpful?
That’s Great!
Thank you for your feedback
Sorry! We couldn't be helpful
Thank you for your feedback
Feedback sent
We appreciate your effort and will try to fix the article