In this guide you will be shown how to create and complete Event Log actions.
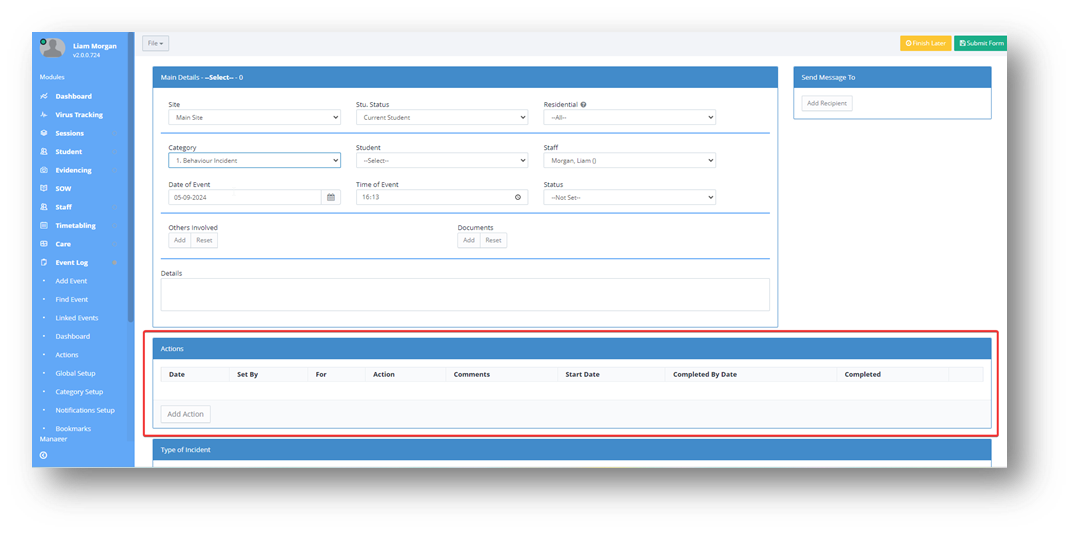
1. If the event log you are filling out allows for Actions to be created, you will find a section for this at the top of the event log, as seen in the screenshot below.
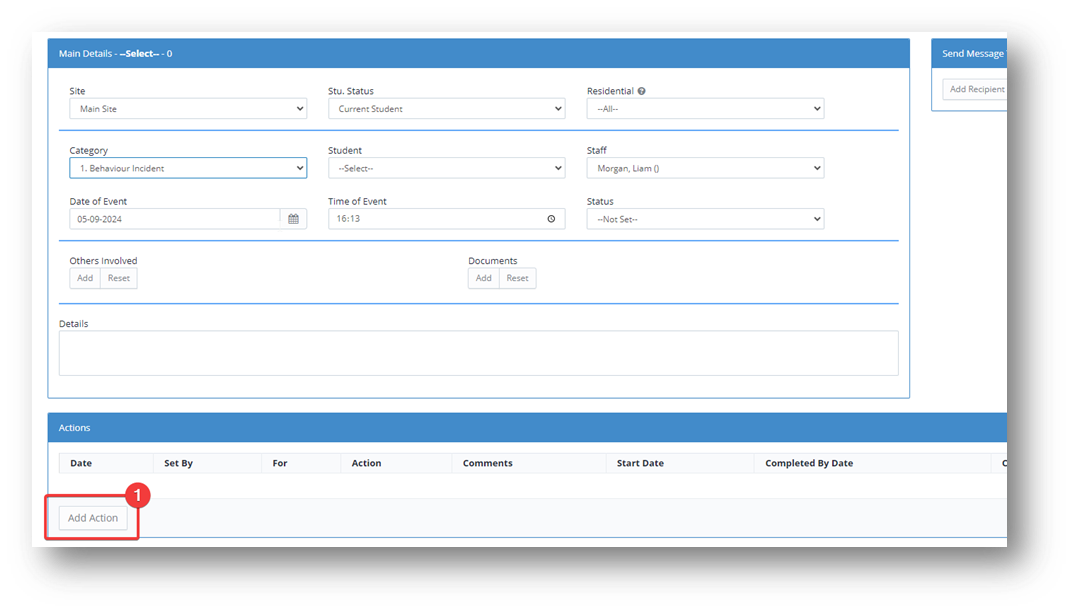
2. If you are viewing a previously created event log, this box with show the details of any previous actions. To assign a new action, click Add Action.
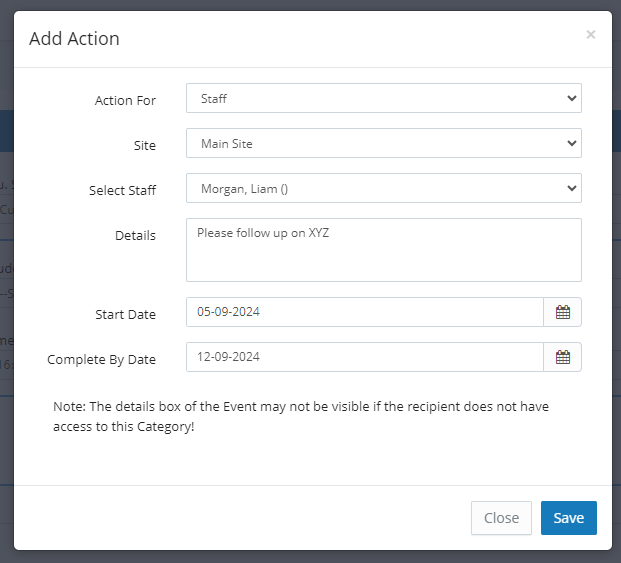
3. You will then be prompted to select who you are assigning the action to. Using the dropdown menus this can be assigned to an individual, or a group.
Fill in the details of the action in the Details box, select a Start Date and Completed By Date indicating when the action needs to take place. When these fields are all completed, press Save.
4. This will now appear within the Actions box. in order to submit the action, complete the rest of the event log as usual, and select Submit Form. 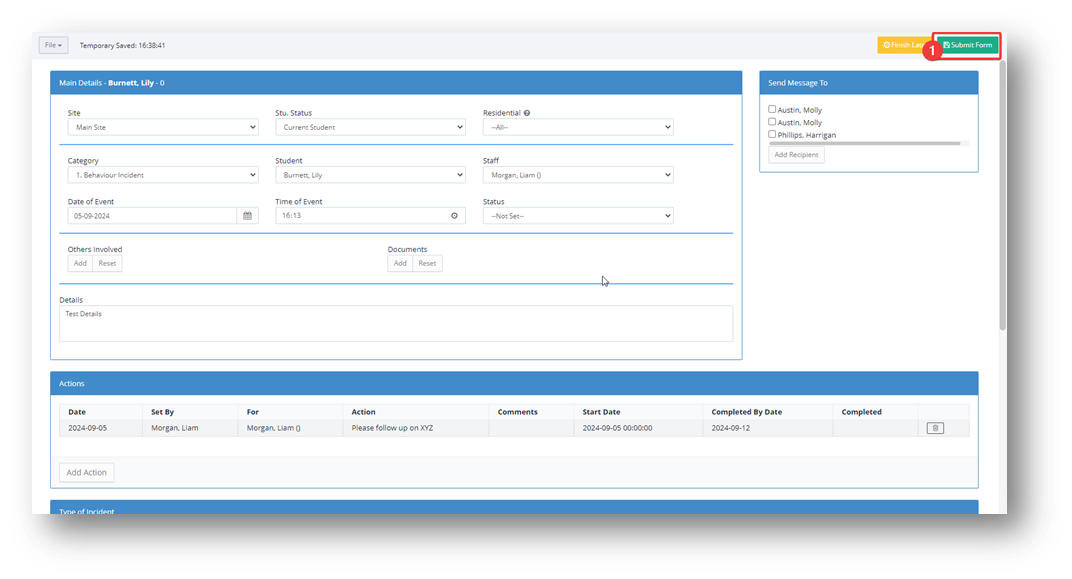
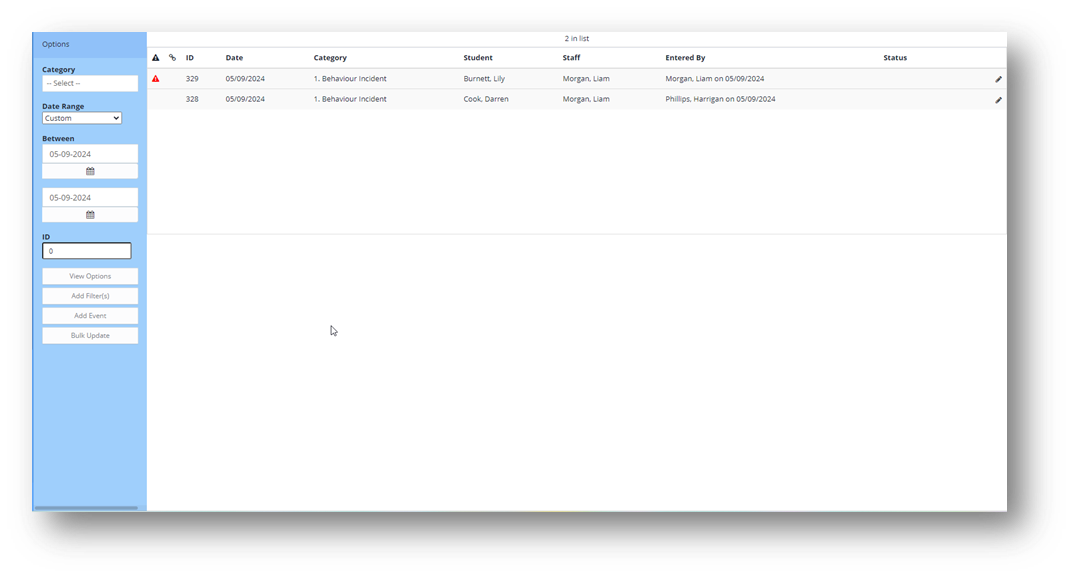
5. This will now take you to the Event Log Actions screen, where all event log actions can be viewed. As indicated by the red triangle seen on the Screenshot below, you can see that the top action just created is currently outstanding.
This page can also be accessed via Event Logs > Actions at any time.
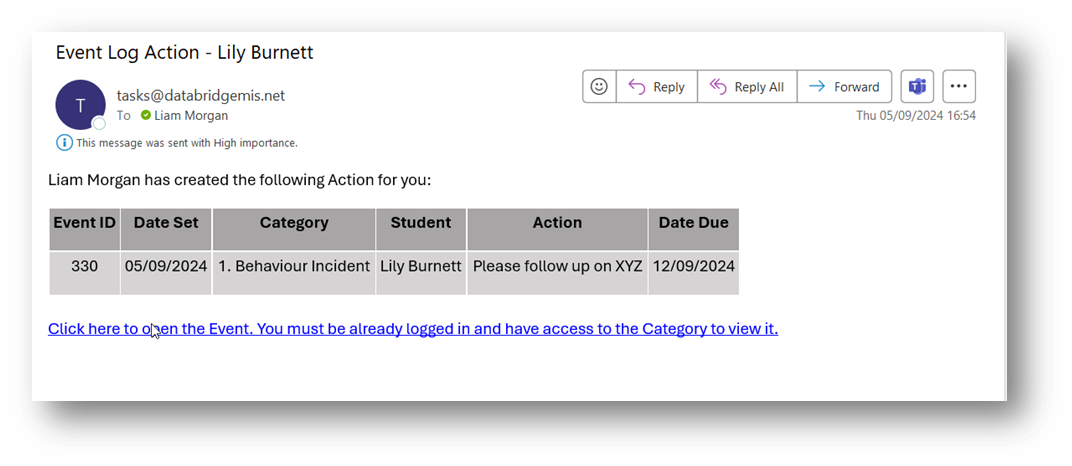
6. The member of staff assigned to the action will be notified in multiple ways. They will receive an email containing the details and a link to complete the action, and they will also get a notification via the Databridge messages system.
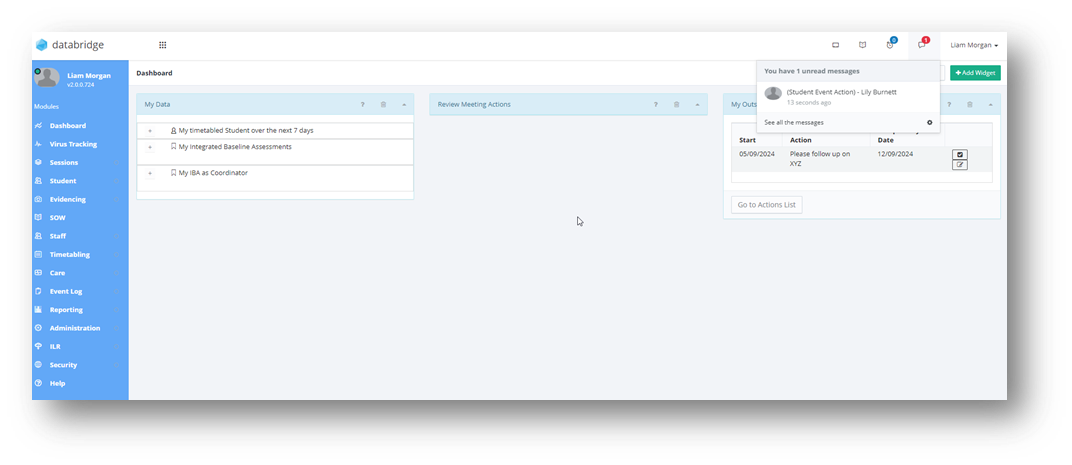
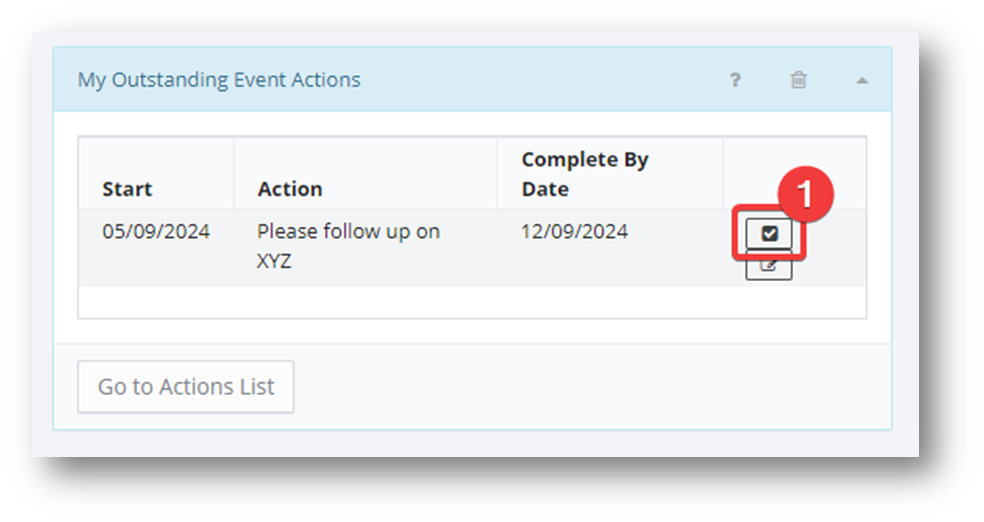
7. Users can also use the Widget, Event Log - My Outstanding Event Actions to continually track any outstanding actions. This will allow staff to see any outstanding actions on their dashboard when first logging in.
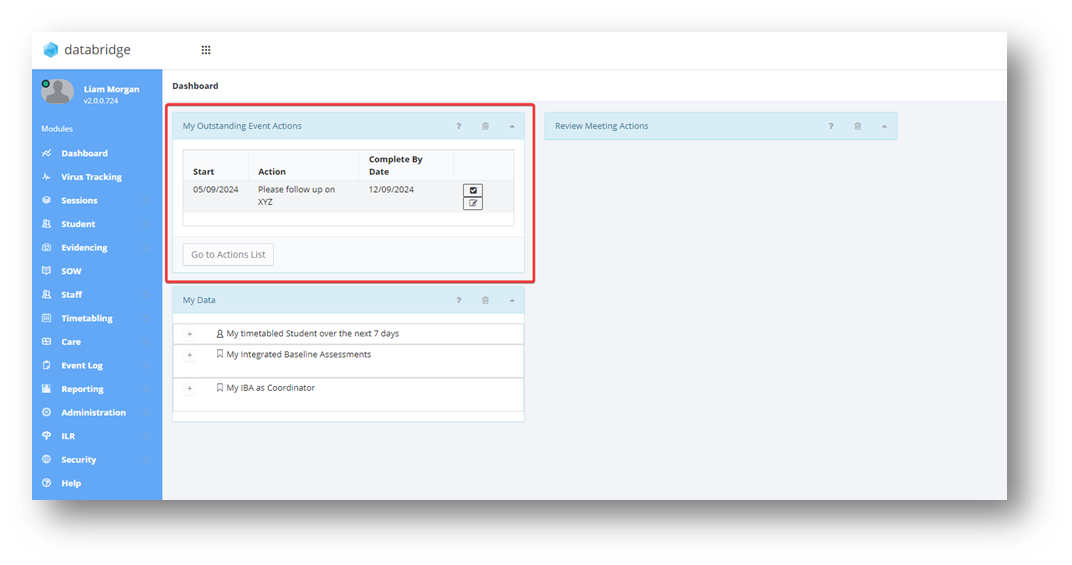
8. From this list of outstanding actions, simply find the one you want to action and select the Tick box Icon. From this screen, you can also select the Pencil Icon to go to the event log details, or go the the full list of actions.
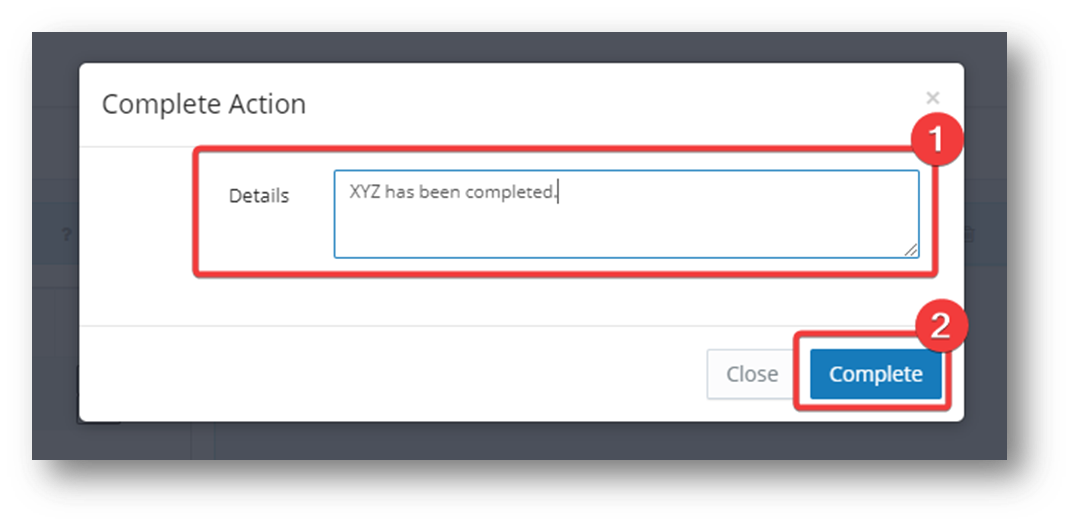
9. Type the details of what action you have taken in the Details box, then press Complete. The action has now been completed, and the member of staff that created the action, will receive a notification and an email, similarly to those in step 7.
Was this article helpful?
That’s Great!
Thank you for your feedback
Sorry! We couldn't be helpful
Thank you for your feedback
Feedback sent
We appreciate your effort and will try to fix the article