In this guide you will be shown how to edit your Session Plans in Databridge.
TABLE OF CONTENTS
- Session plan formats
- Adding Intent, Implementation & Impact
- Student learning profile pop up
- Session plan text defaults
Session plan formats
1. Navigate to Administration > SP Formats.

2. Click the Notepad icon for the session plan format that you want to change
In the Group section, tick the boxes for the items you want to appear in the session plan; The names of these sections can be changed as per step 3.
Do the same for the Individual tab.
You can also use Add New Plan just under Default Format if you need a different template. This isn't limited to subjects, it could also be used for sites. The feature allows users to create various session plan templates and apply them as needed, whether for specific subjects or sites.
3. If you need to change the labelling for session plan textboxes, click on the Session Plan Labels button.
A tab will appear with all session plan labels which you can edit and change.


4. Once you’ve configured the group and individual settings, ensure the subject areas or sites are linked to the session plan format by clicking the Link Subject button.
Linking is only necessary if you want to have a specific plan for a specific subject or site. If you’re using a single session plan format universally, linking is not required.
5. Select the Dropdown box to view all the subjects available on your system. You can select one or multiple subject areas as needed.
If applicable, you can also use this option to select sites. This flexibility allows you to associate multiple subjects or sites with a session plan format.
Click Save when finished.

6. All your selected subjects will appear on the right hand side under Subjects.
You can reveal and minimize all of your selections by clicking the + or - on the left of Subjects or Sites.

7. When finished, click Save.
Adding Intent, Implementation & Impact
1. Navigate to Administration > Policies > System Policies > Session Policies.
From here, put a tick in the checkbox directly right of Show Intent / Implementation / Impact.
This will now be added to the session plan. If you want to remove this, you can untick the checkbox.
Make sure to save your changes when editing policies by clicking the green Save Changes button in the top left.

2. The screenshot below shows the session plan interface with Intent / Implementation / Impact.
Student learning profile pop up
1. Navigate to Administration > Policies > Browser Policies.
Click the Check Box on the right of Popup Learning Styles on Sessions if not already ticked.
Select Save Changes.

2. Learner styles will now pop up when opening a session plan.
Click the + on the left of Additional Accessibility to expand the tab and view the information for that student.

3. Click Assistive Technologies to view the list of tools and resources available to support the student's learning needs and preferences during the session.


Session plan text defaults
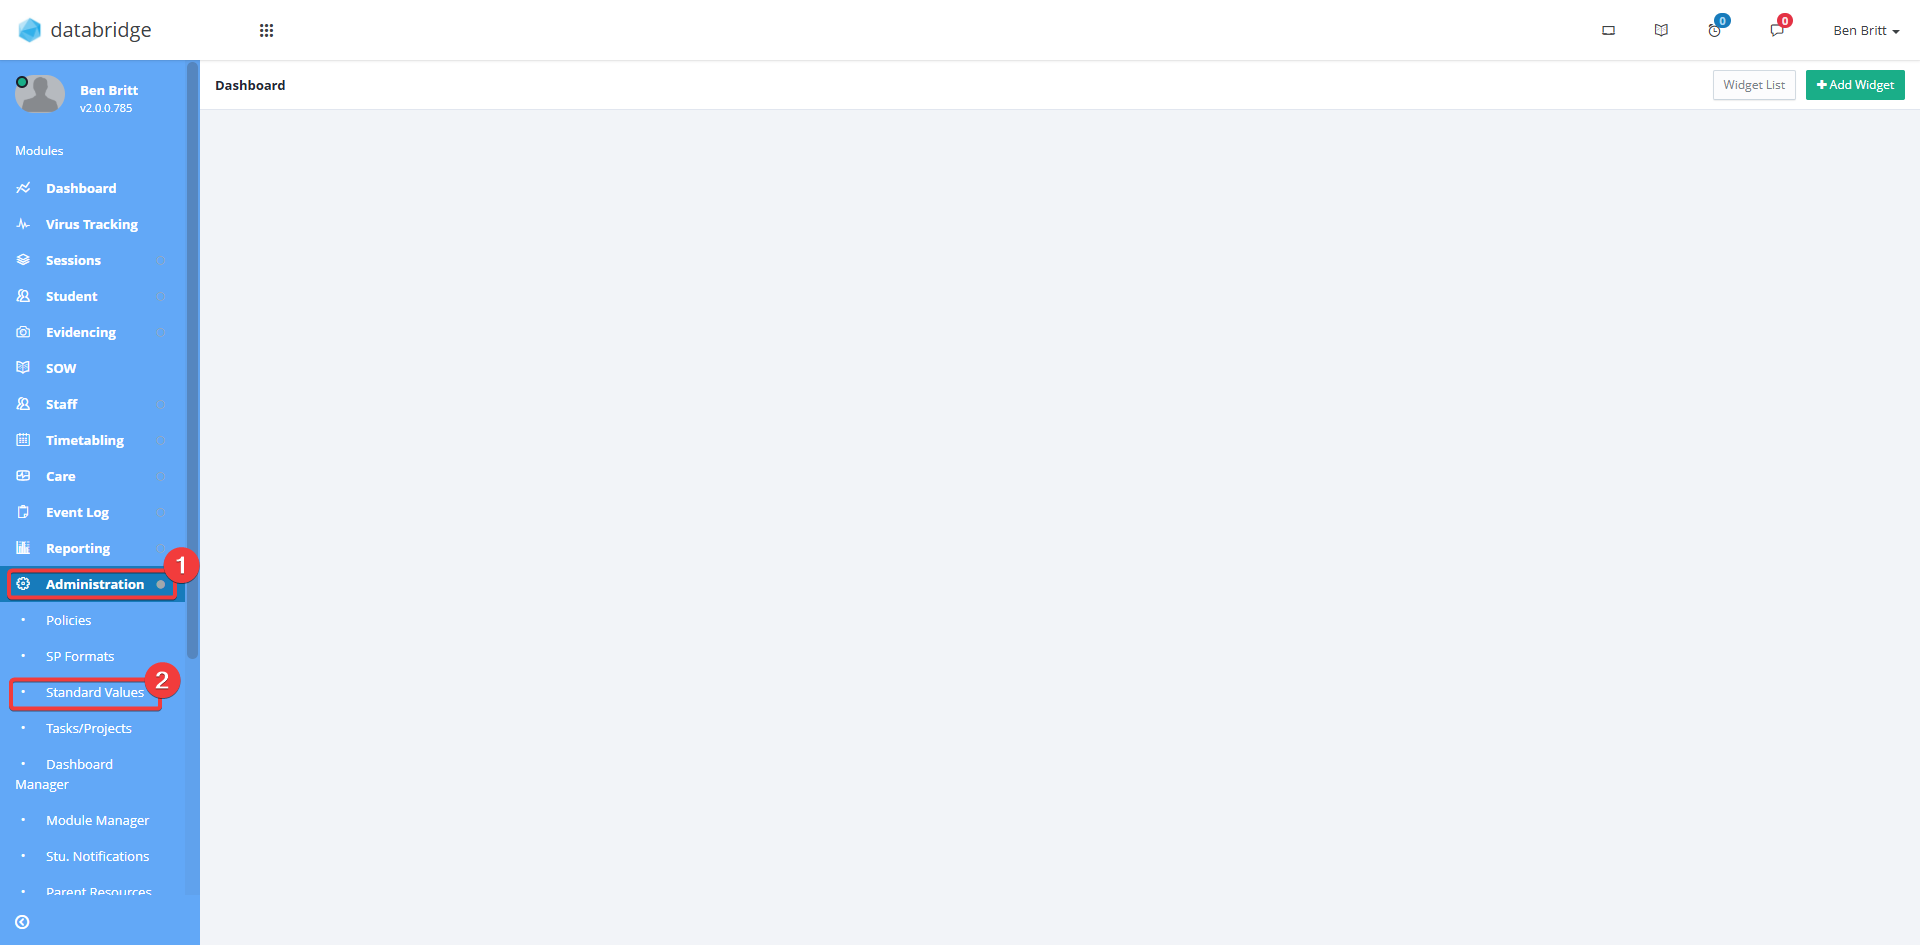
1. Navigate to Administration > Standard Values.

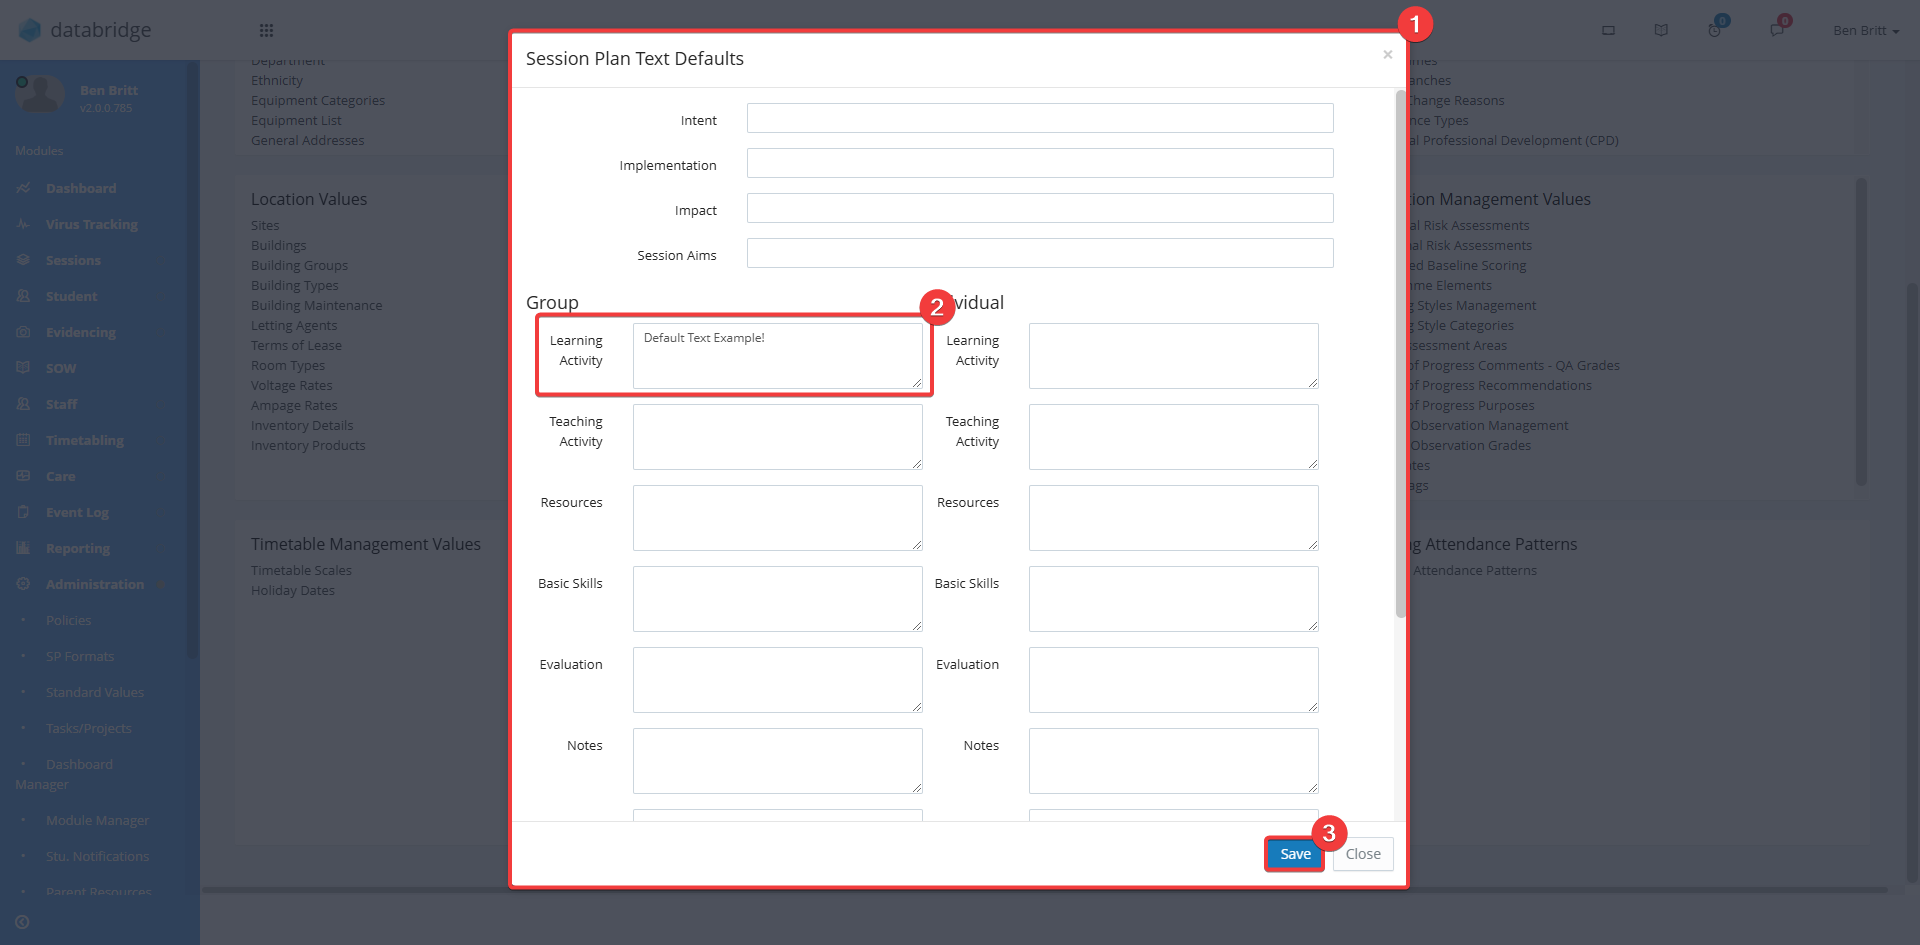
2. Find the Defaults tab and select Session Plan Text Defaults.
3. From here, you can add text into the text boxes, which will automatically appear in a session plan if the session plan label is in use.
For example, I have put 'Default Text Example!' into the Learning Activity section.
If you make any changes to this page, click Save.

4. This is how it will appear on the session plan.

Was this article helpful?
That’s Great!
Thank you for your feedback
Sorry! We couldn't be helpful
Thank you for your feedback
Feedback sent
We appreciate your effort and will try to fix the article

