This guide will look at how to configure the custom tabs within the Student record.
1. First, navigate to Administration > Standard Values.
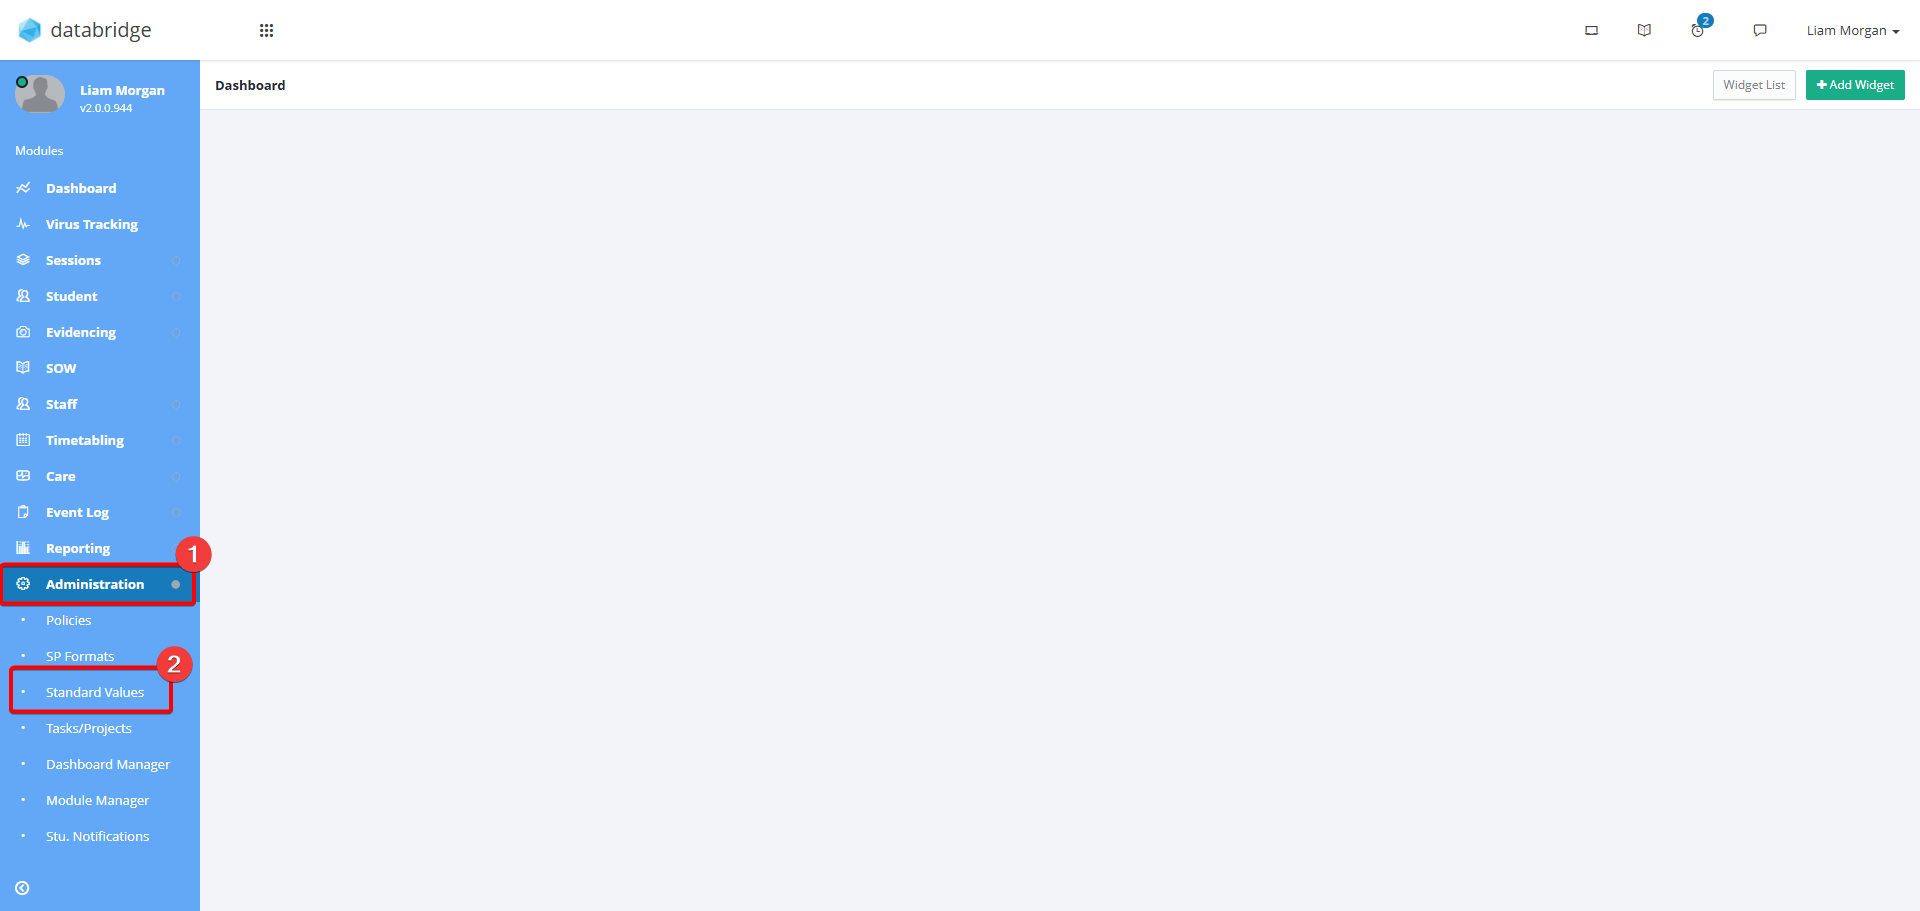
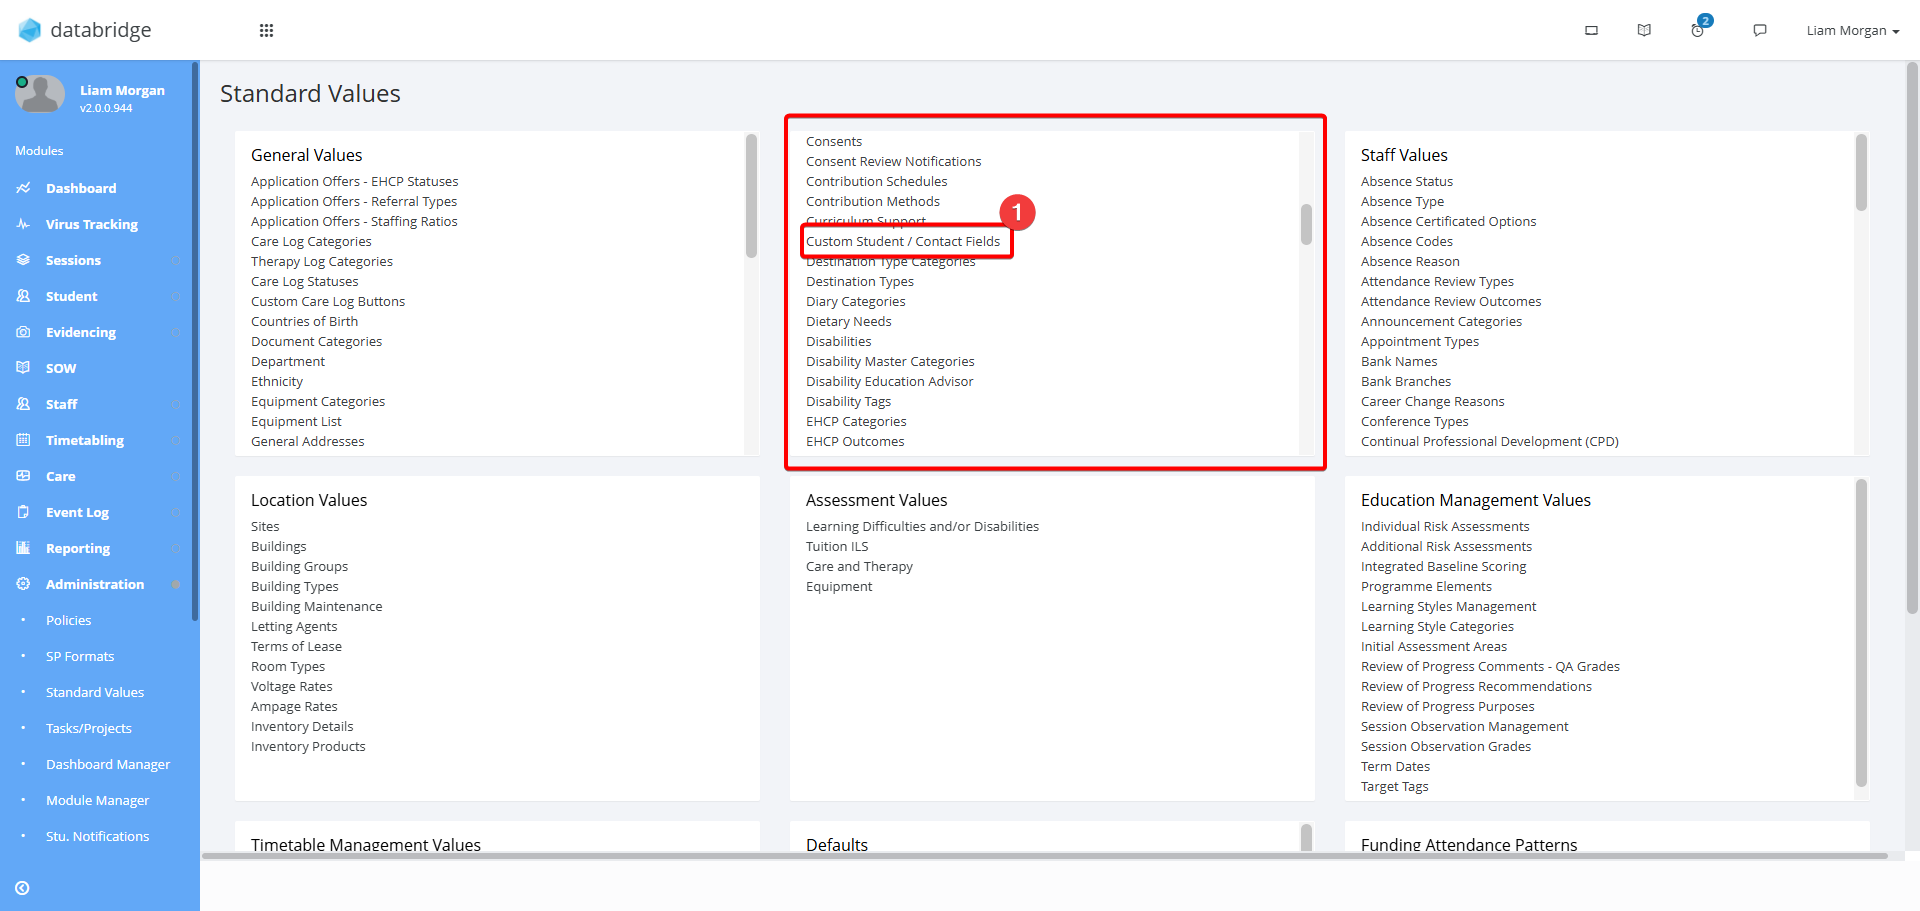
2. Within the Student box, select Custom Student / Contact Fields
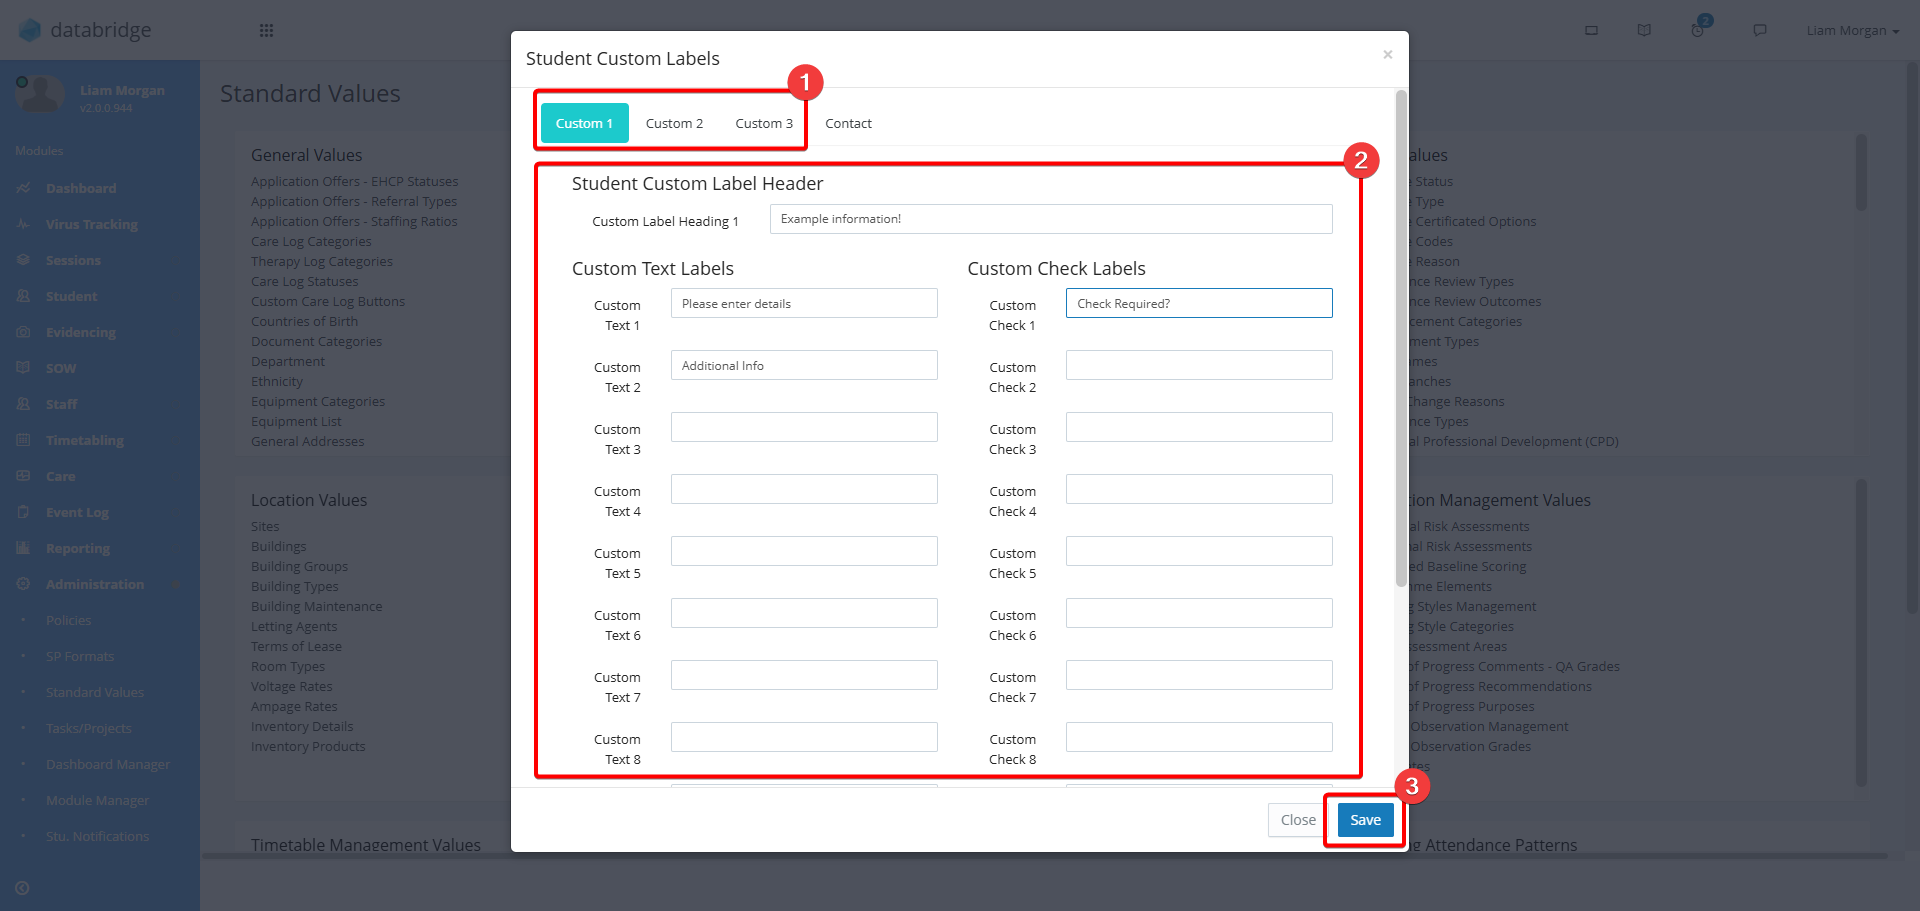
3. There are 3 custom tabs that can be used. Select the one you want to edit from the top bar and then enter the names of the custom fields within the textboxes.
There a 12 Text fields, 12 Checkboxes and 2 Date fields available. If you want a field to not appear, leave the box blank.
Click Save when complete.
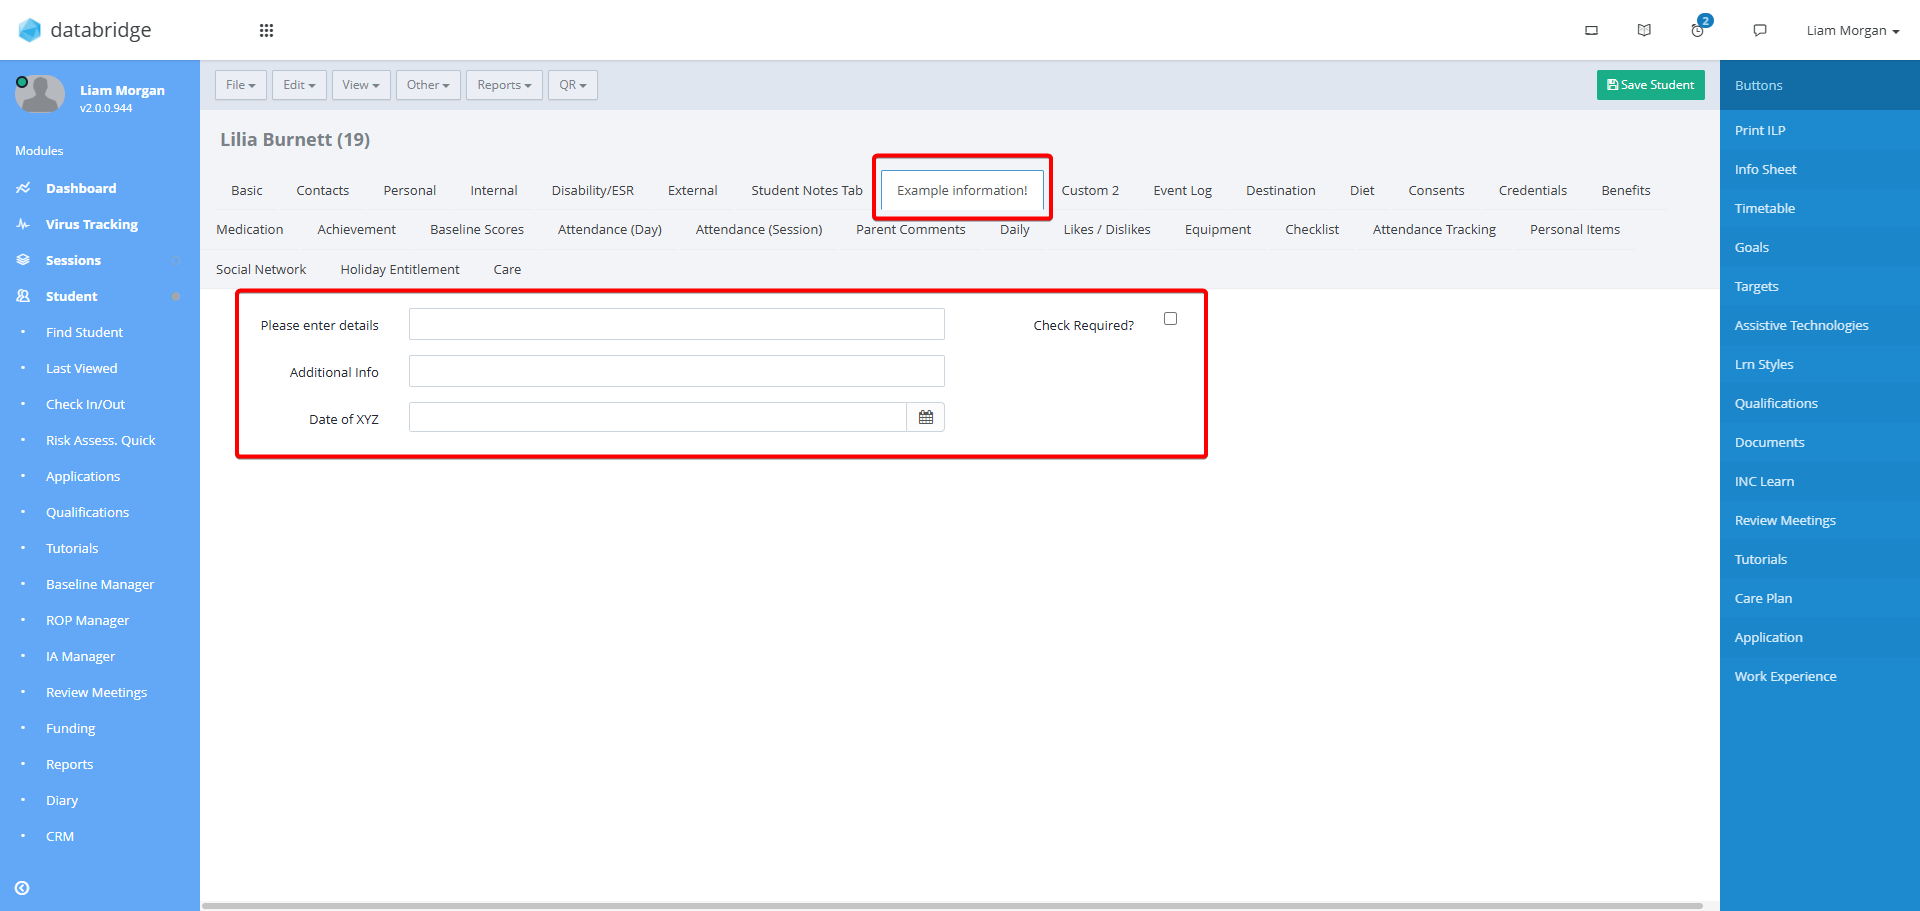
4. These changes will now be reflected in the Student Record.
Was this article helpful?
That’s Great!
Thank you for your feedback
Sorry! We couldn't be helpful
Thank you for your feedback
Feedback sent
We appreciate your effort and will try to fix the article