This guide will look at how to set up the relevant structure and rationale and how to add Funding Entries for a Student in order to calculate the Funding you need.
TABLE OF CONTENTS
Setting up Funding Rationale
1. First, navigate to Administration > Standard Values and locate the Student Values area.
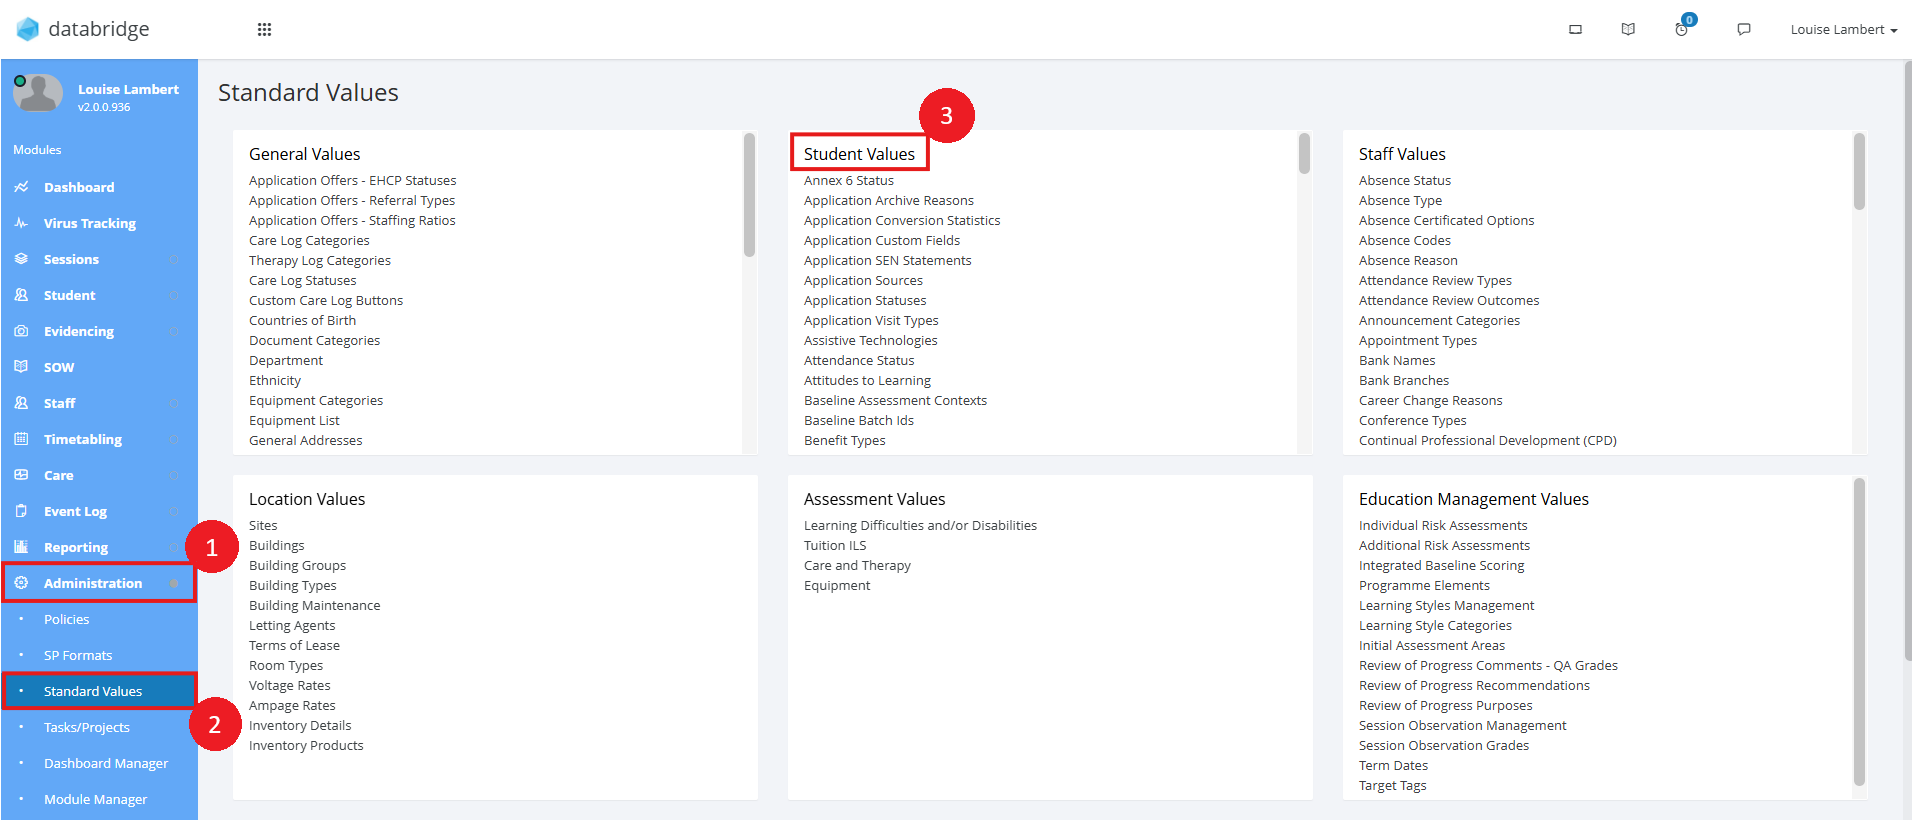
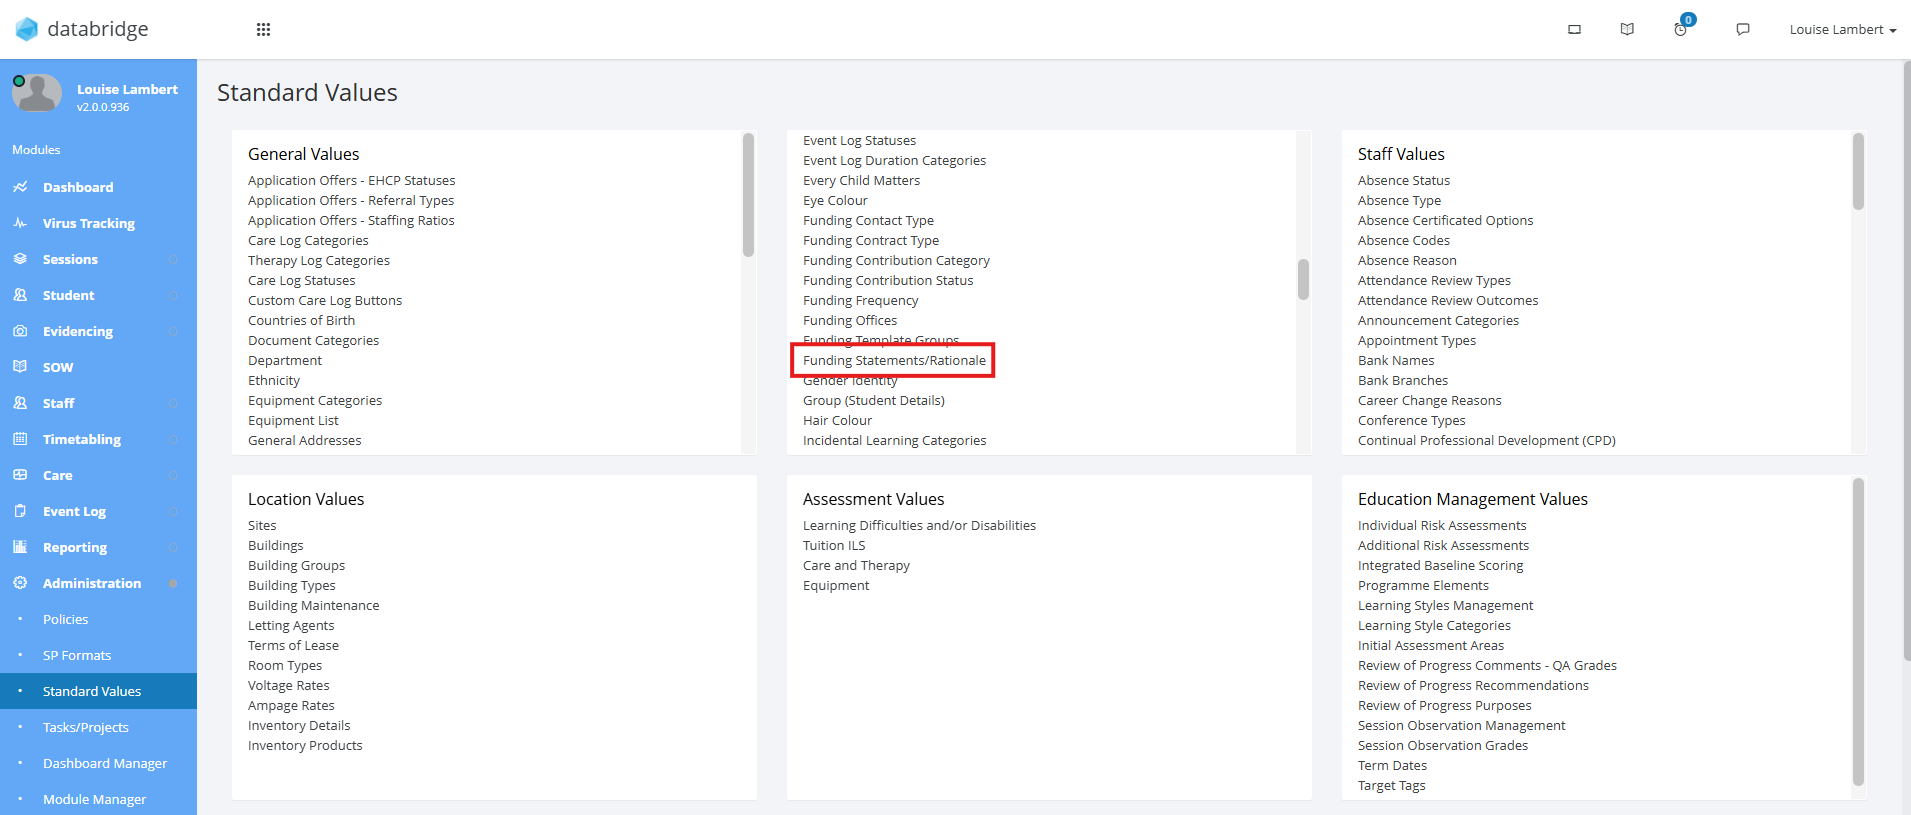
2. Within this box, select Funding Statements/Rationale.
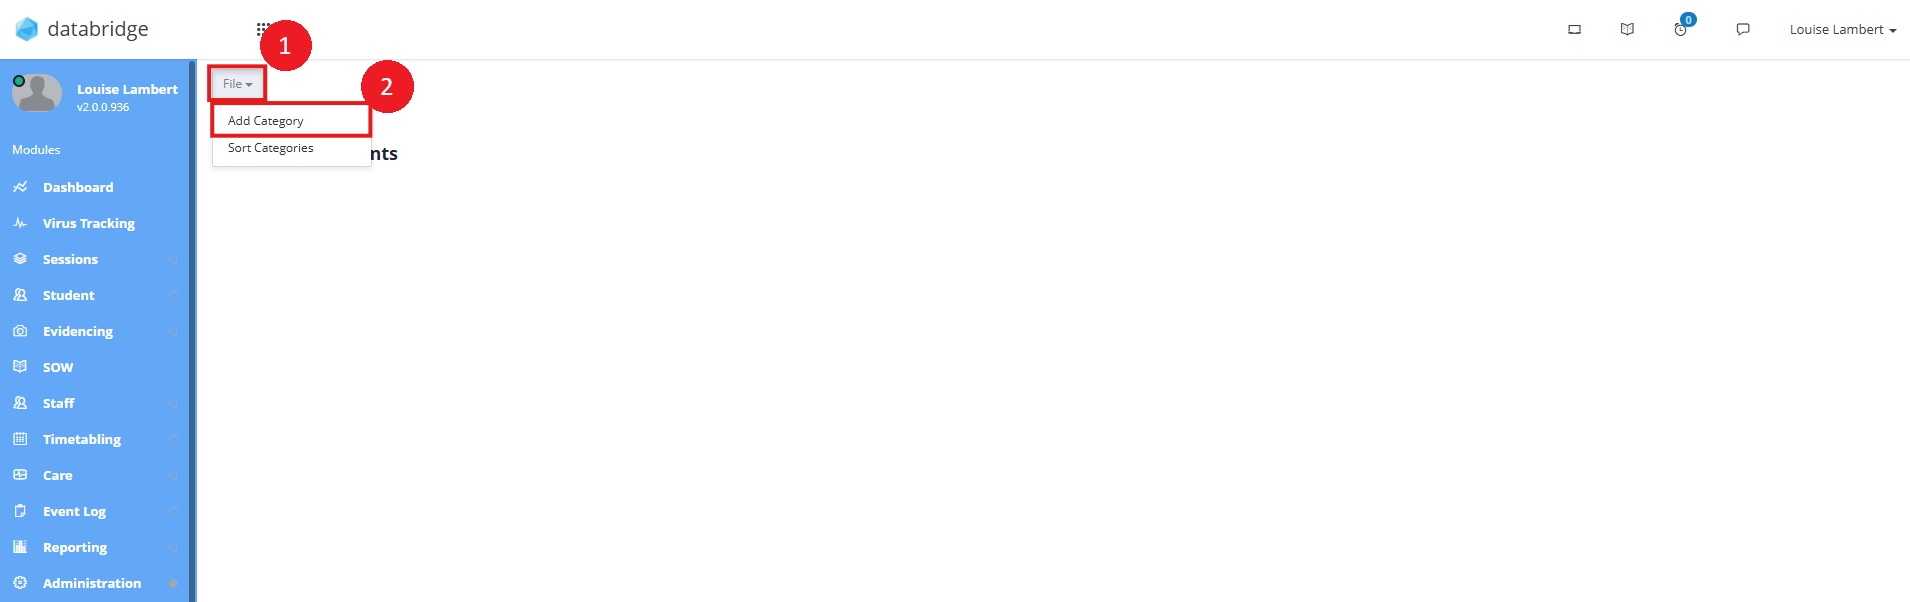
3. This will take you to a screen where you can beginning setting up these areas. Click on File at the top of the screen, and Add Category.
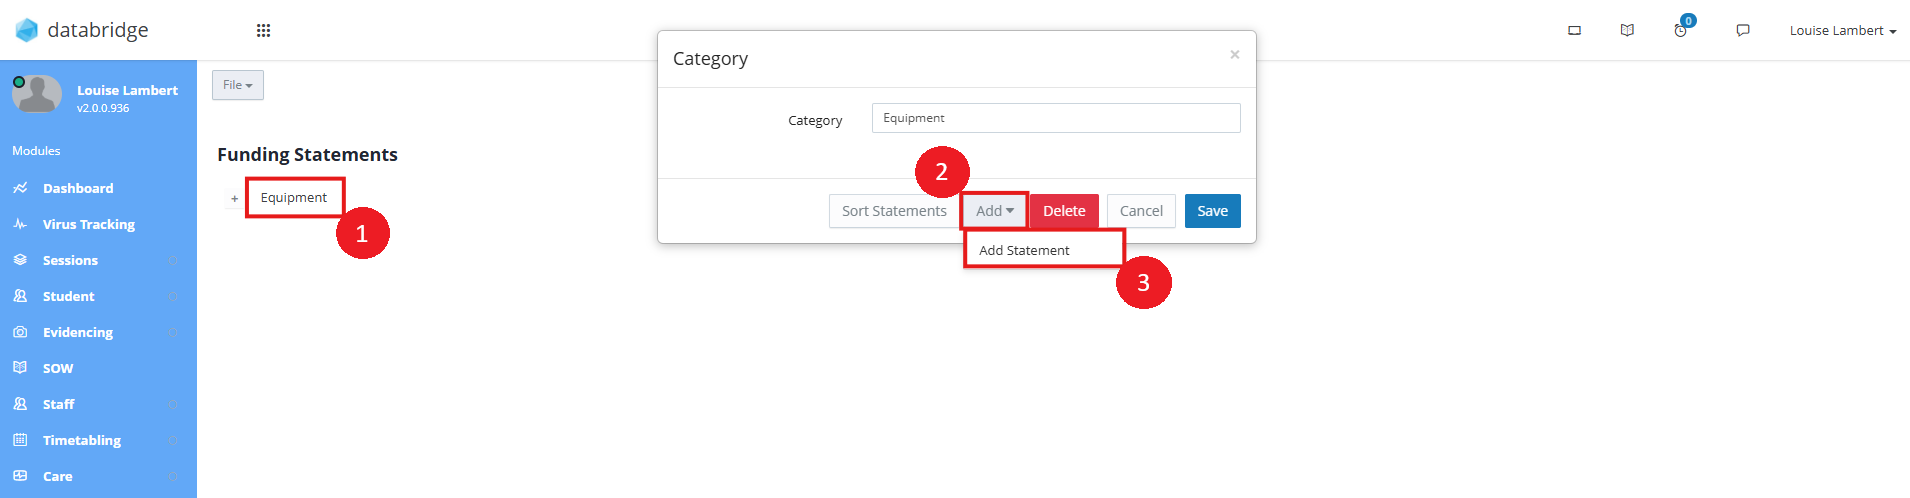
4. In the pop up that appears, give this Category a title (e.g Care, Equipment, Therapy etc) and click Save.

5. Once a Category has been added, click on the Title to bring up a window with various options. Click on the Add button and then Add Statement.
6. A modal will appear for you to enter details of the Statement, including the Statement Title (e.g Electric Wheelchair, Therapy Support), a description, the Type and the Cost. Once you have captured all relevant details, click Save.
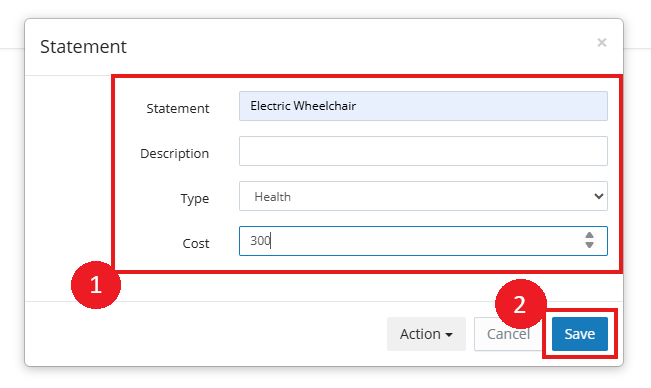
Note:
Entering a base Cost (optional) means when this Statement is added to any Funding record, it will use this by default.
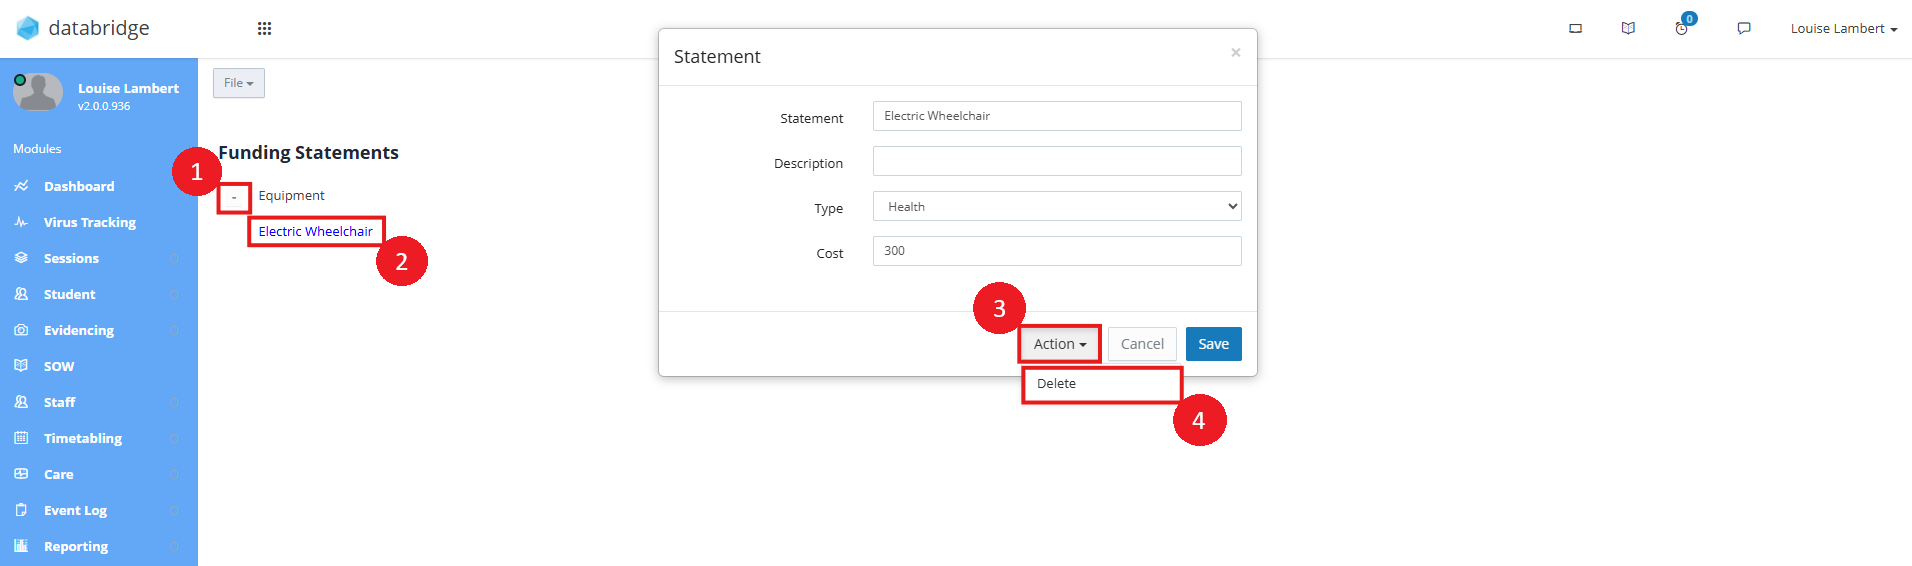
7. You can use this process to add as many Statements as you'd like. To delete a Statement, expand the Category using the Plus Icon, locate the Statement and click on it. This will bring up the previous modal, where you can click Action and Delete to remove this.
Adding Funding Entries
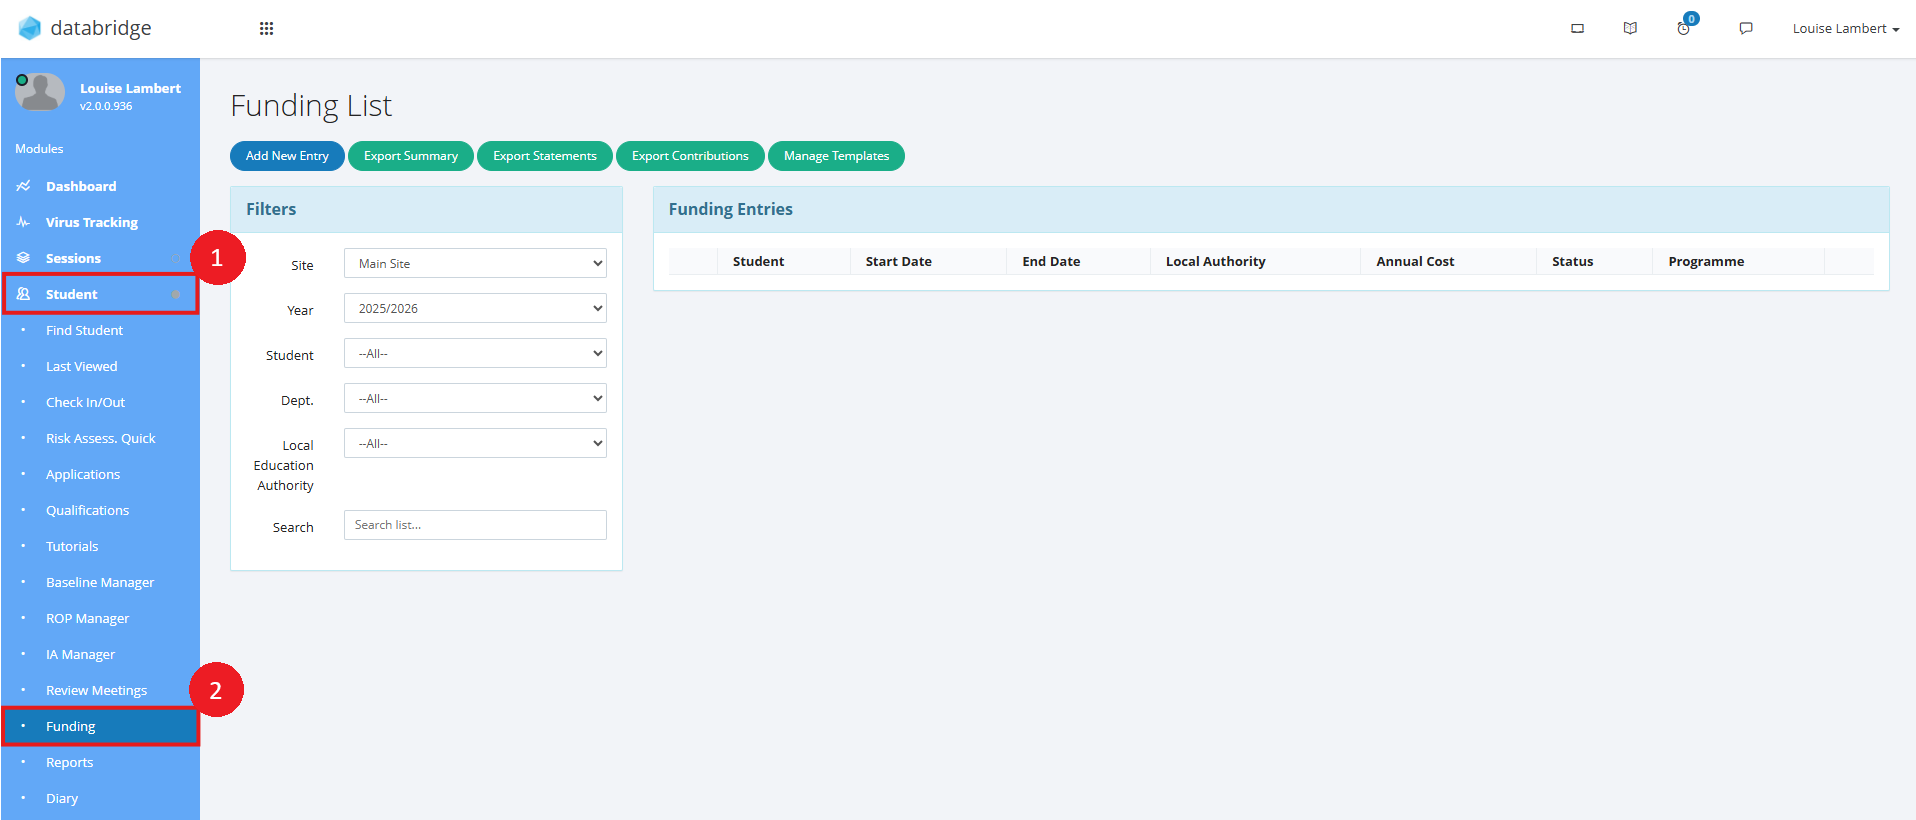
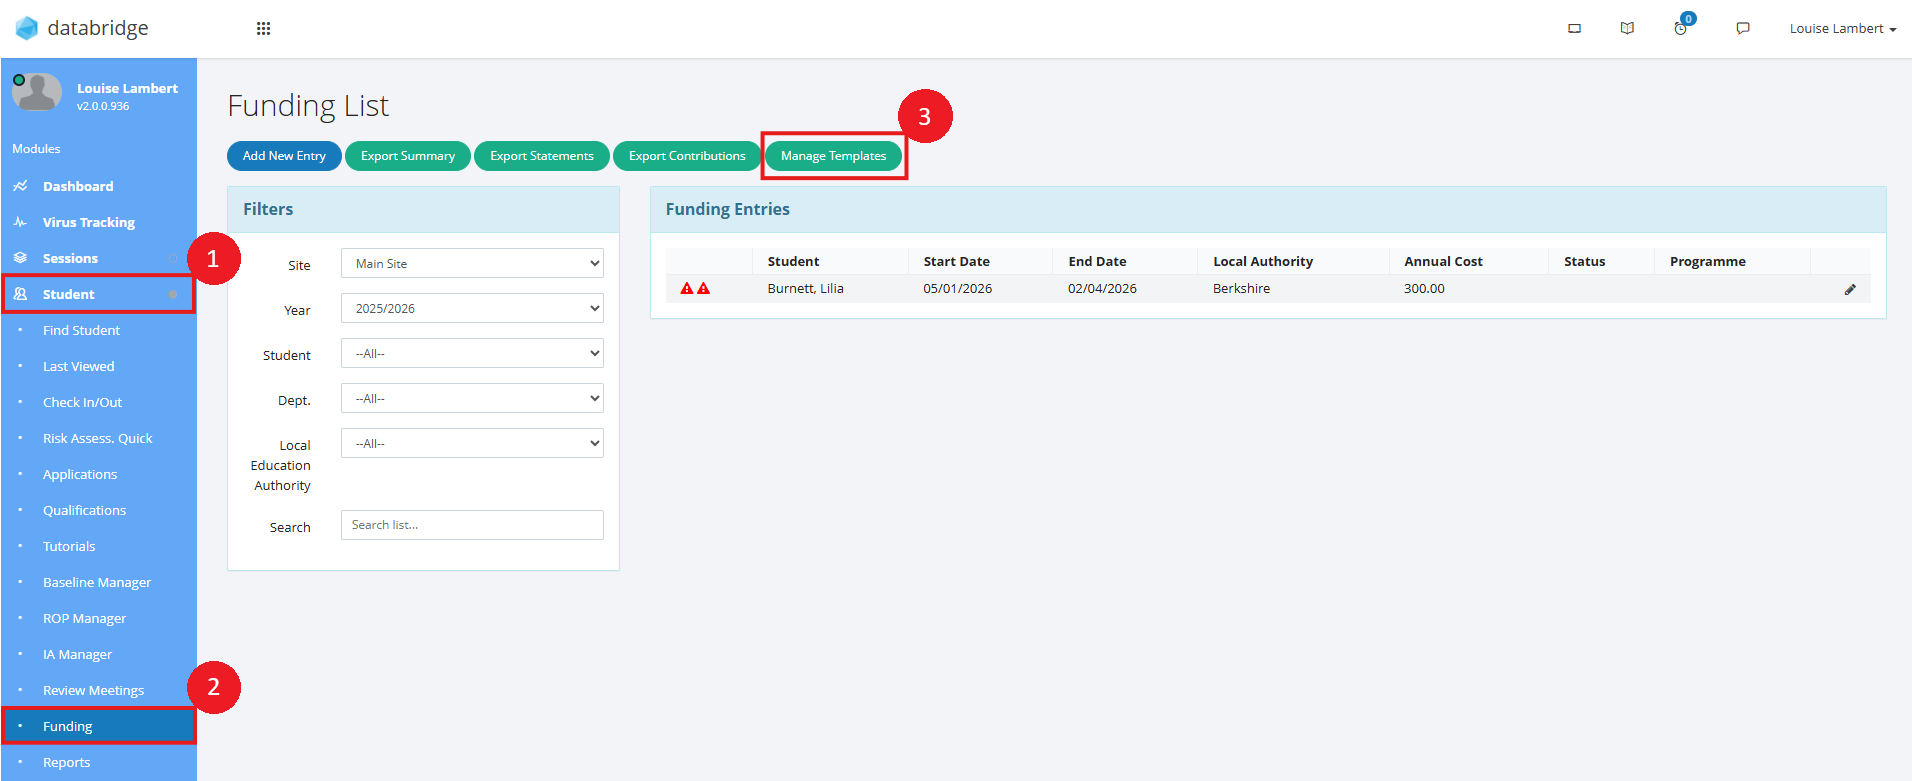
1. To begin adding Funding Entries, first navigate to Student > Funding.
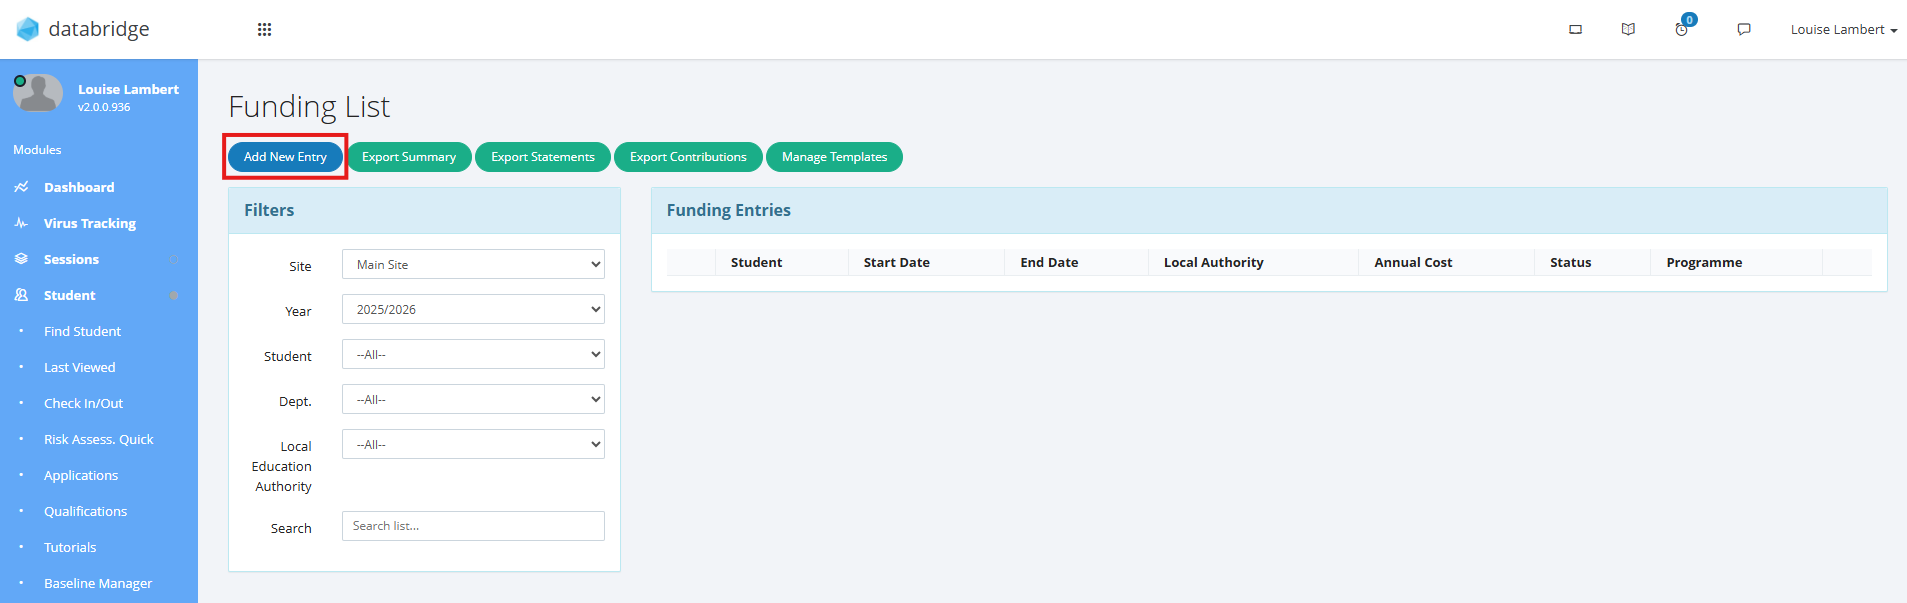
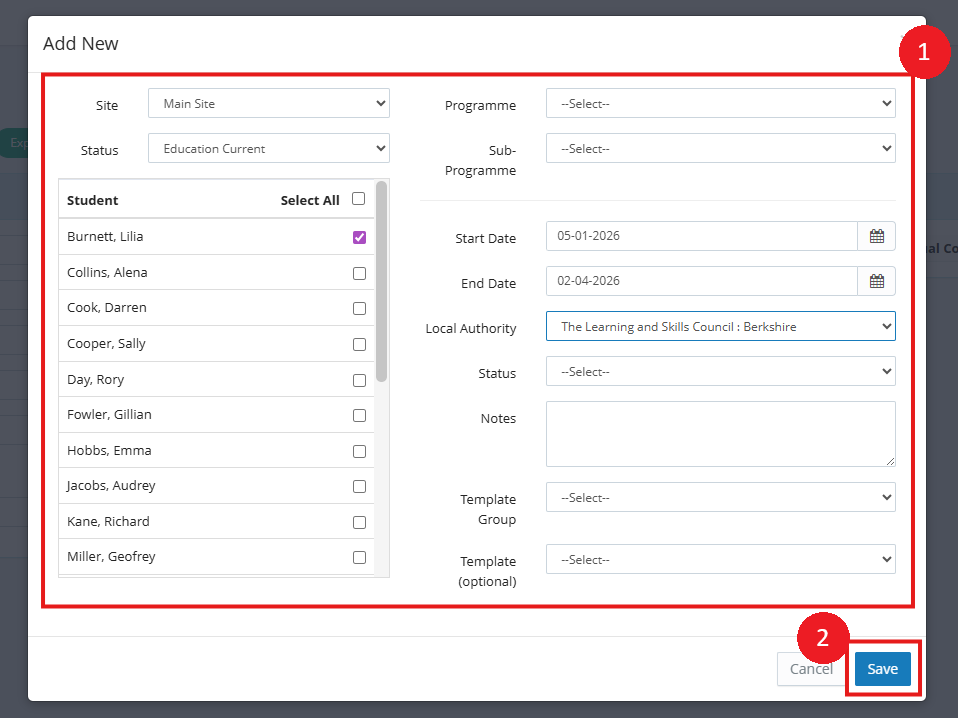
2. Click on the Add New Entry option at the top of the screen.
3. In the modal that opens, select the Student(s) you wish to create an entry for, enter the relevant details and click Save when finished.
4. This entry will now appear in the list. Entries will display based on the start/end dates set and the year filter you have selected on the left hand side (which by default will be the current academic year). Click on the Pencil Icon next to your entry to bring up the following options:
View Details - Open the full details of this entry.
Copy - Make a copy of this entry to edit. Used often for doing year calculations without having to start from scratch.
Audit Log - If you have the necessary permission, see who has made changes to this entry.
Delete - Remove the entry if required.
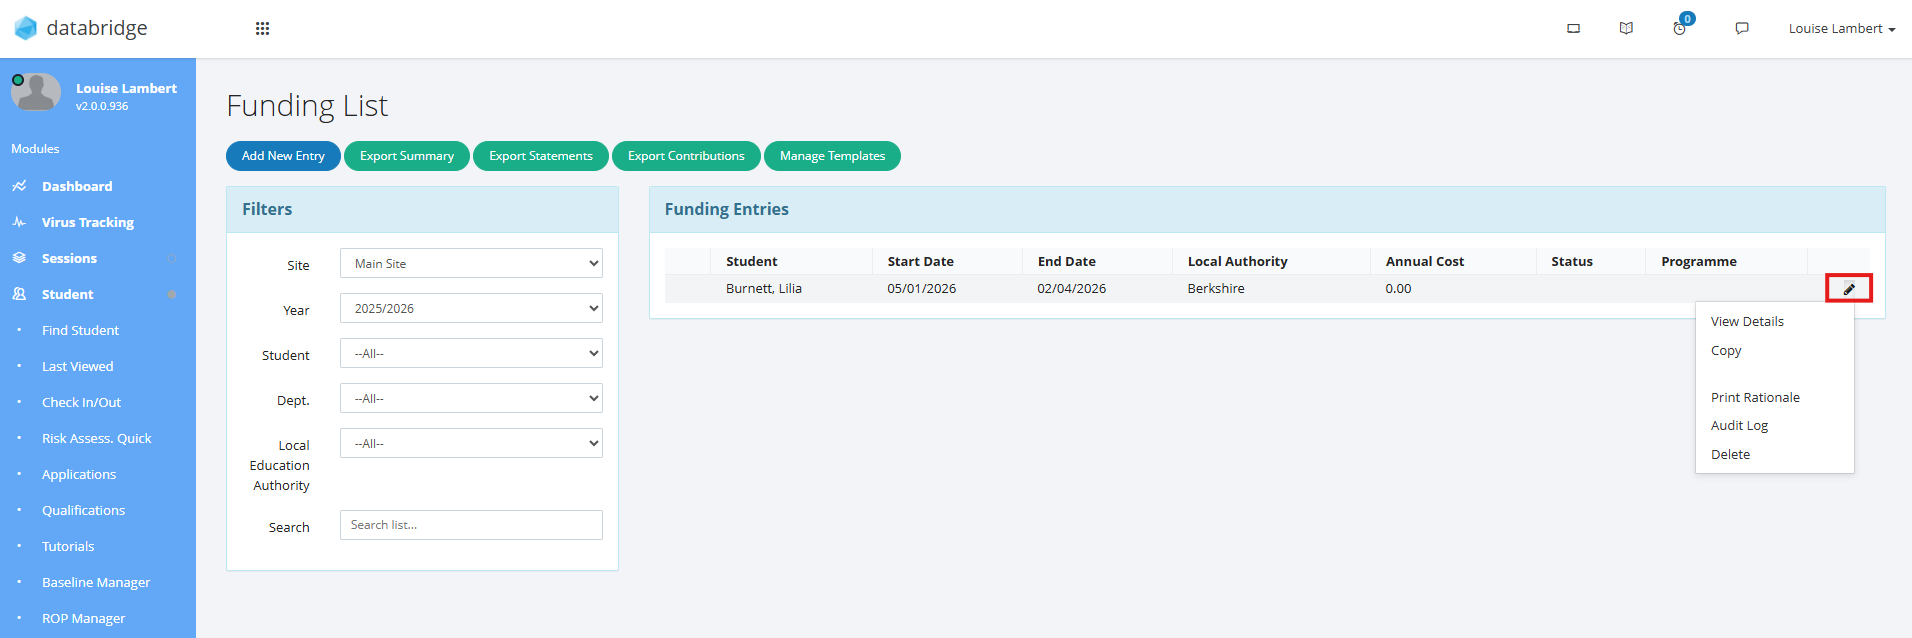
Note:
If applicable, to the left of each entry you may see up to two warning icons. These display if the figures on that entry do not match in certain ways. You can hover over the warning icon to see why it is showing. This helps you identify if you may have miscalculated somewhere.
5. Select View Details to update the full details of this entry.

6. Beginning with the Main Details tab, fill in the relevant details on this screen, and click Save Changes when done.
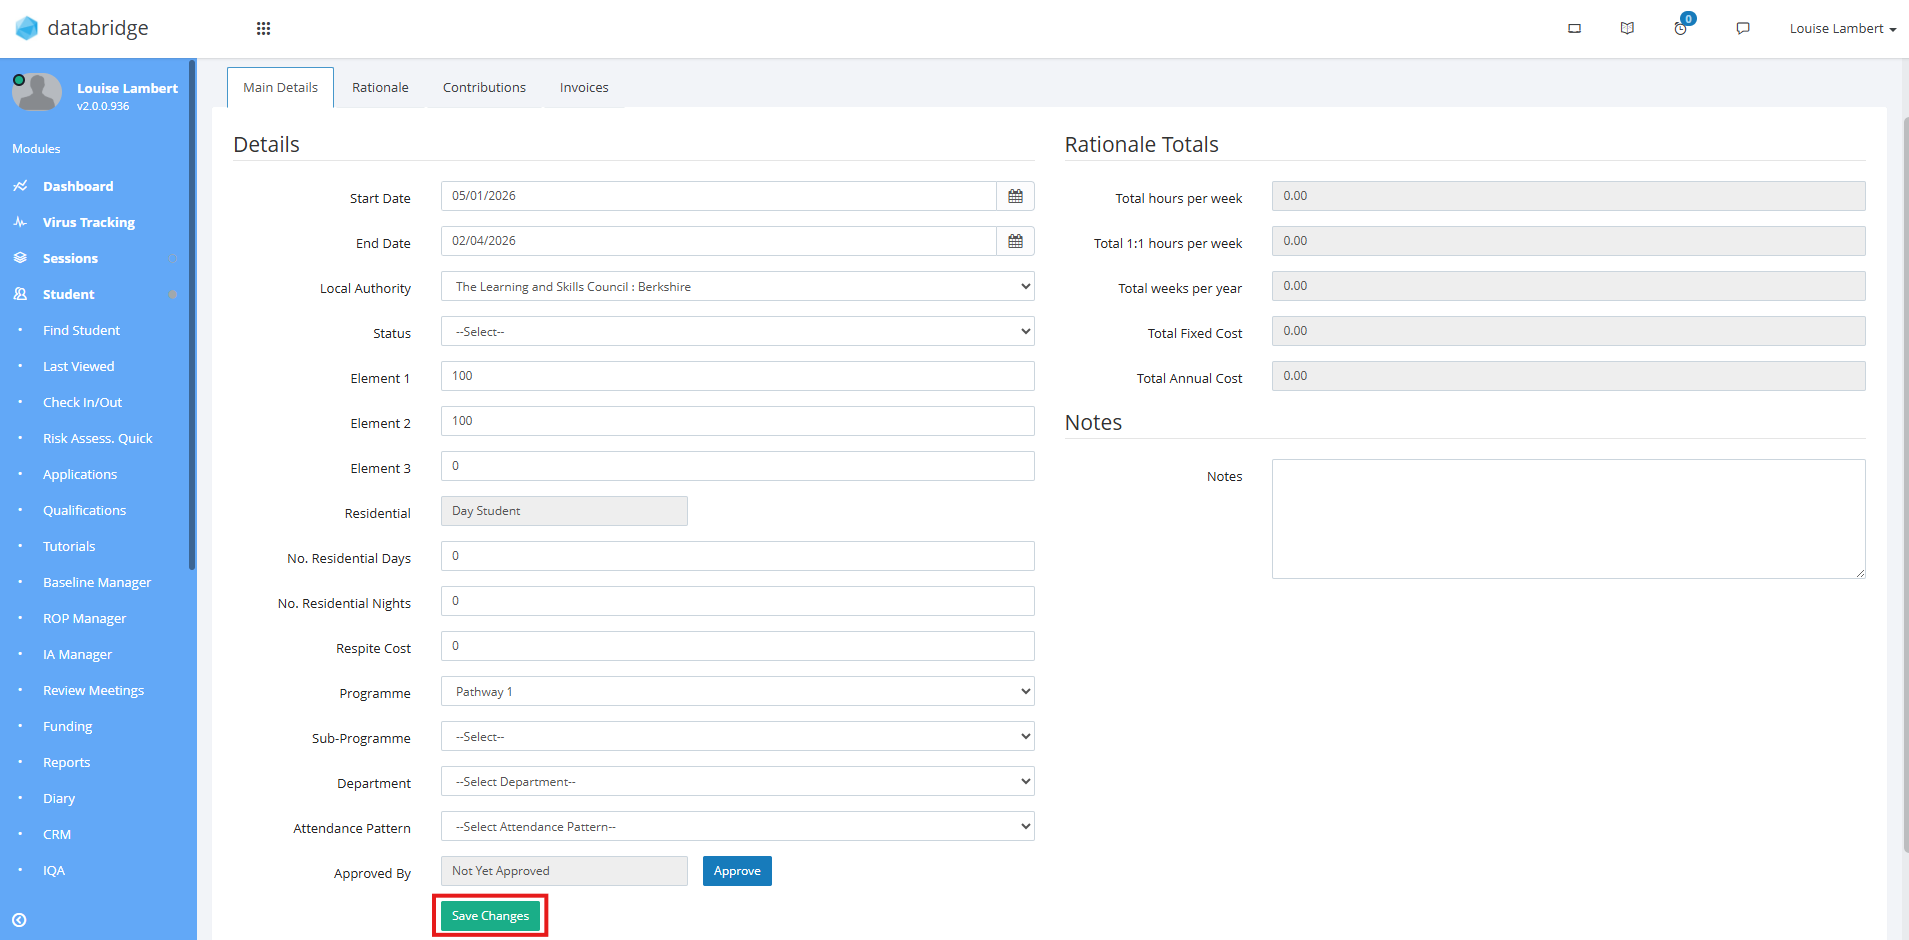
Note:
There are additional fields available to you once a funding entry has been completed:
Attendance Pattern can be set using the relevant dropdown. The options in this dropdown are configurable in Administration > Standard Values > Funding Attendance Patterns.

There is also an Approved By field which allows you to approve the Funding Details for a Student. The Staff member who approved the entry will appear in this field once they have done so. In order to approve funding, you will need the permission 'Student - Funding Approval'
7. Once you have entered all information under the Main Details tab, click on the Rationale tab at the top.
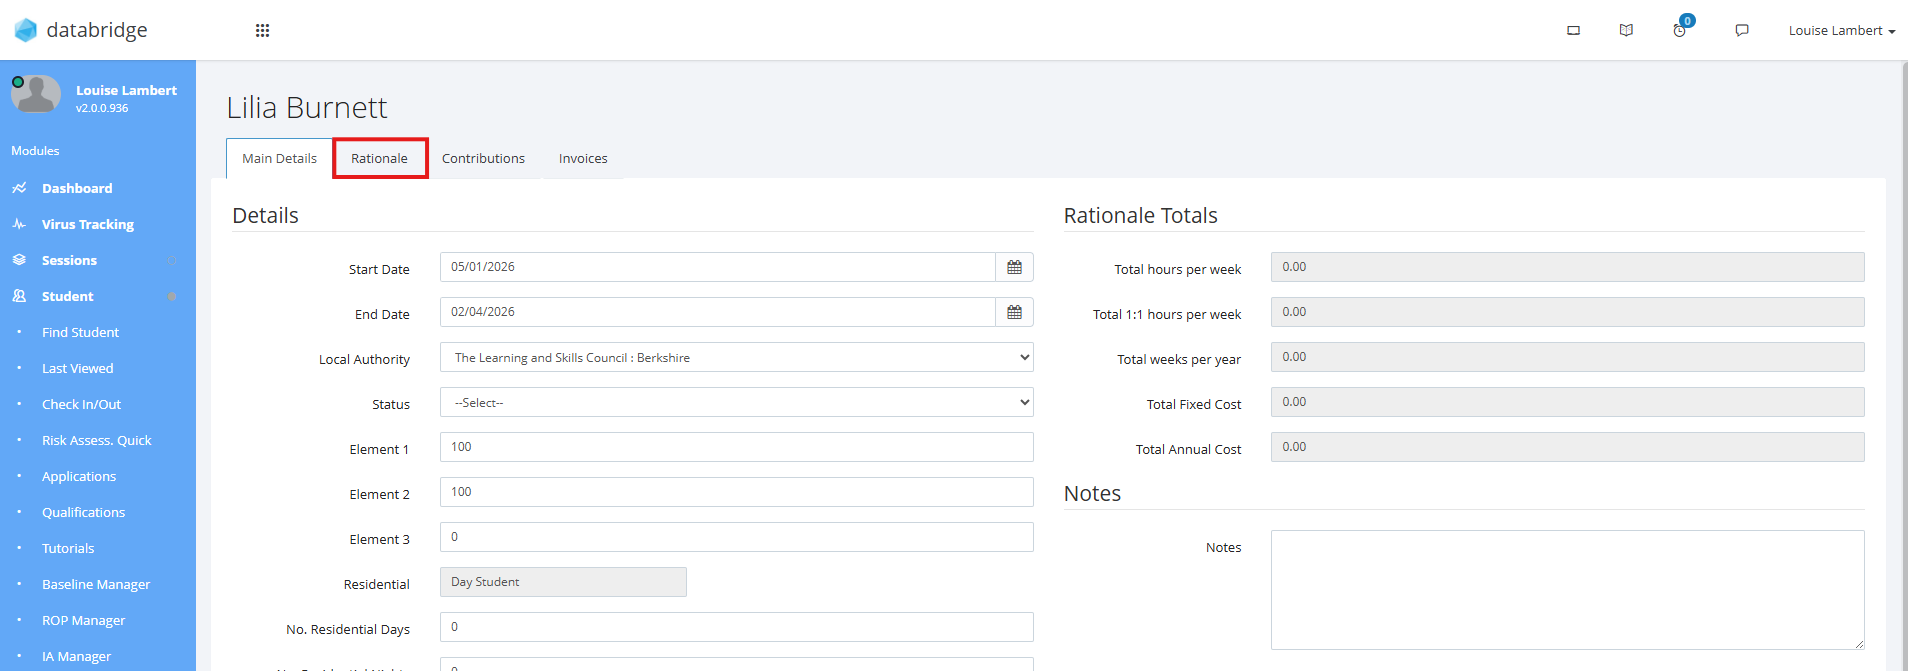
8. To add a new Statement, click Add Statement.
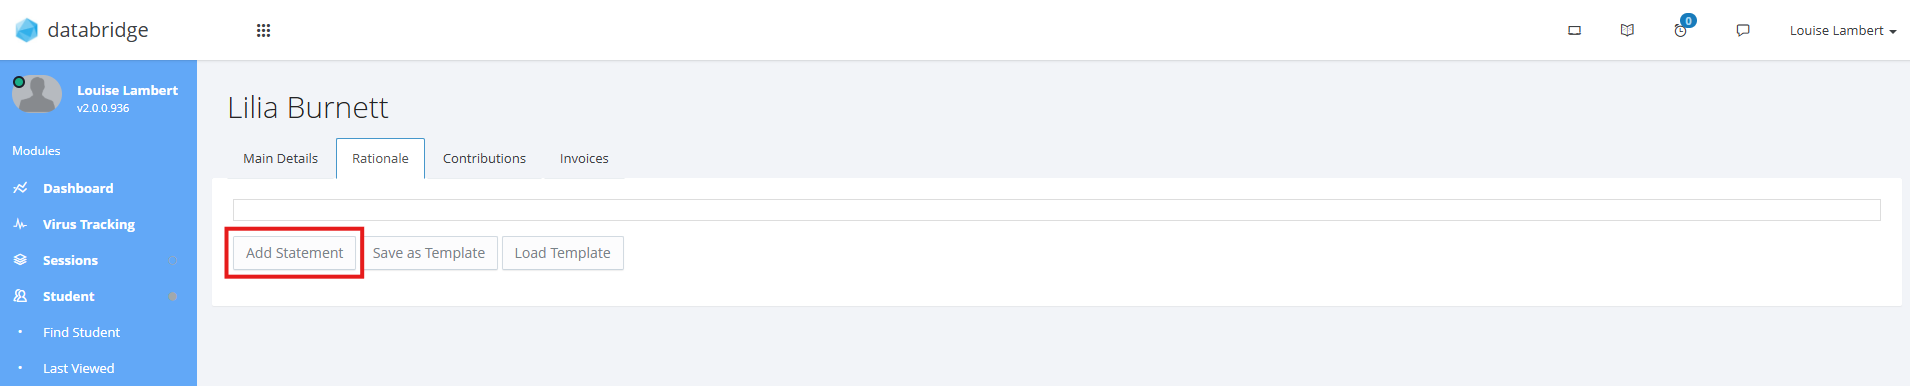
Note:
These are the Categories and Statements we set up in the first section of this guide
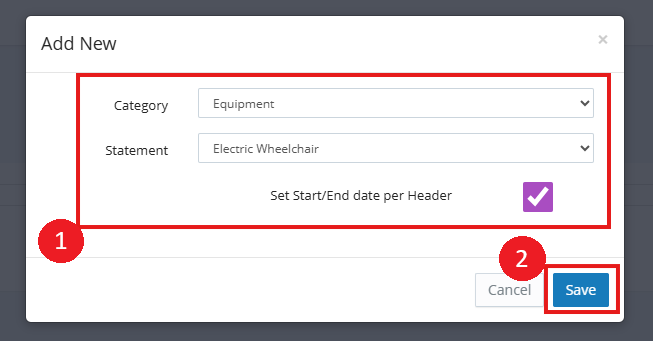
9. In the pop-up that appears, select the relevant Category and Statement from the dropdown. You can also tick to decide whether you want this Statement to use the same Start/End date as the funding entry by default. Click Save when done.
10. This entry will now appear in the list and you can click the Notepad Icon to add any further details.
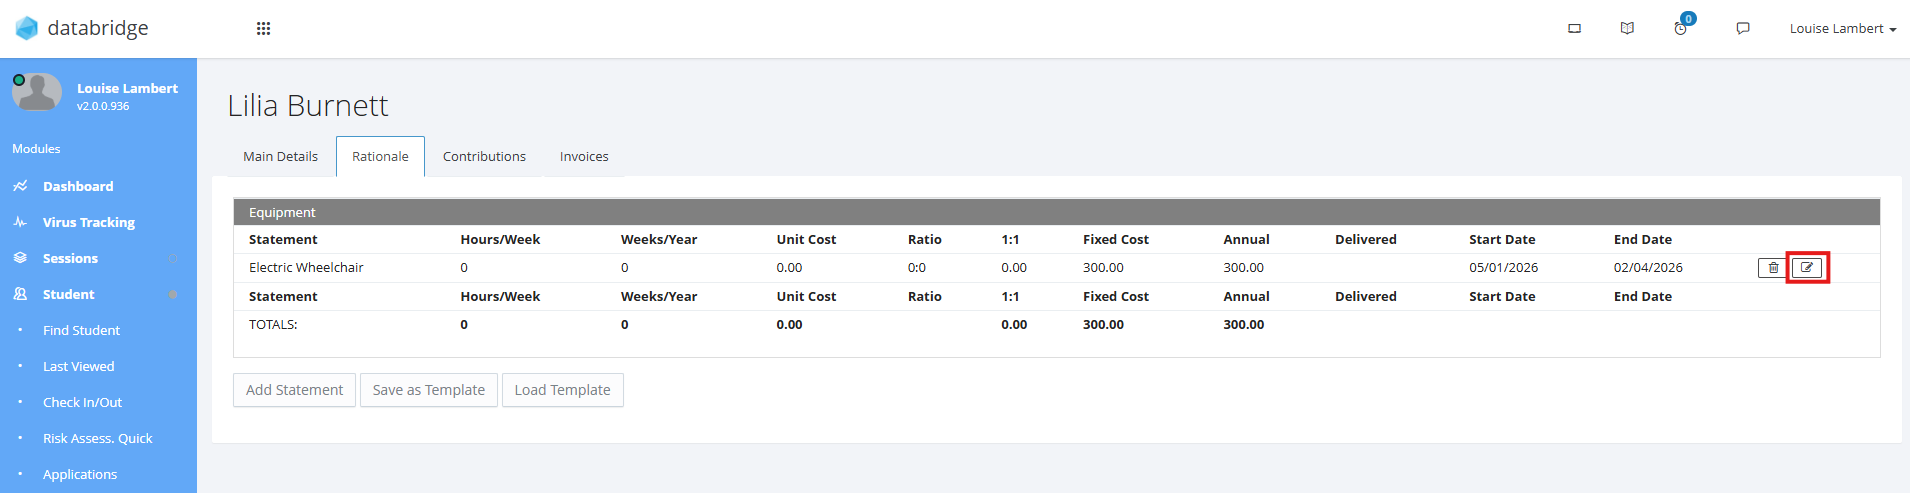
Once you have made any updates, the list on the Rationale tab will update accordingly and so to will the totals display on the Main Details tab.
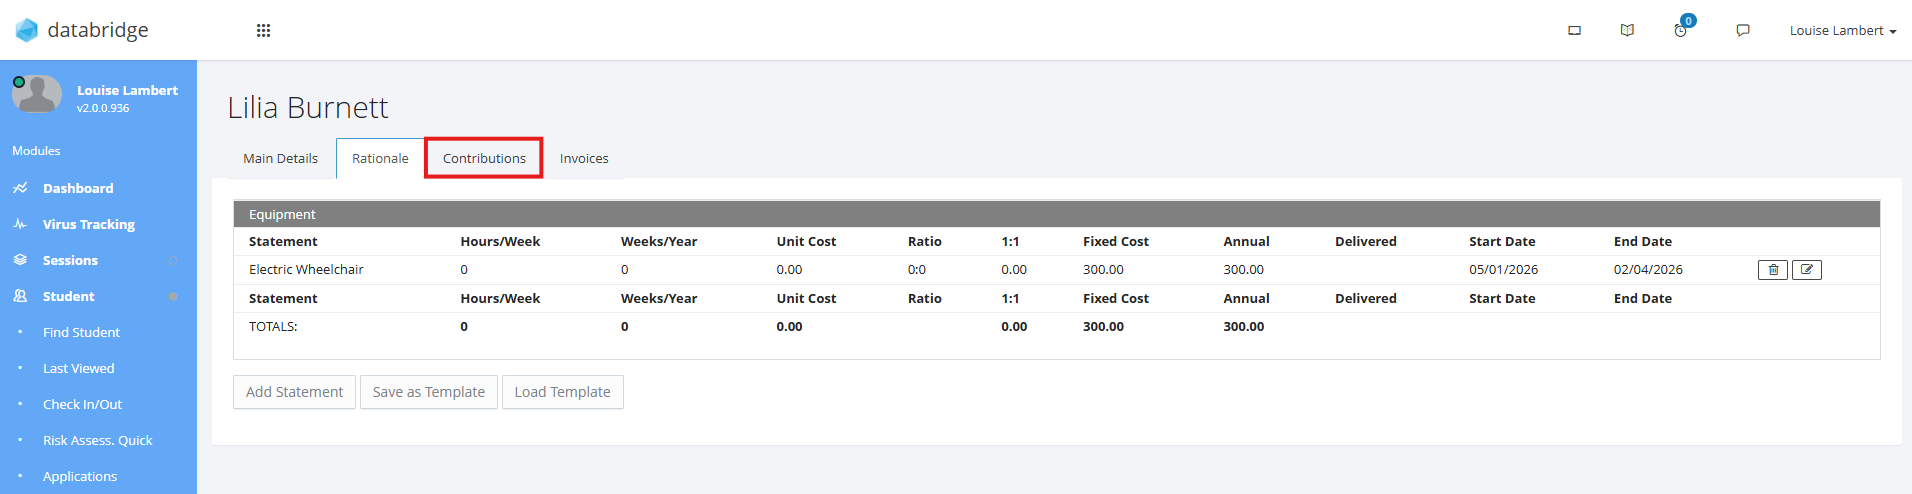
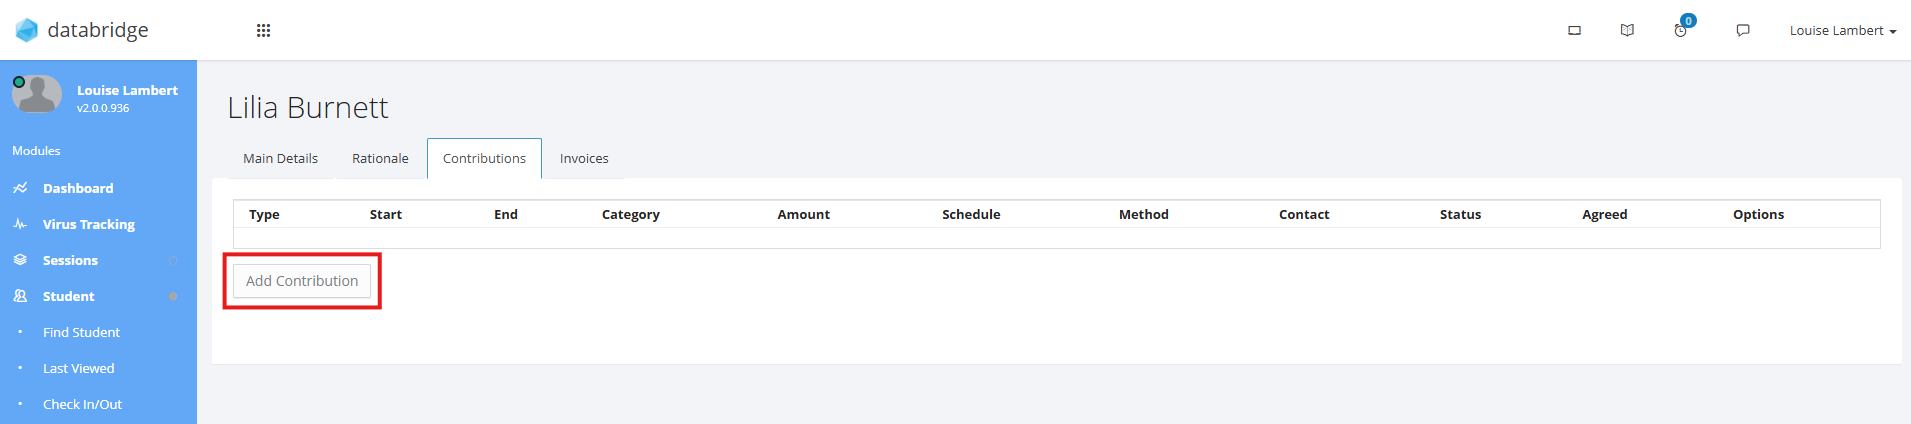
12. Next, head over to the Contributions tab at the top of the screen.
13. To add a new Contribution, click Add Contribution.
14. Enter all relevant details for the Contribution, and click Save when finished.
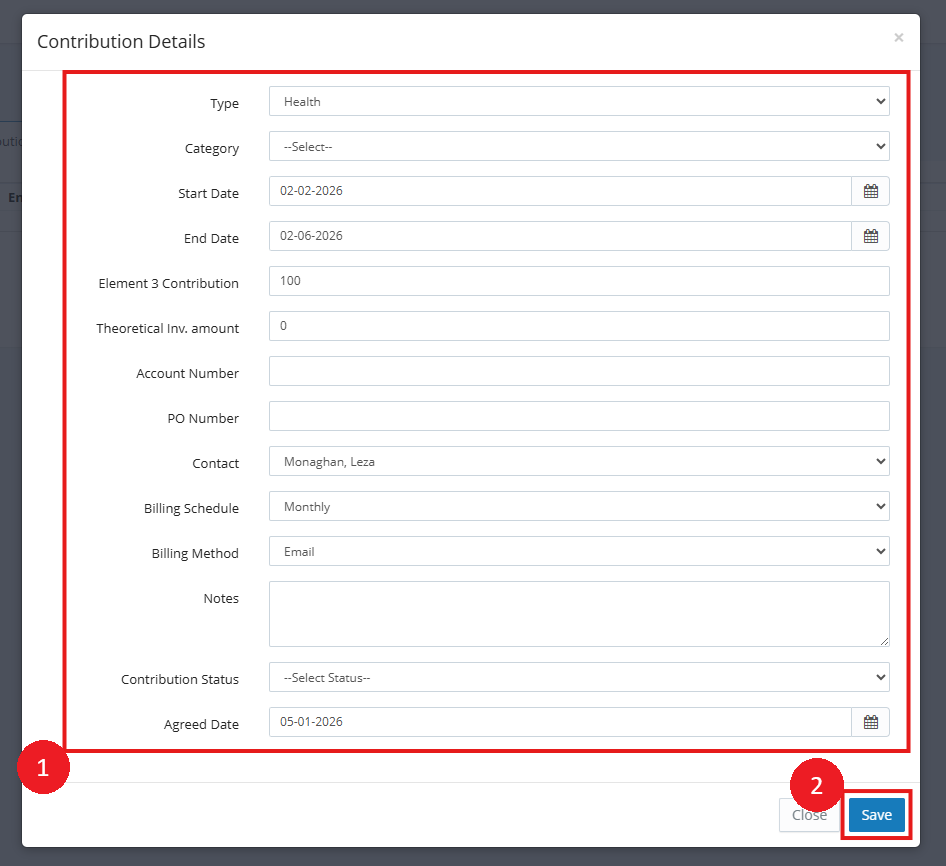
Note:
The Element 3 figure will be totalled with all other contributions and the Funding List screen will check that this tally matches with what you have entered in the Element 3 field for the main details of the entry
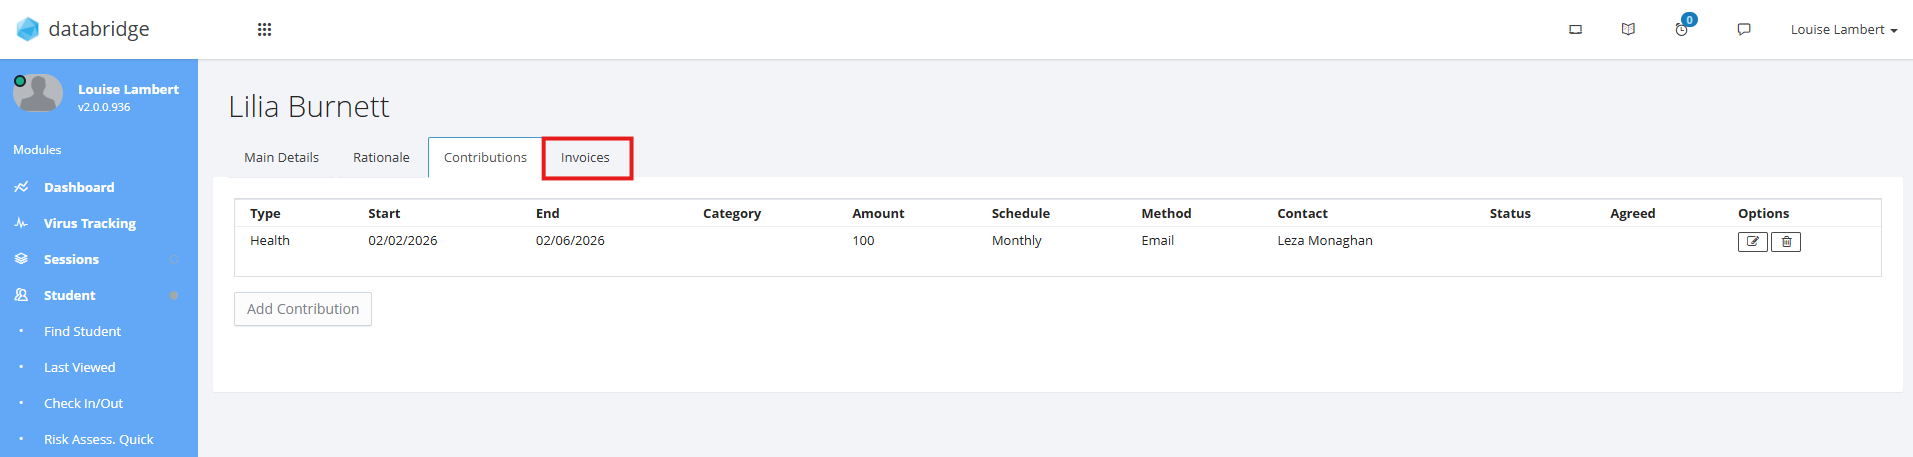
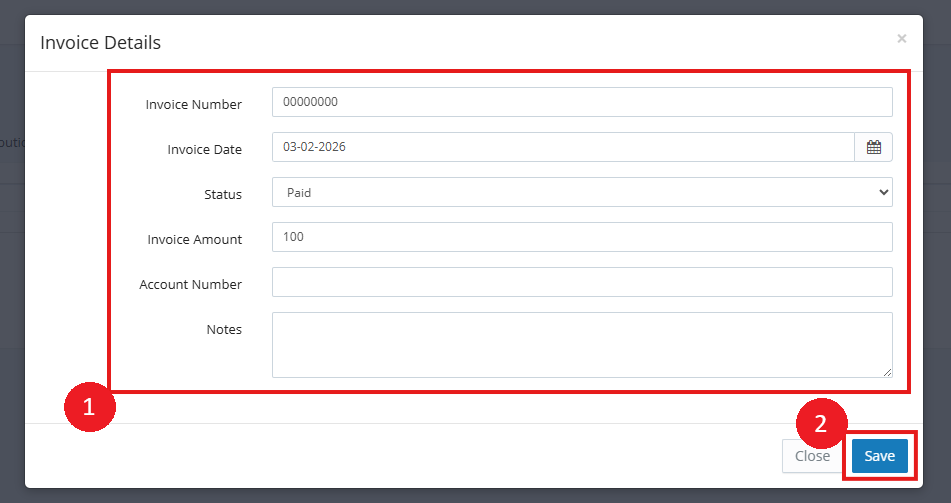
15. The final tab along the top of the screen is the Invoices tab. Click on this to add a new Invoice.
16. Next, click Add Invoice.
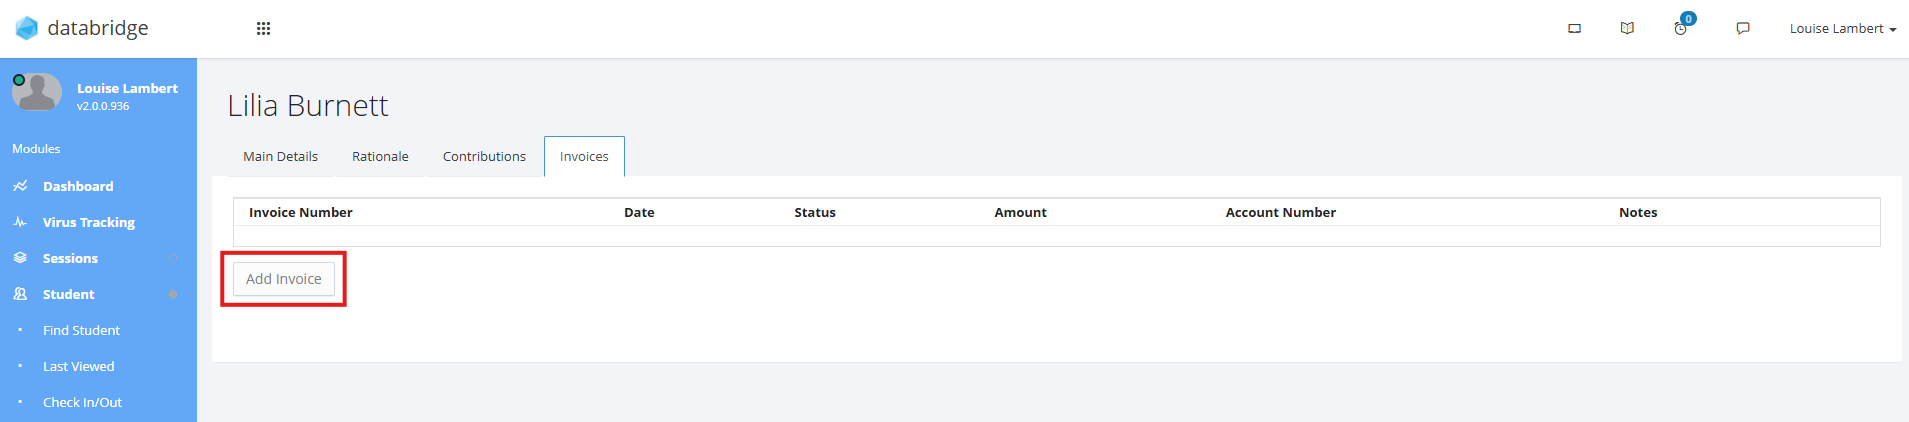
17. In the pop-up that appears, you can enter all details for the Invoice including Number, Date, Status and Amount. When finished, click Save.
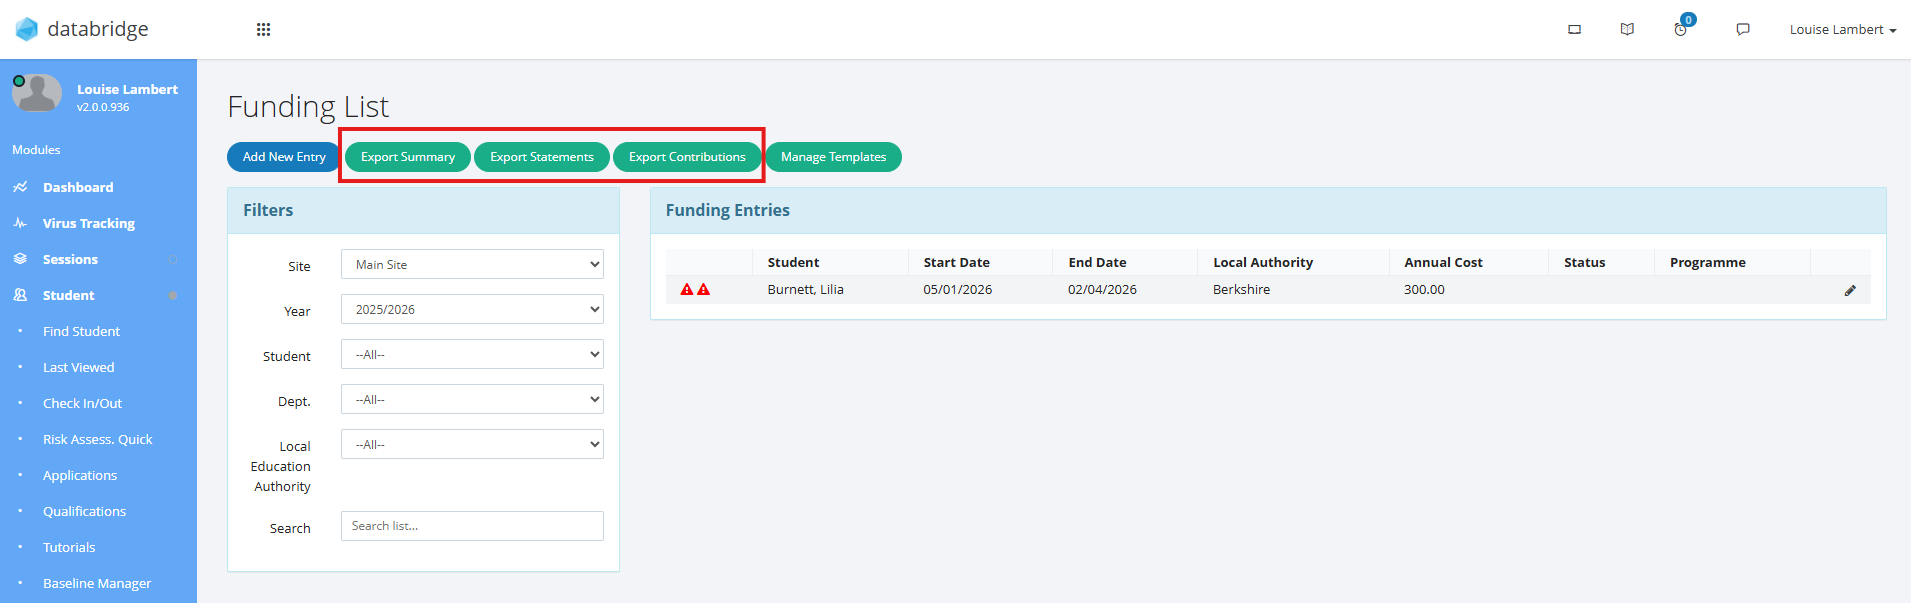
18. Heading back to the Funding Screen, you have several Export options at the top of the page. Click on one of these to print the relevant information to Excel.
Using Funding Templates
If you have a generic set of Categories/Statements that apply to most or all Students, you can use Templates to save you time in setting up the rationale on each entry.
1. Navigate to Student > Funding and click Manage Templates.
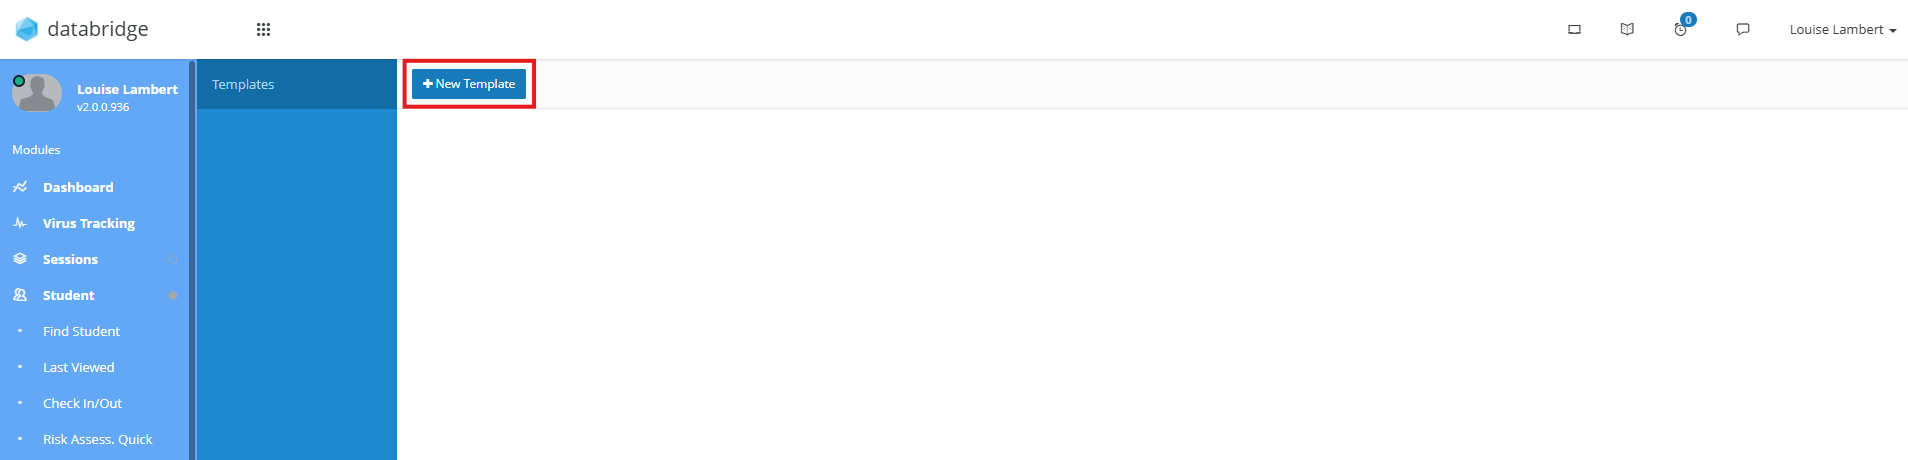
2. Click + New Template at the top of the screen.
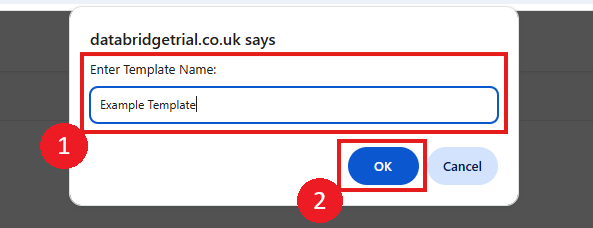
3. Give the template a name and click Ok.
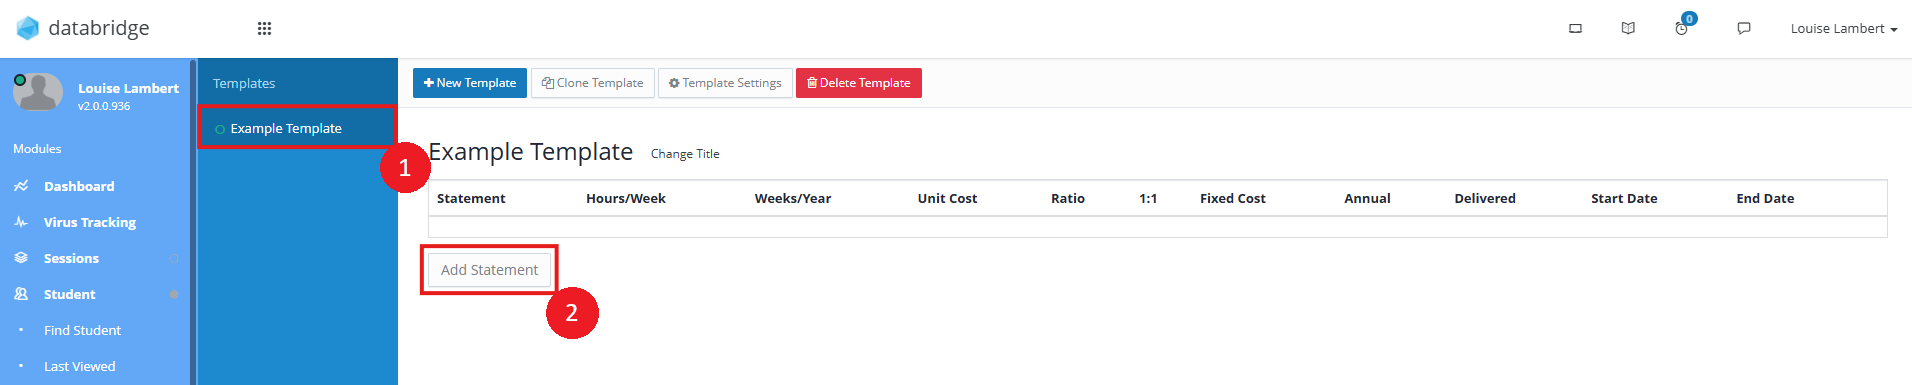
4. Your new template will now appear on the left. Click on this, and then click Add Statement to begin setting up your rationale for your template.
Now, when adding a Funding entry, you can choose this Template from the dropdown to automatically add this Rationale to the entry.
Note:
You can also create a Template while on the Rationale tab for an existing entry by clicking the Save as Template button to save the current Rationale on that entry as a new template to use on future ones.
Was this article helpful?
That’s Great!
Thank you for your feedback
Sorry! We couldn't be helpful
Thank you for your feedback
Feedback sent
We appreciate your effort and will try to fix the article