TABLE OF CONTENTS
In this guide you will be shown how to use the Qualifications Manager screen, and the Student Records screen.
Qualifications can be added either from the Qualification Manager screen or via the Student Record. Changes made to qualifications in the Student Record will apply only to that specific student. In contrast, changes made within the Qualification Manager will apply to all students enrolled. For most cases, it is recommended to use the Qualification Manager when qualifications need to be applied to multiple students. In either case once a Qualification has been attached to a Student, there is no way to delete that qualification. However, they can be archived.
Uploading via Qualifications Manager
1. To add Qualifications via the Qualifications Manager, first navigate to Student > Qualifications.

2. Clicking Qualifications will load the Qualifications page. Here select File > Add New Qualification.

3. Clicking Add New Qualification will load a list of Qualifications on your Databridge. To select a Qualification, click the + icon.

4. Clicking the + icon will generate a pop up. The pop up asks if you are sure you wish to add this Qualification. To do so, click Ok.

5. Clicking Ok will add the Qualification to the Qualifications page. To add Student(s) to this qualification, click the Enroll Student icon.

6. Clicking the Enroll Student icon will load a window for you to select the relevant student's. Using the Dropdowns you can filter the list of students shown.
Clicking the Checkbox on the right of a student's name will attach this qualification to their record.
Alternatively, you can click Select All to select everyone in the list.
When finished, click Select and then Close.

7. Clicking Close will take you back to the Qualifications page. To add any details to a Qualification, click the Notepad icon.

8. Here you can fill in the necessary fields in the form, ensuring all required information is entered accurately.
When all required fields are completed, click Save to finalise the process.
This will update the details for all students attached to this qualification. If you need to make changes to an individual student's details, you will need to go to the student's qualifications screen to make those adjustments.

Uploading Via Student Record
1. To add Qualifications via a Student's Record, navigate to Student > Find Student > *Student* > View Student.

2. Once the Students record has loaded, select the Qualification button on the right side of the screen.

3. The Student Record Qualification page shows all completed and ongoing qualifications for this specific student.
Click Add Qualification on the right side of the screen.

4. Similarly to when using the Qualification Manager screen, click the + icon next to a Qualification to assign it to this Student.

5. A pop-up will appear asking if you would like to enter Start and Expected end dates for the qualification. Clicking Ok will take you to the details screen for the selected qualification.

6. Use the text boxes to fill in all required and relevant information.
Use the tabs to navigate through the form, and fill in all required details.
Click Save Changes when finished.

Adding Qualification Units
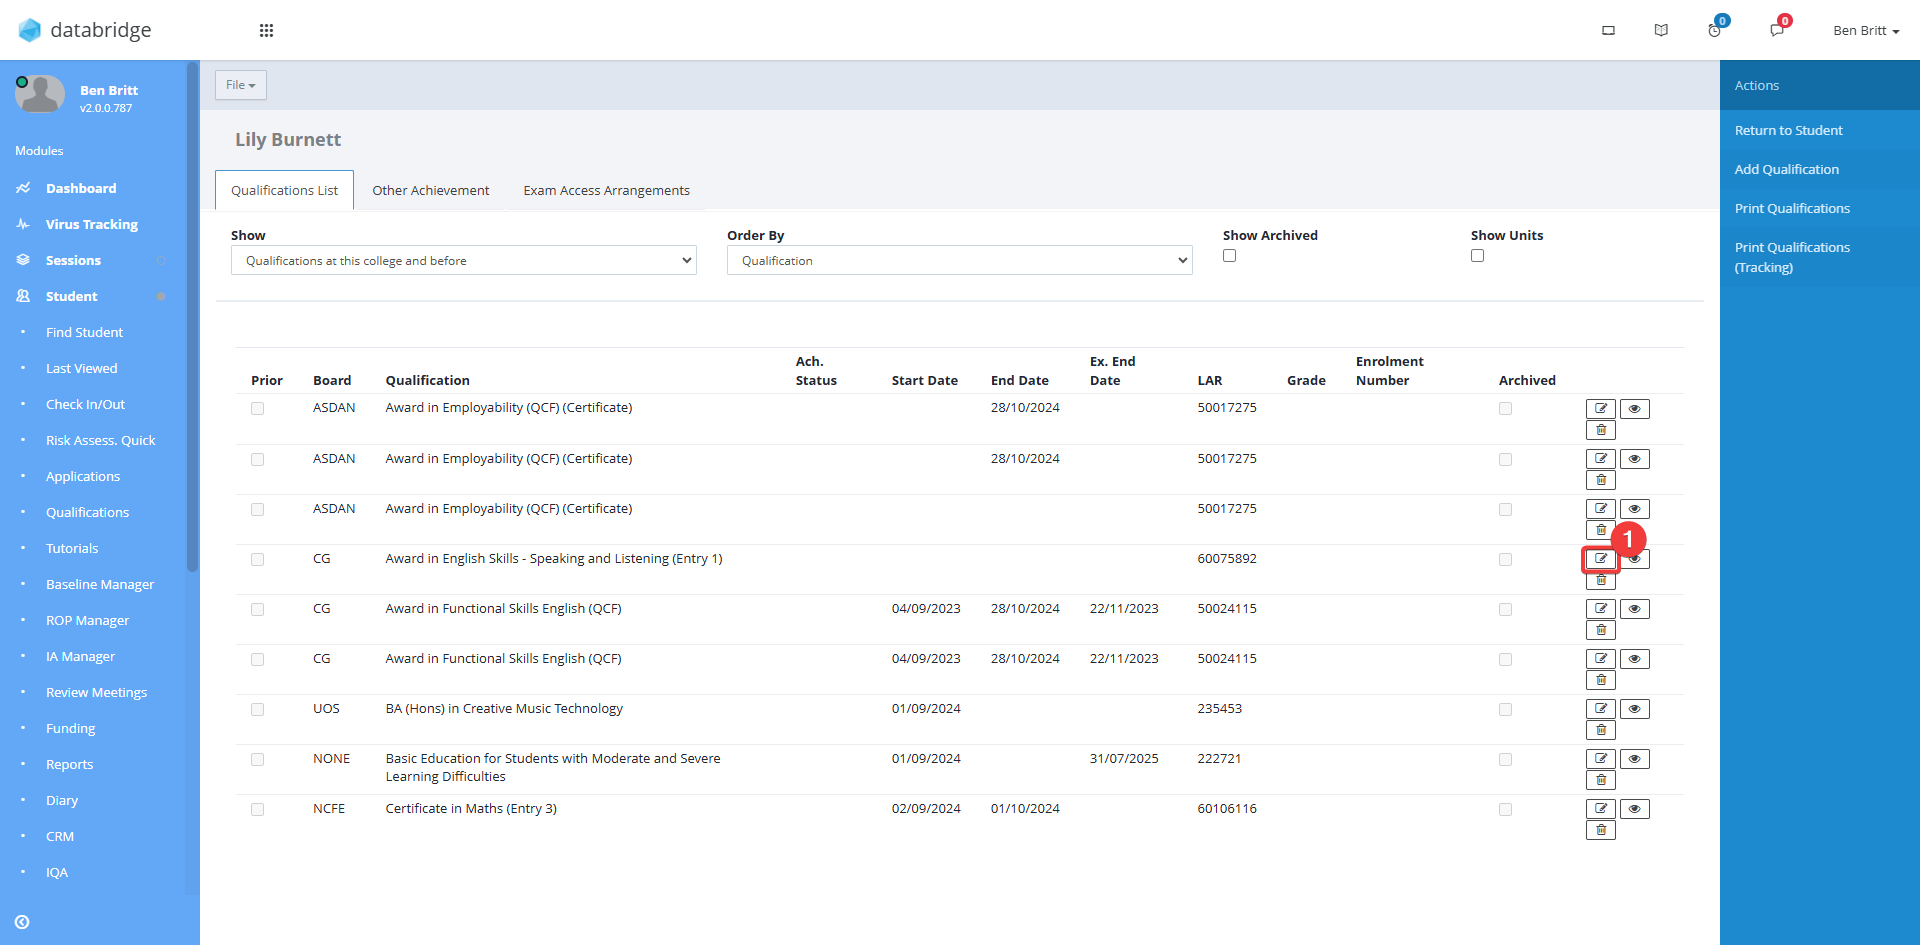
1. Once you have uploaded your Qualifications and attached to your Students, you can then add your Qualification Units. To do so, navigate to the Students Qualification page: Student > Find Student > select the Student from the list > View Student > Qualifications. Click the Notepad icon next to a qualification you want to add units to.
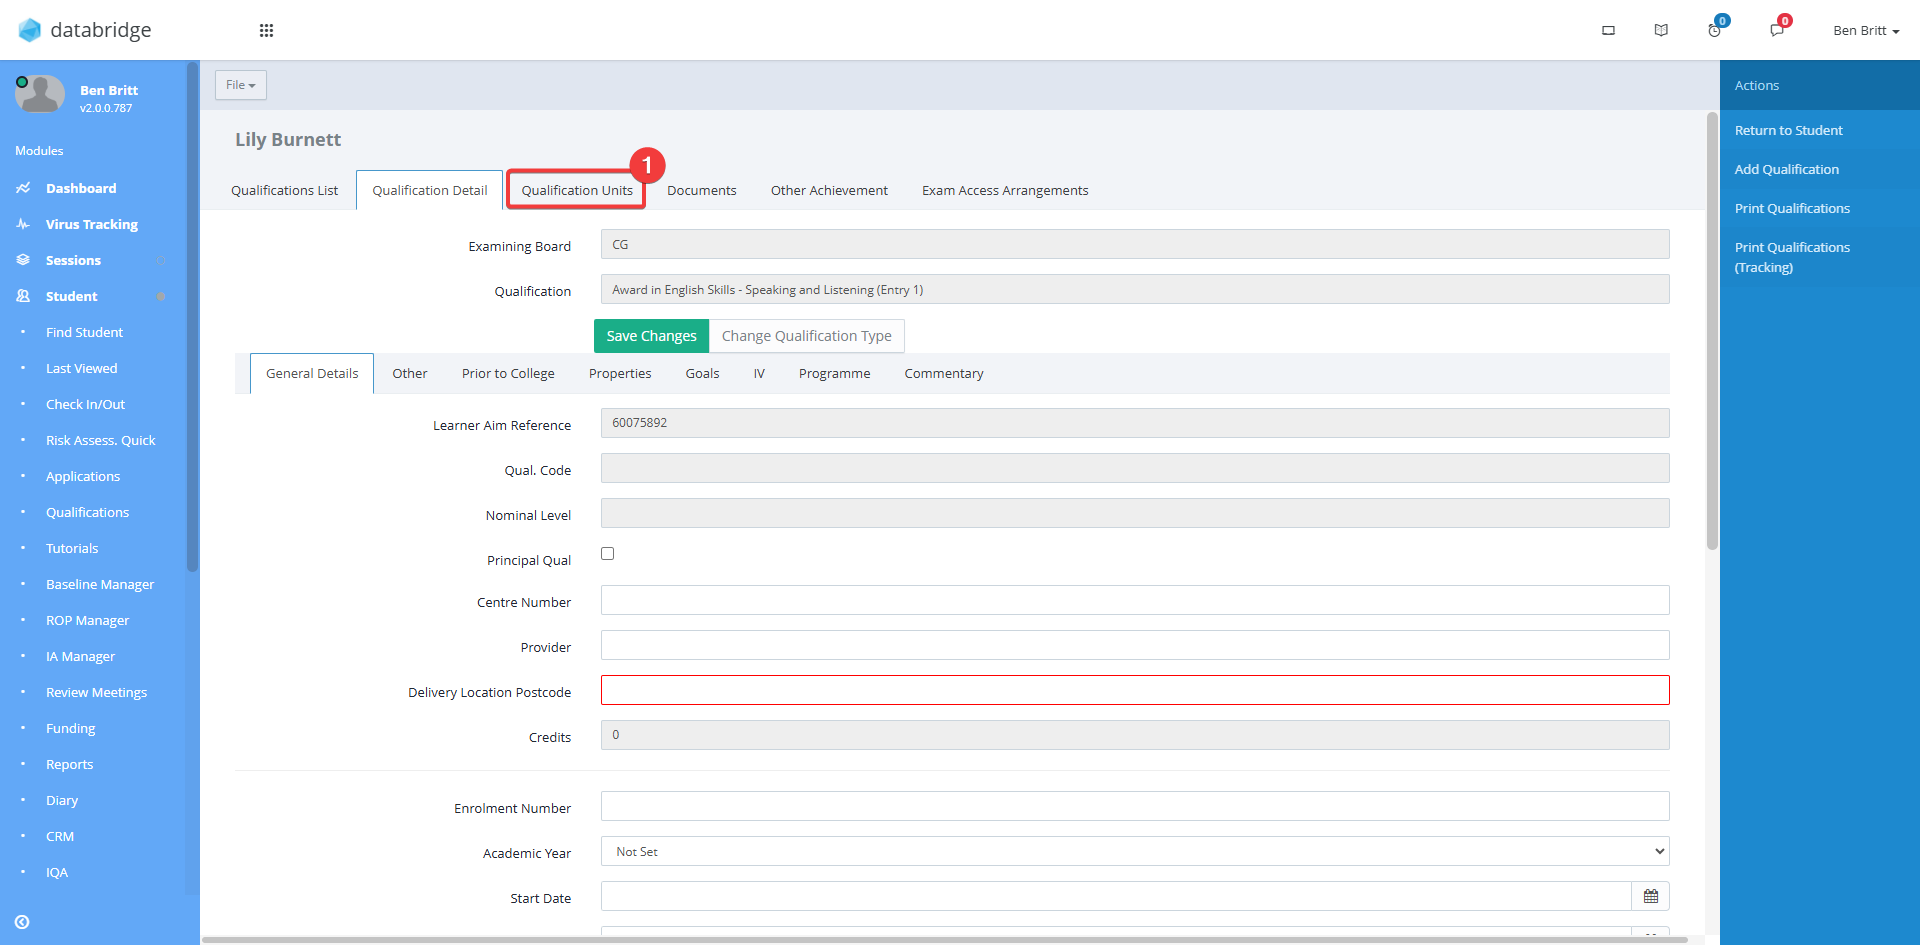
2. Once you have select the Qualification, navigate to the Qualification Units tab.
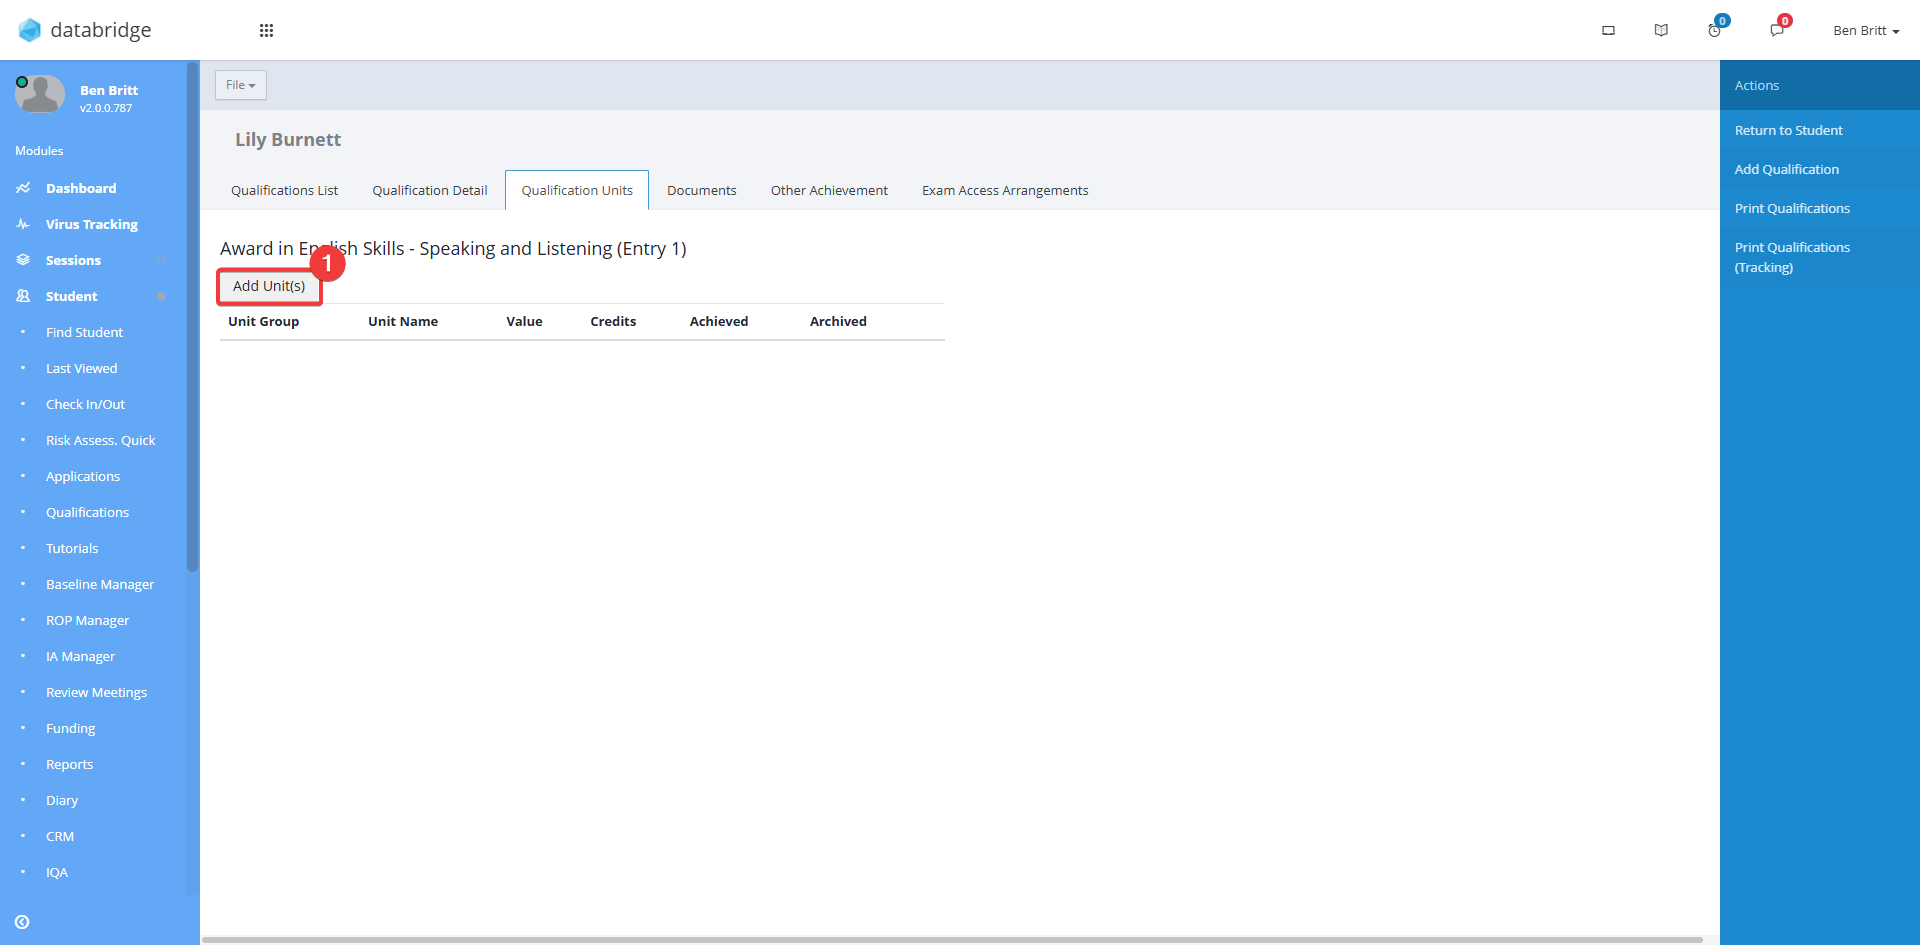
3. Here, click Add Units.
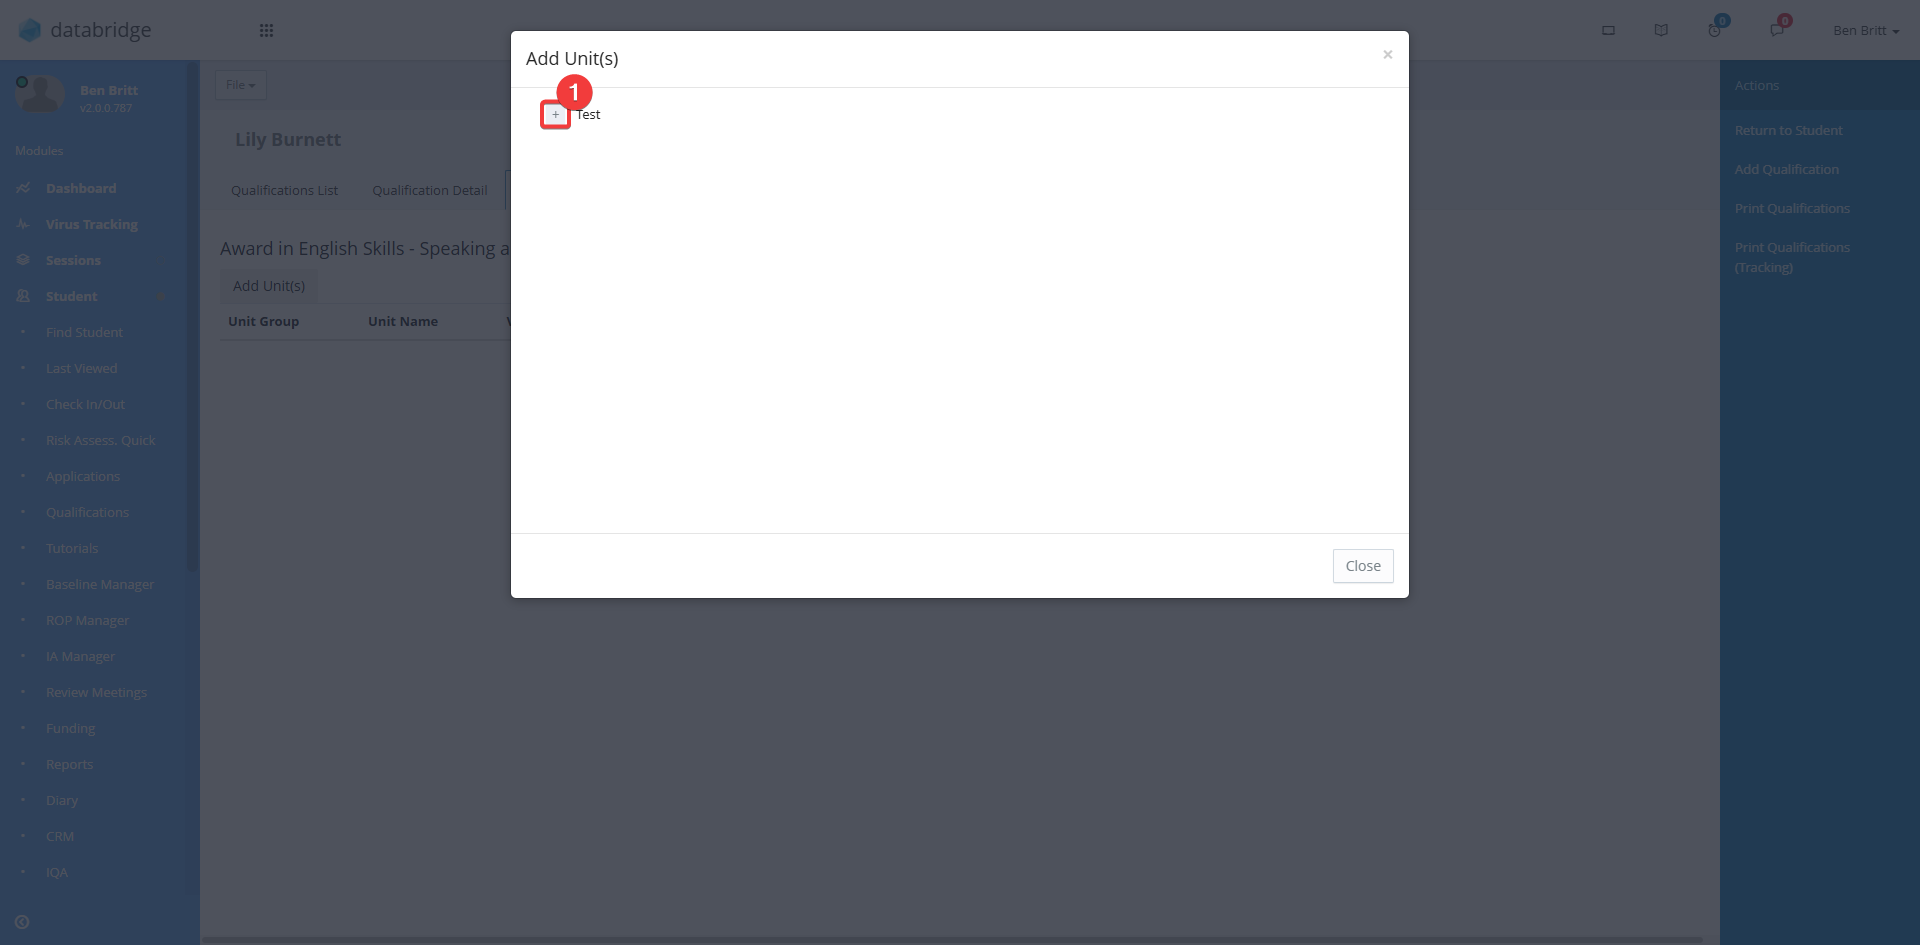
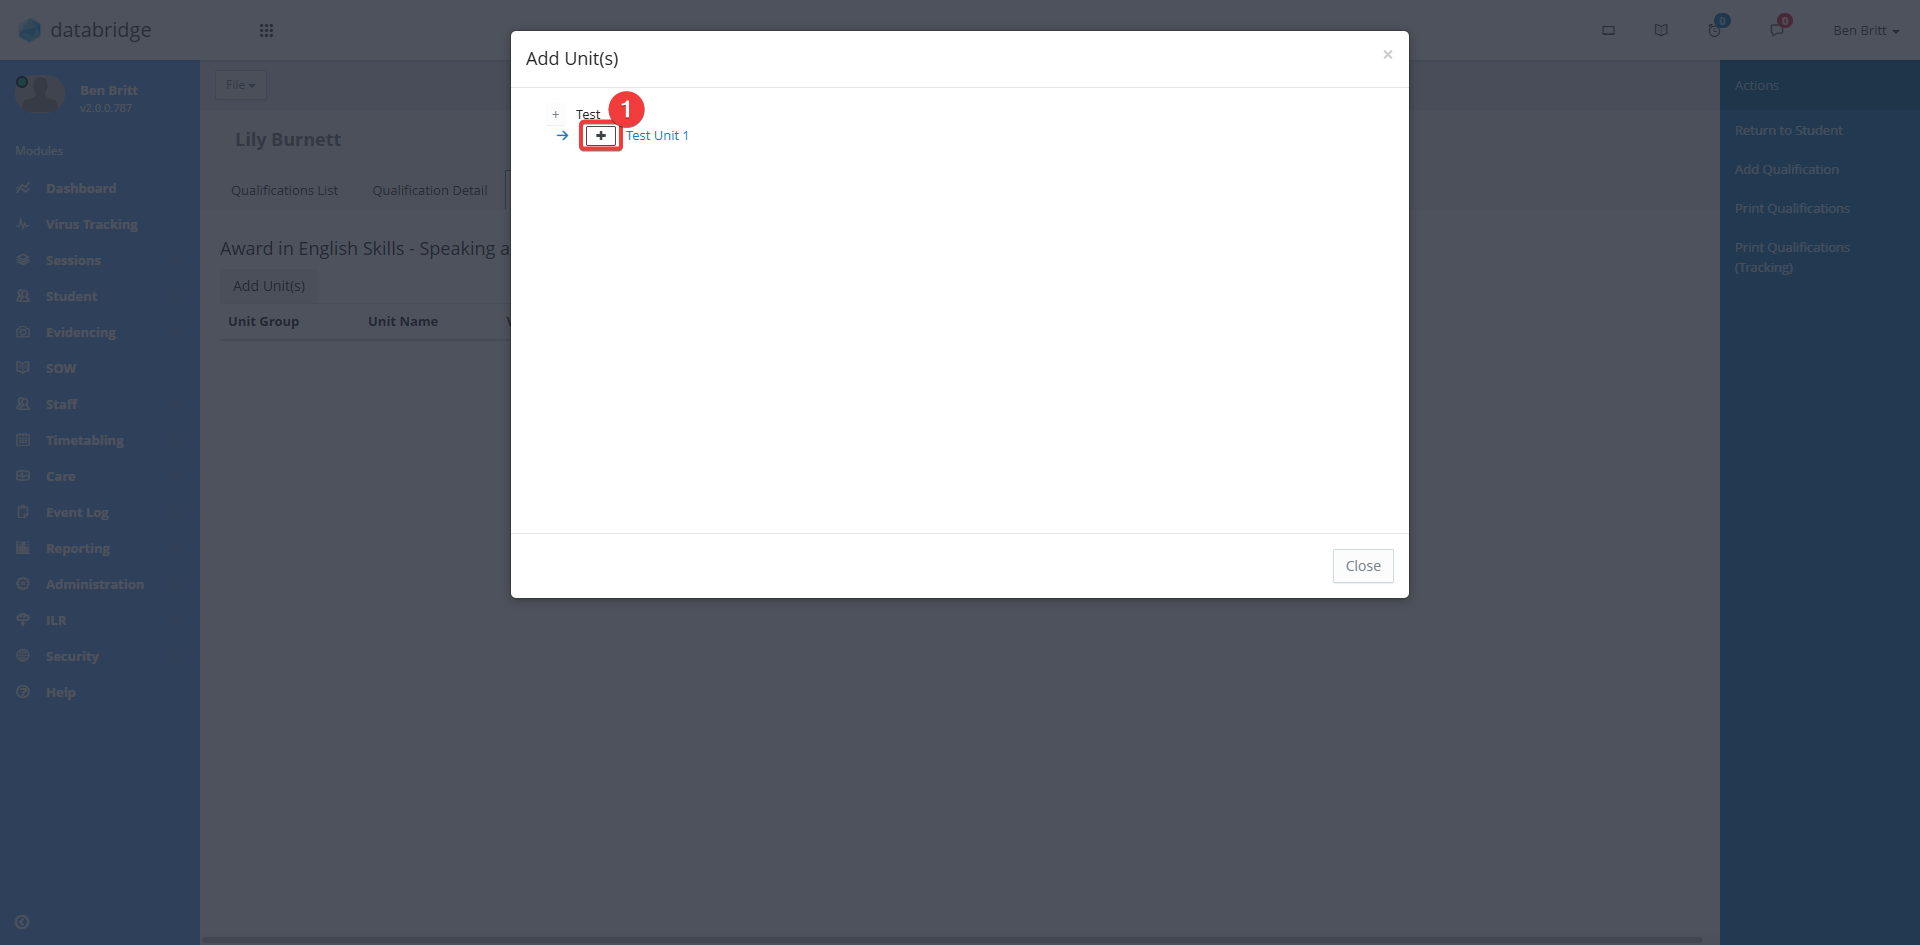
4. All Unit Groups that have been setup in Standard Values will appear here. Click the + icon to expand the group and view individual units.
5. Click the + icon next to the Unit you would like to add.
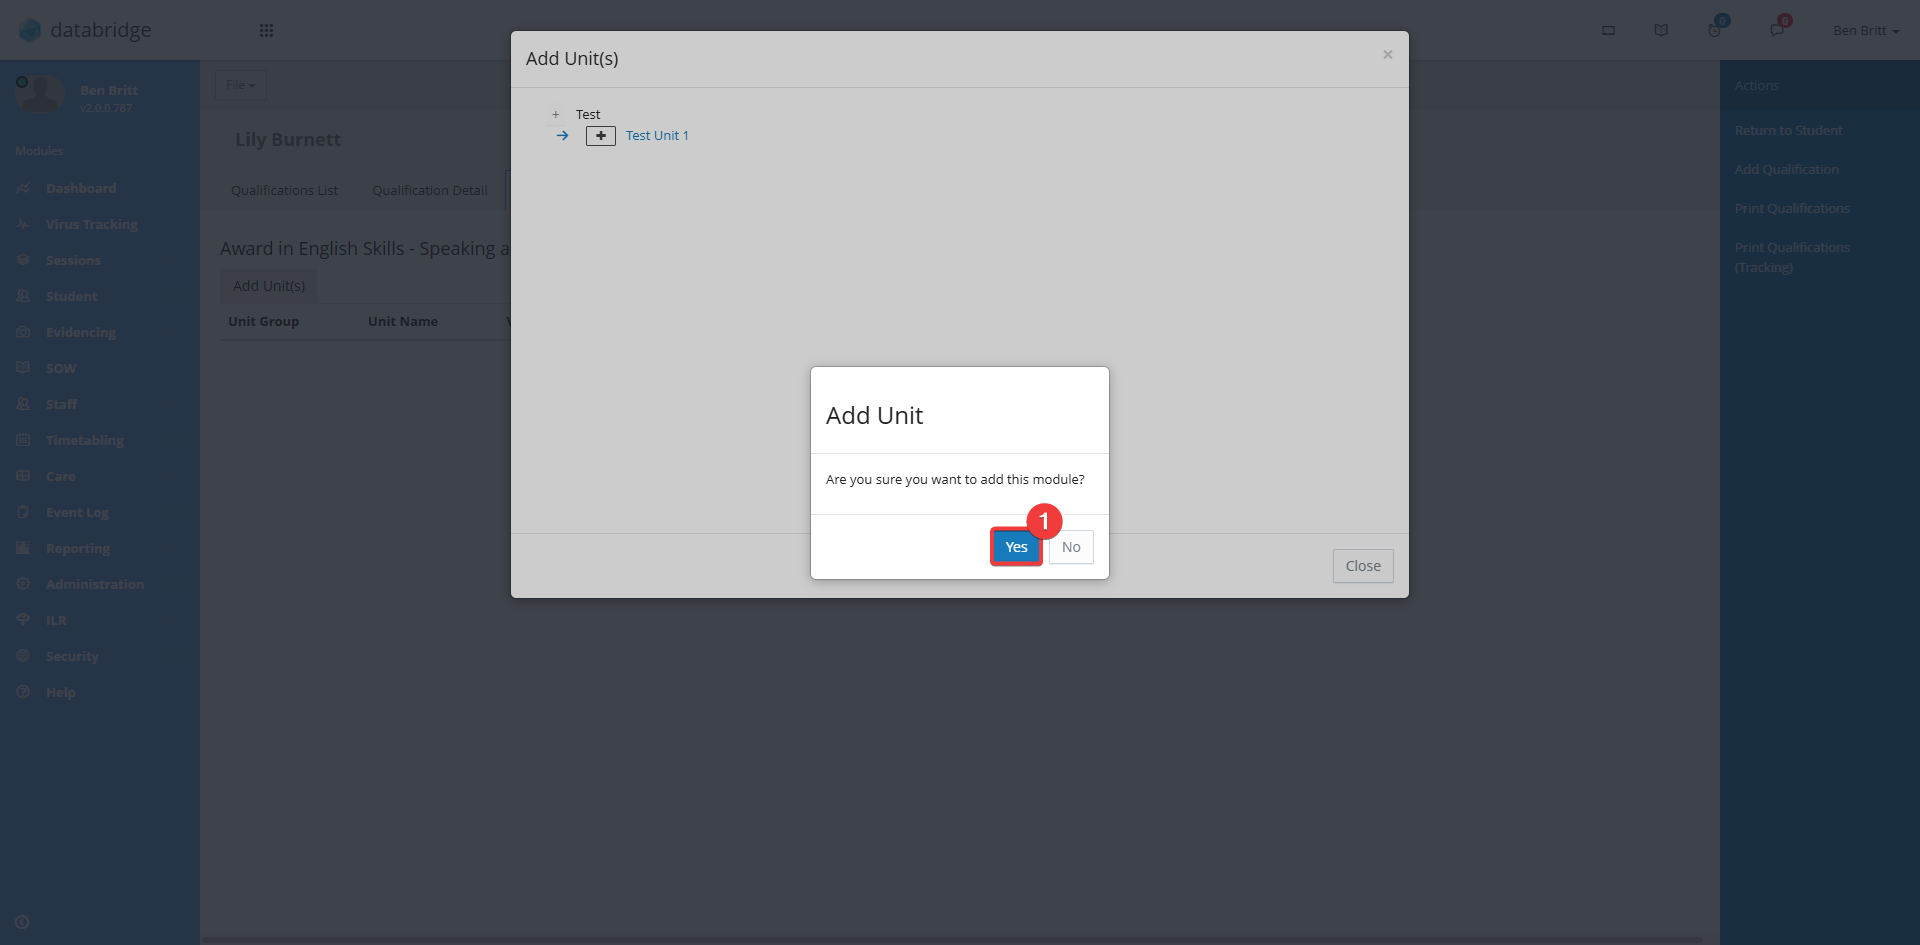
6. A pop-up will appear asking if you wish to add this Unit. Click Yes to add the Unit.
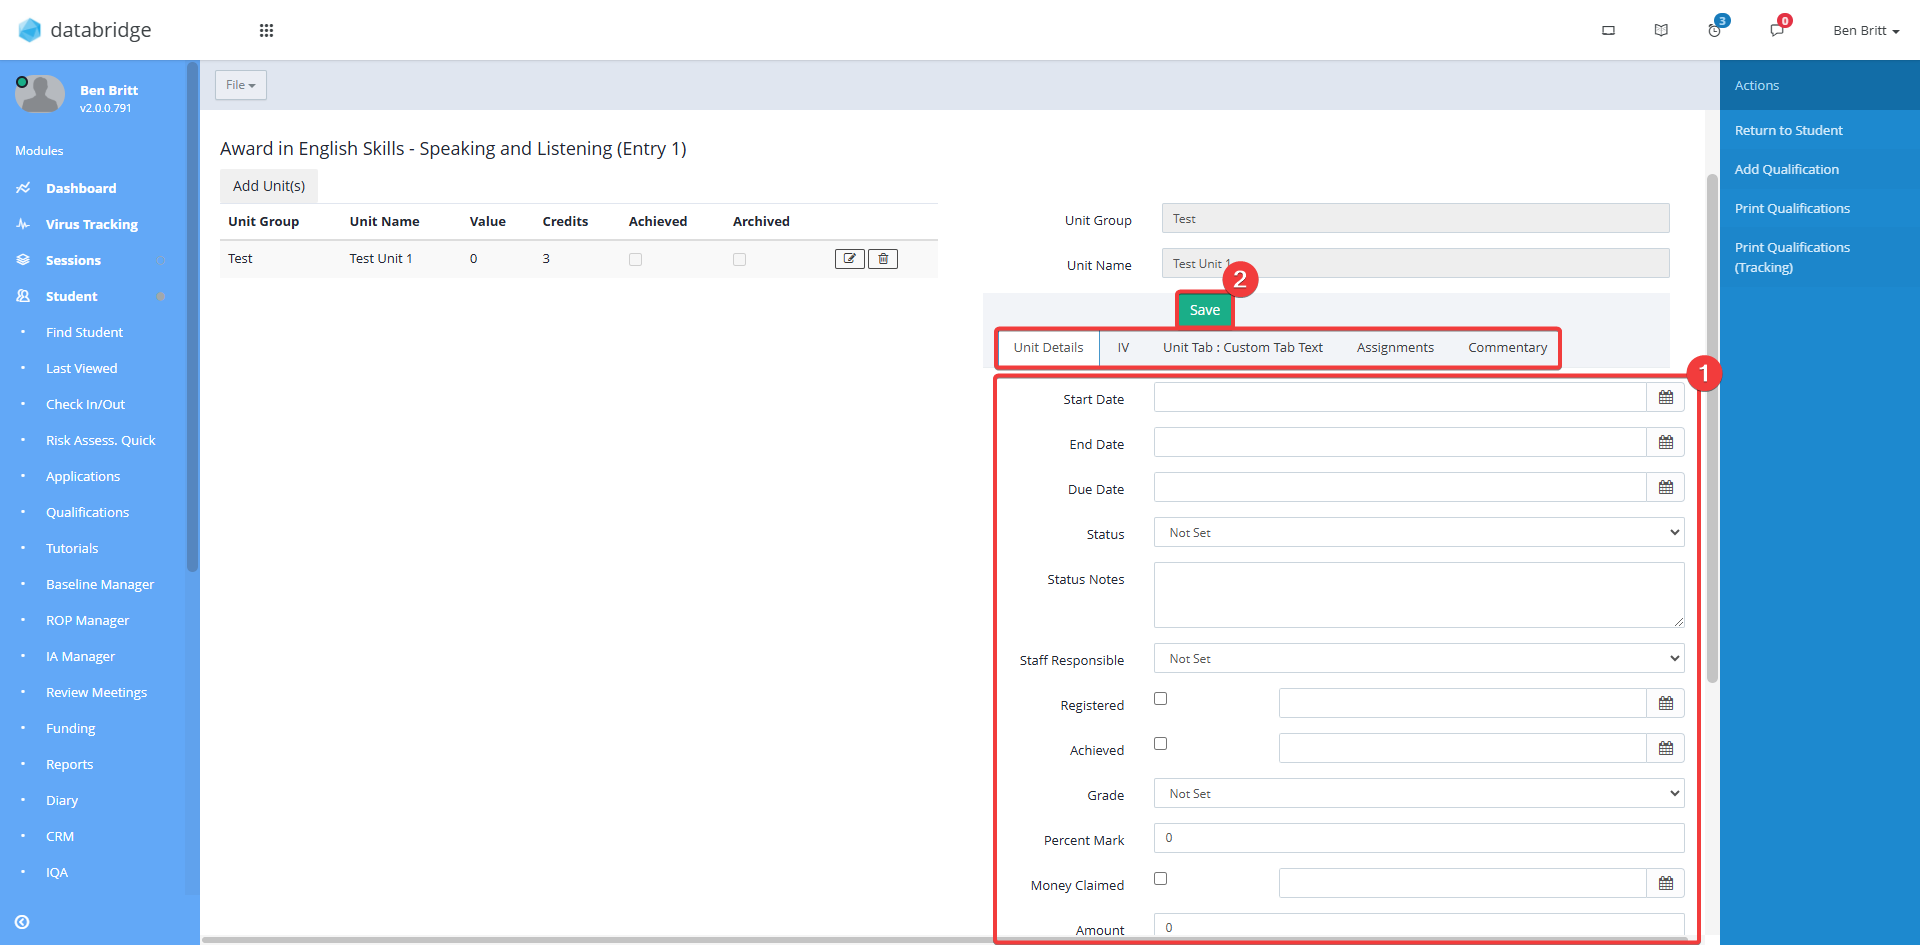
7. The Unit is now setup and will appear on the front page of the Qualification Units tab for that specific student.

8. To view the details of Qualification Units, click the Notepad icon.

9. Clicking the Notepad icon will open a Unit Details pop-up window. You can navigate this section by clicking the tabs sectioned in red.
From here, you can also update and edit any details needed on the unit.
Select Save when finished.
Was this article helpful?
That’s Great!
Thank you for your feedback
Sorry! We couldn't be helpful
Thank you for your feedback
Feedback sent
We appreciate your effort and will try to fix the article