Template Block Reporting is an extension of Block Reporting that allows you to create custom reports, but export them to bespoke template using Bookmarks.
If you are familiar with Block Reporting and the Templates used for either Event Logs or Care Plans, this works as a combination of the two.
TABLE OF CONTENTS
- Navigating to Template Block Reporting
- Creating Custom Reports - Adding Blocks
- Creating Custom Reports - Adding Individual Bookmark Blocks
- Creating Templates
- Using the Template Manager
Navigating to Template Block Reporting
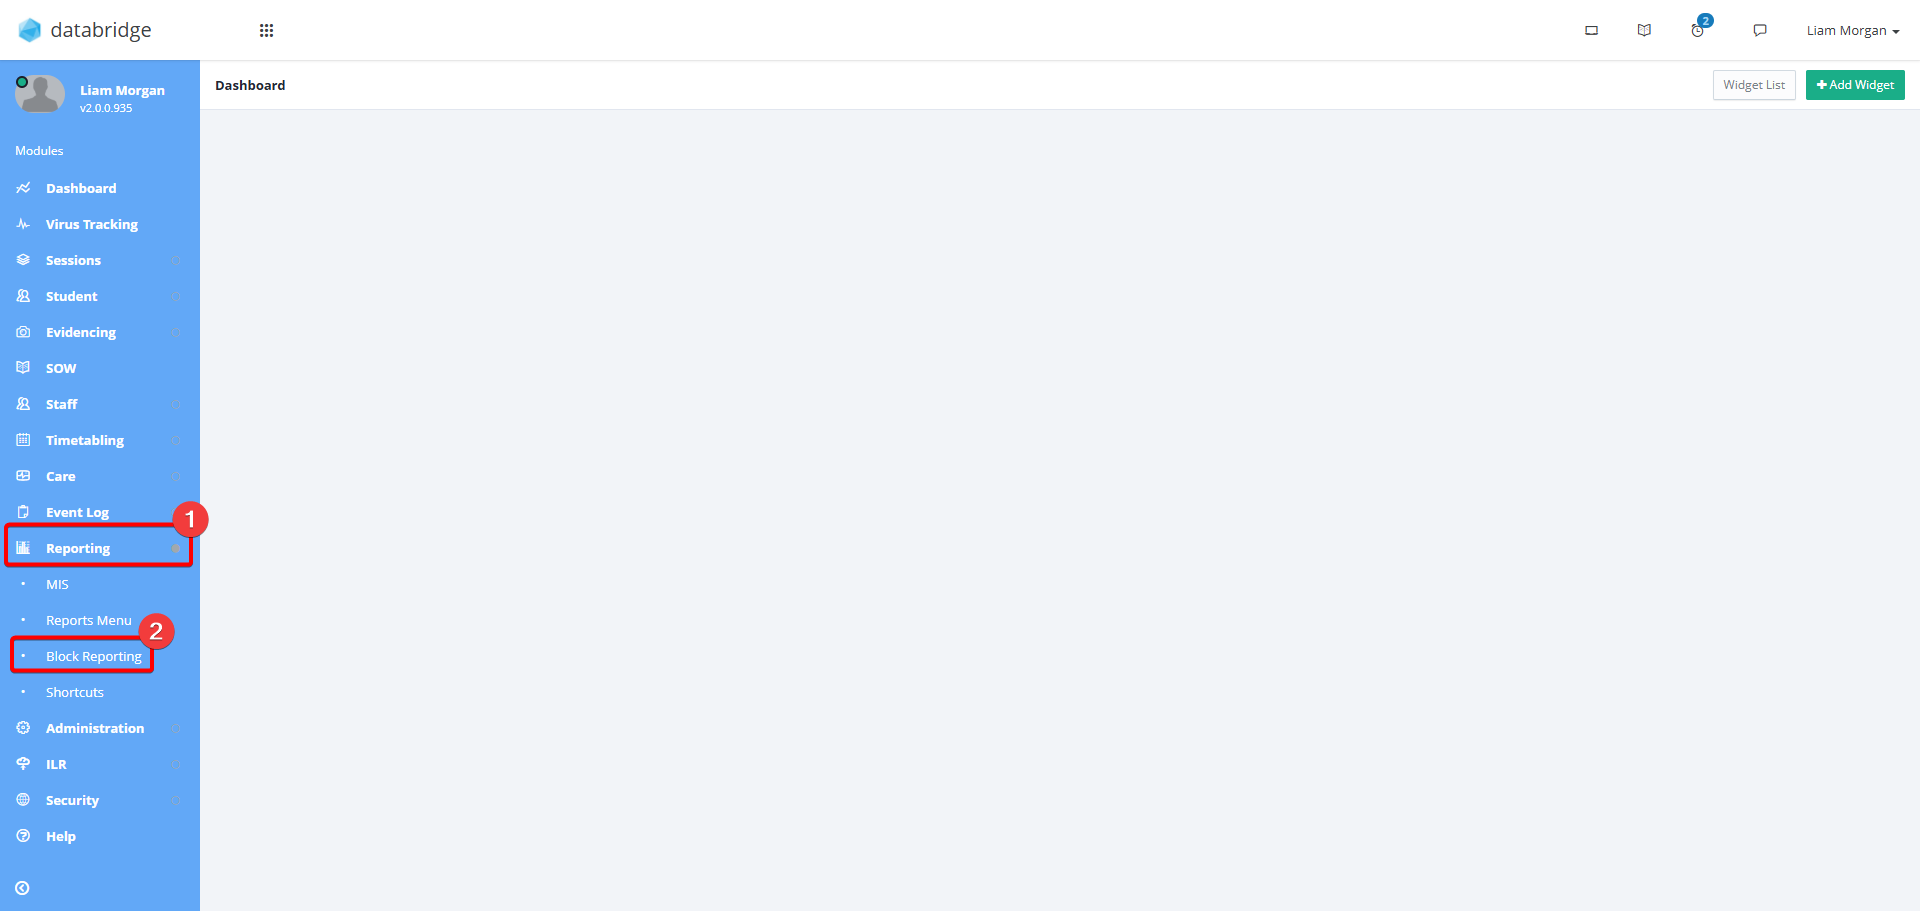
1. First, navigate to Reporting > Block Reporting.
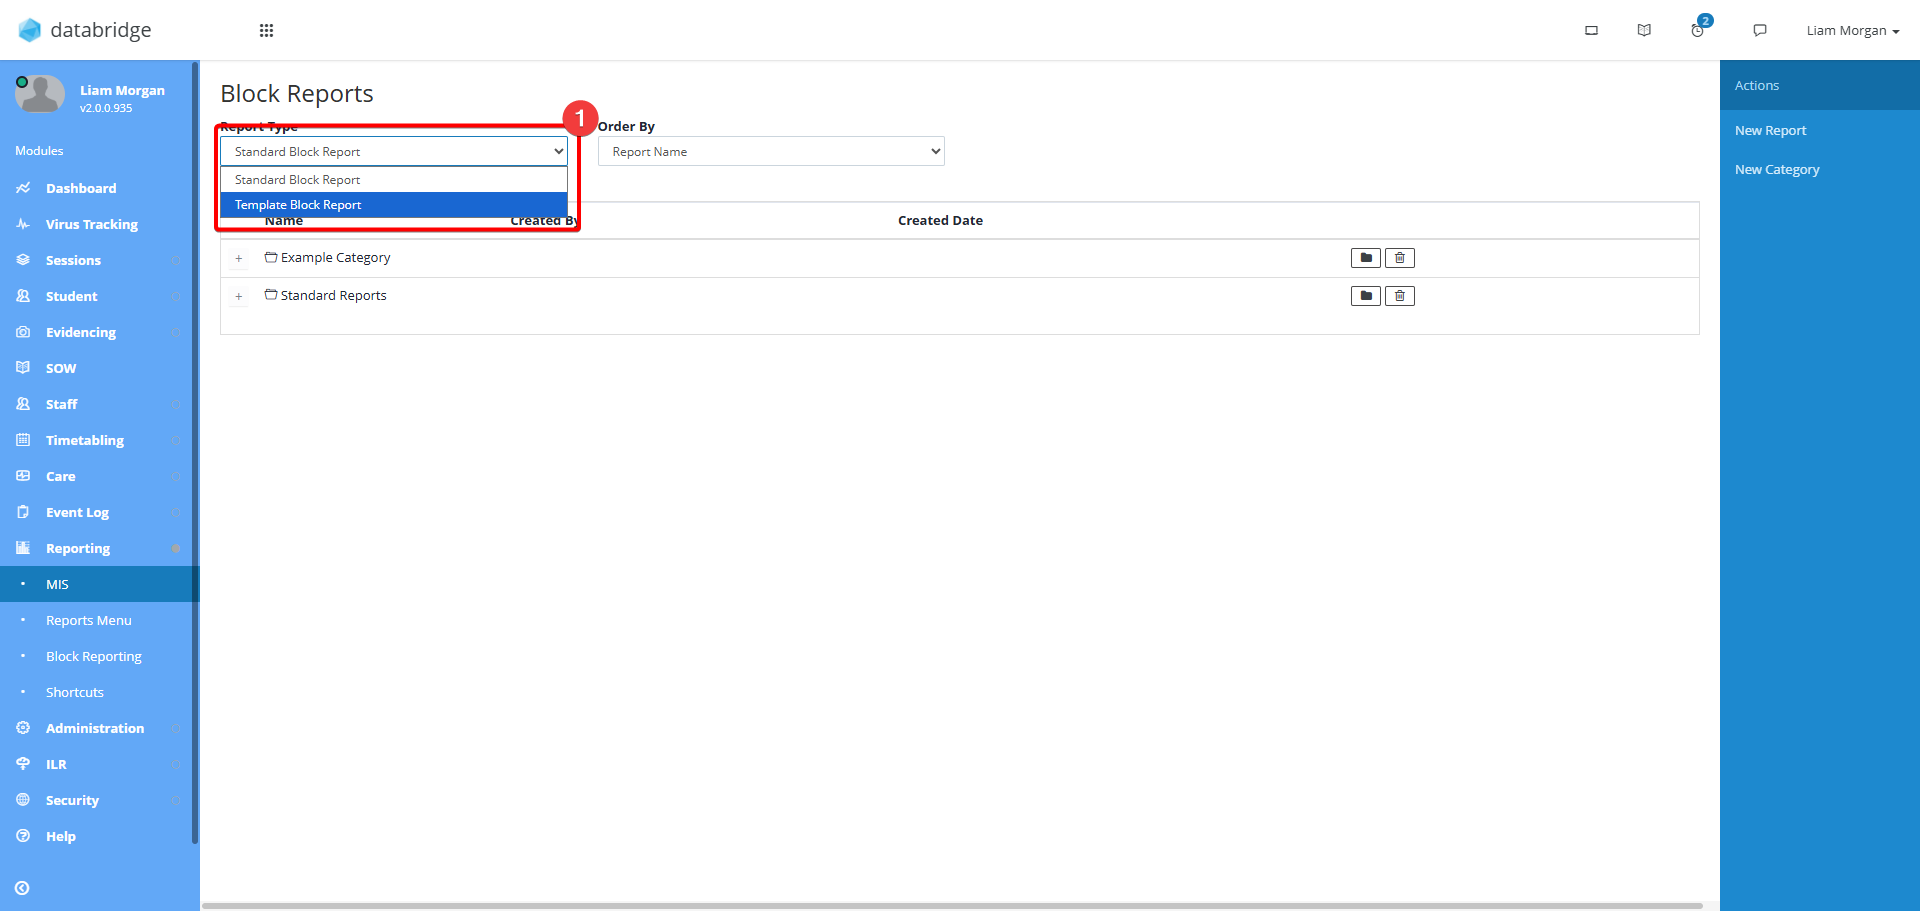
2. Click the Report Type dropdown and select Template Block Report.
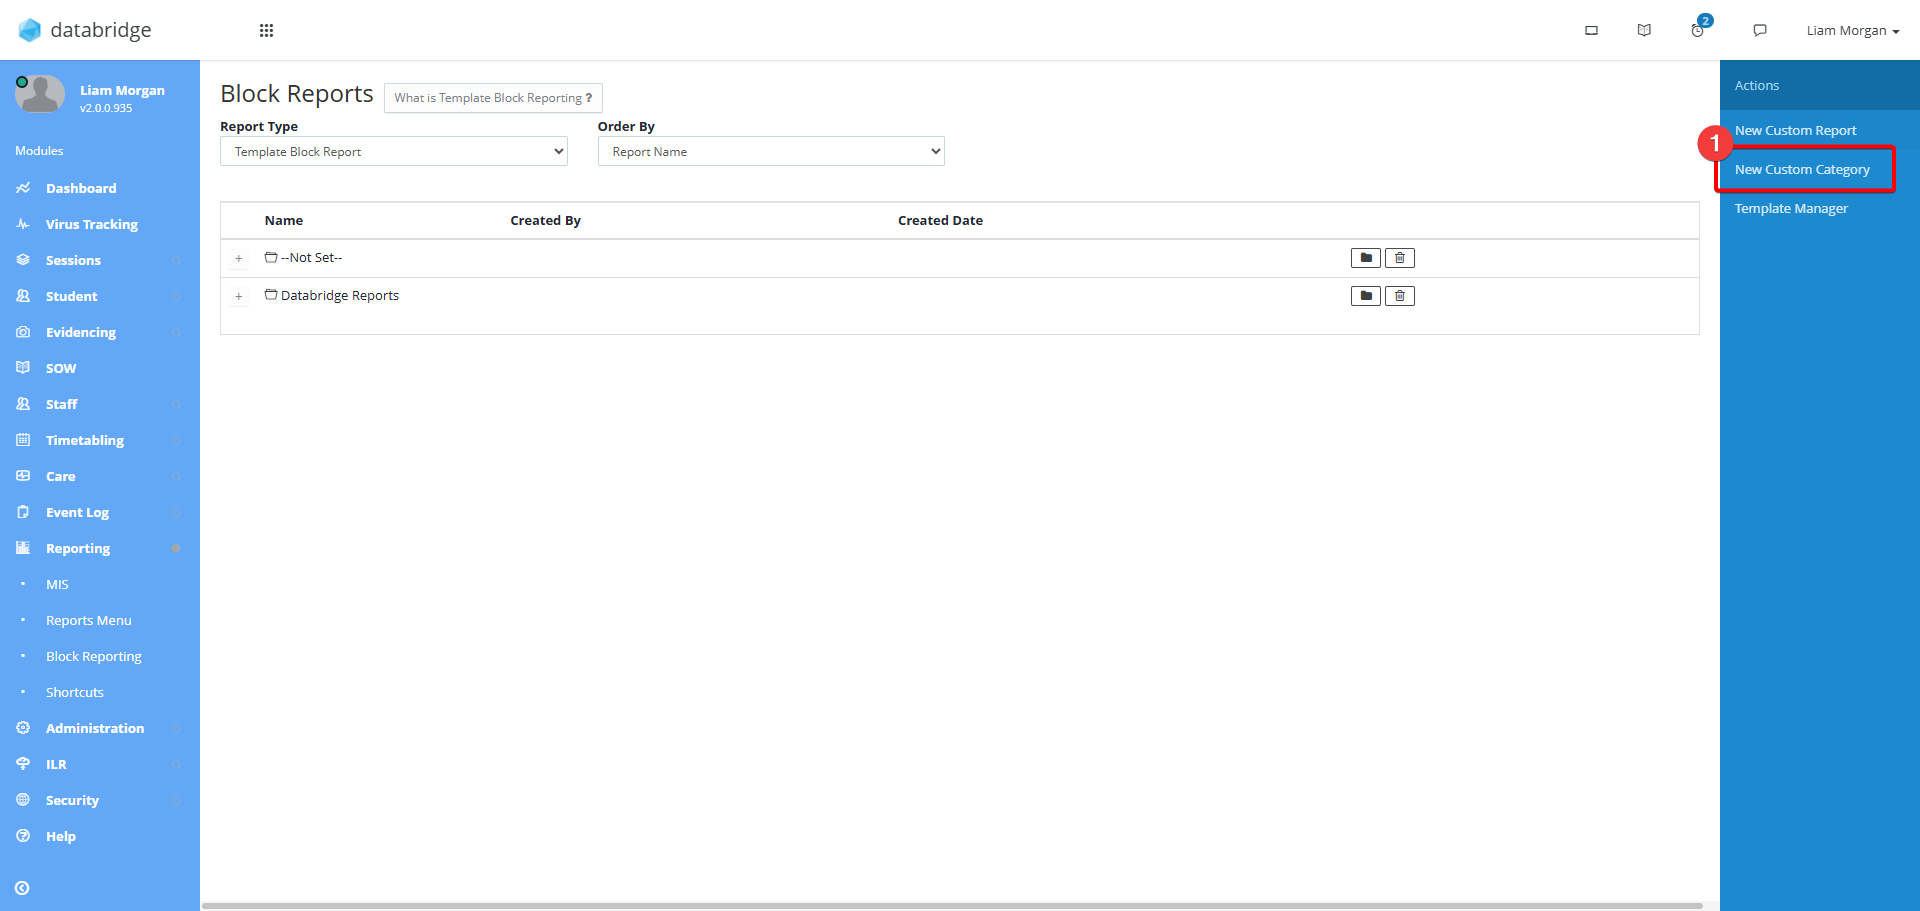
3. This screen will show you any existing Template Block Reports. To create a new folder to organise these click New Custom Category.
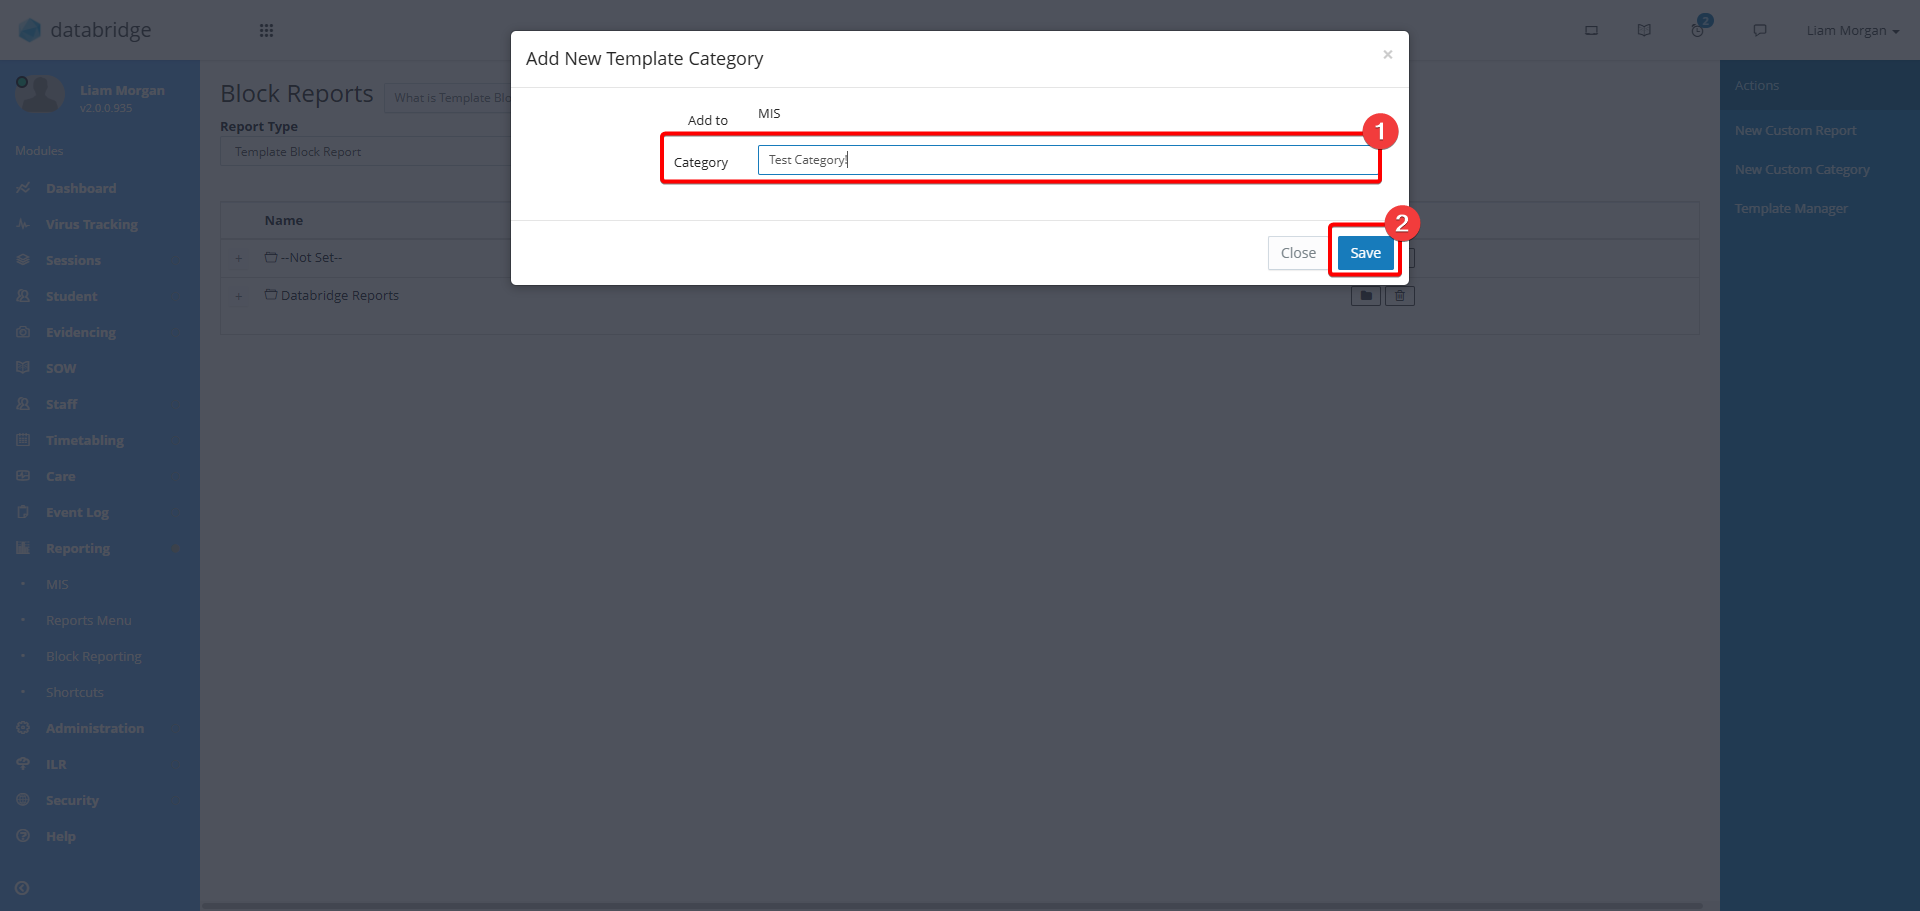
4. Give the folder a name in the Category textbox, then click Save.
Creating Custom Reports - Adding Blocks
5. To create a new Report, click New Custom Report.

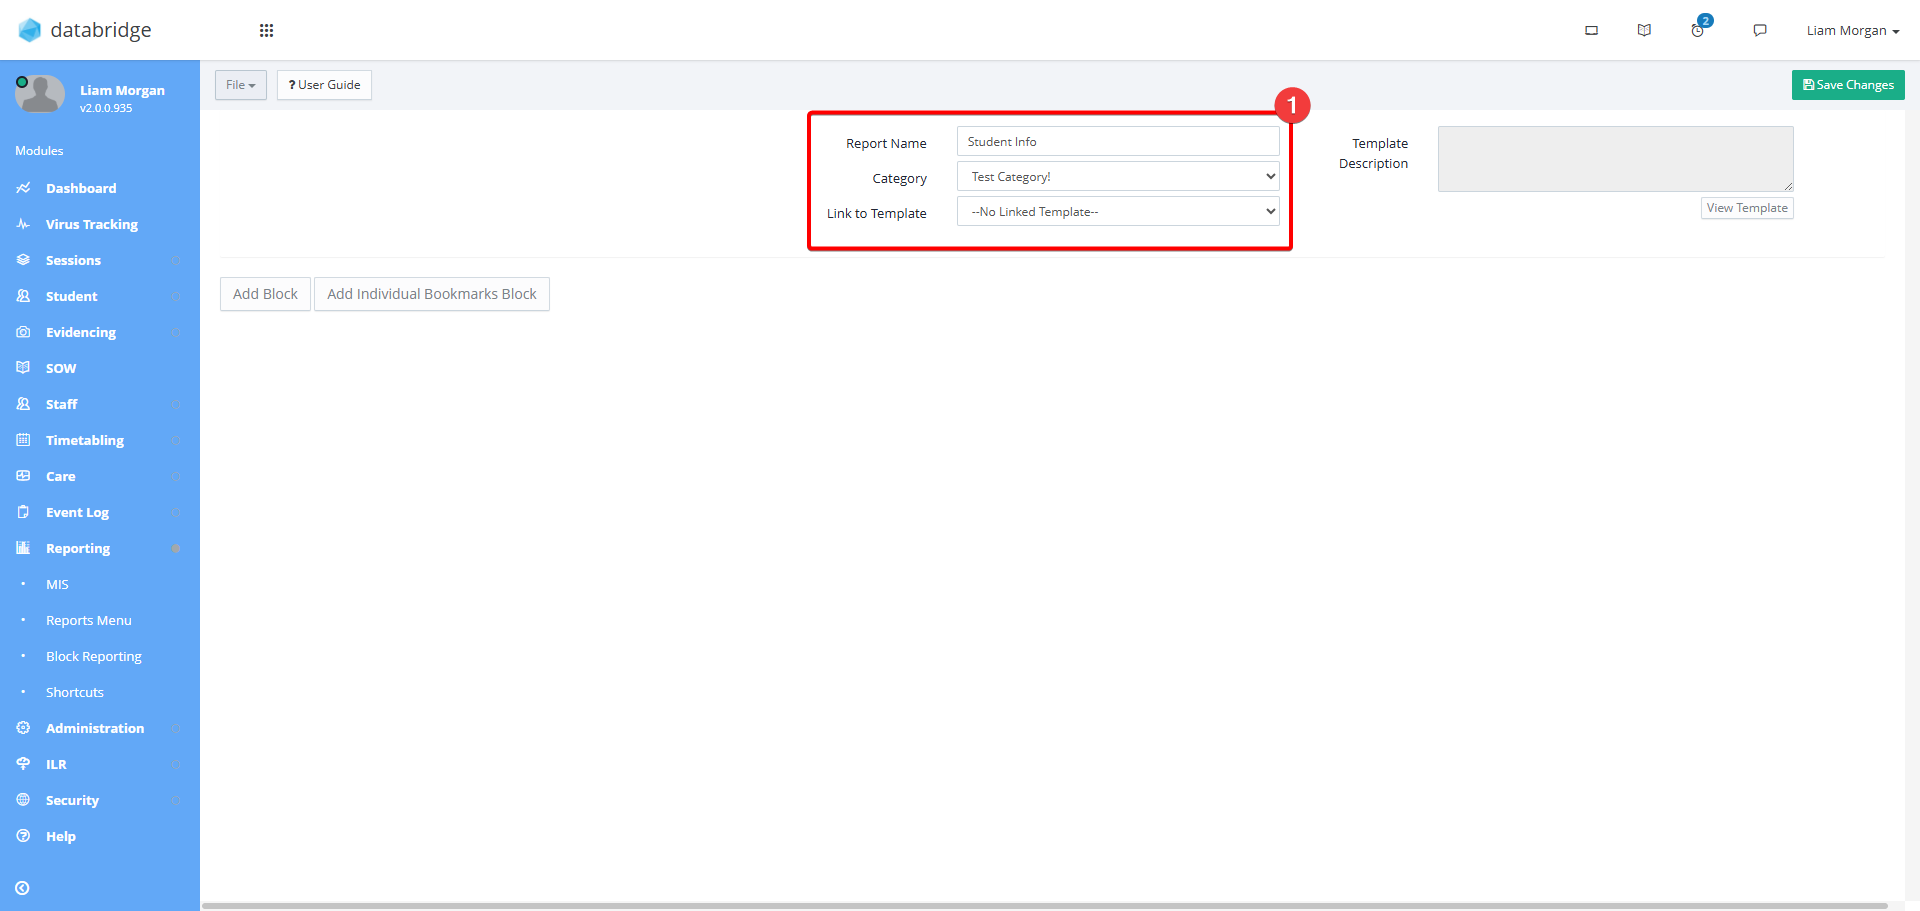
6. First, fill in the 3 fields at the top of the screen:
- Report Name - Give your report a name. This is what will be displayed on the Template Block Reporting main screen.
- Category - Select the Category folder the report will be saved to.
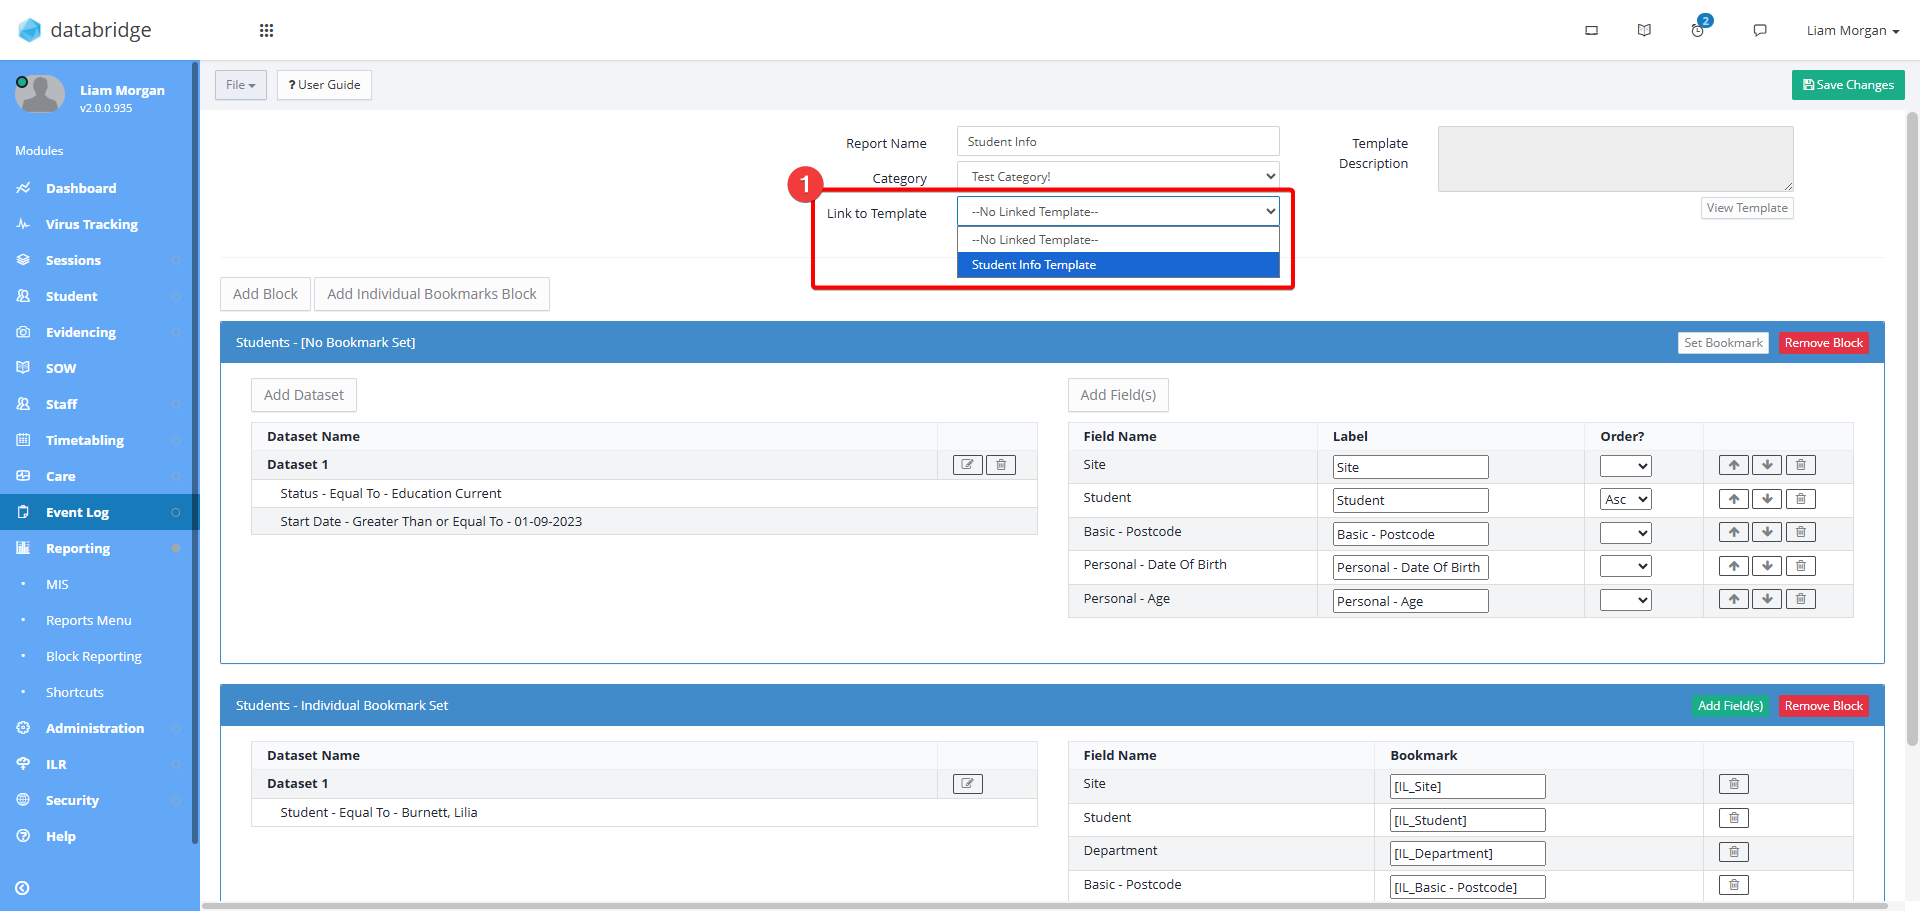
- Link to Template - If a template has already been uploaded to the system, it can be linked now. This will be covered in more detail further in the guide.
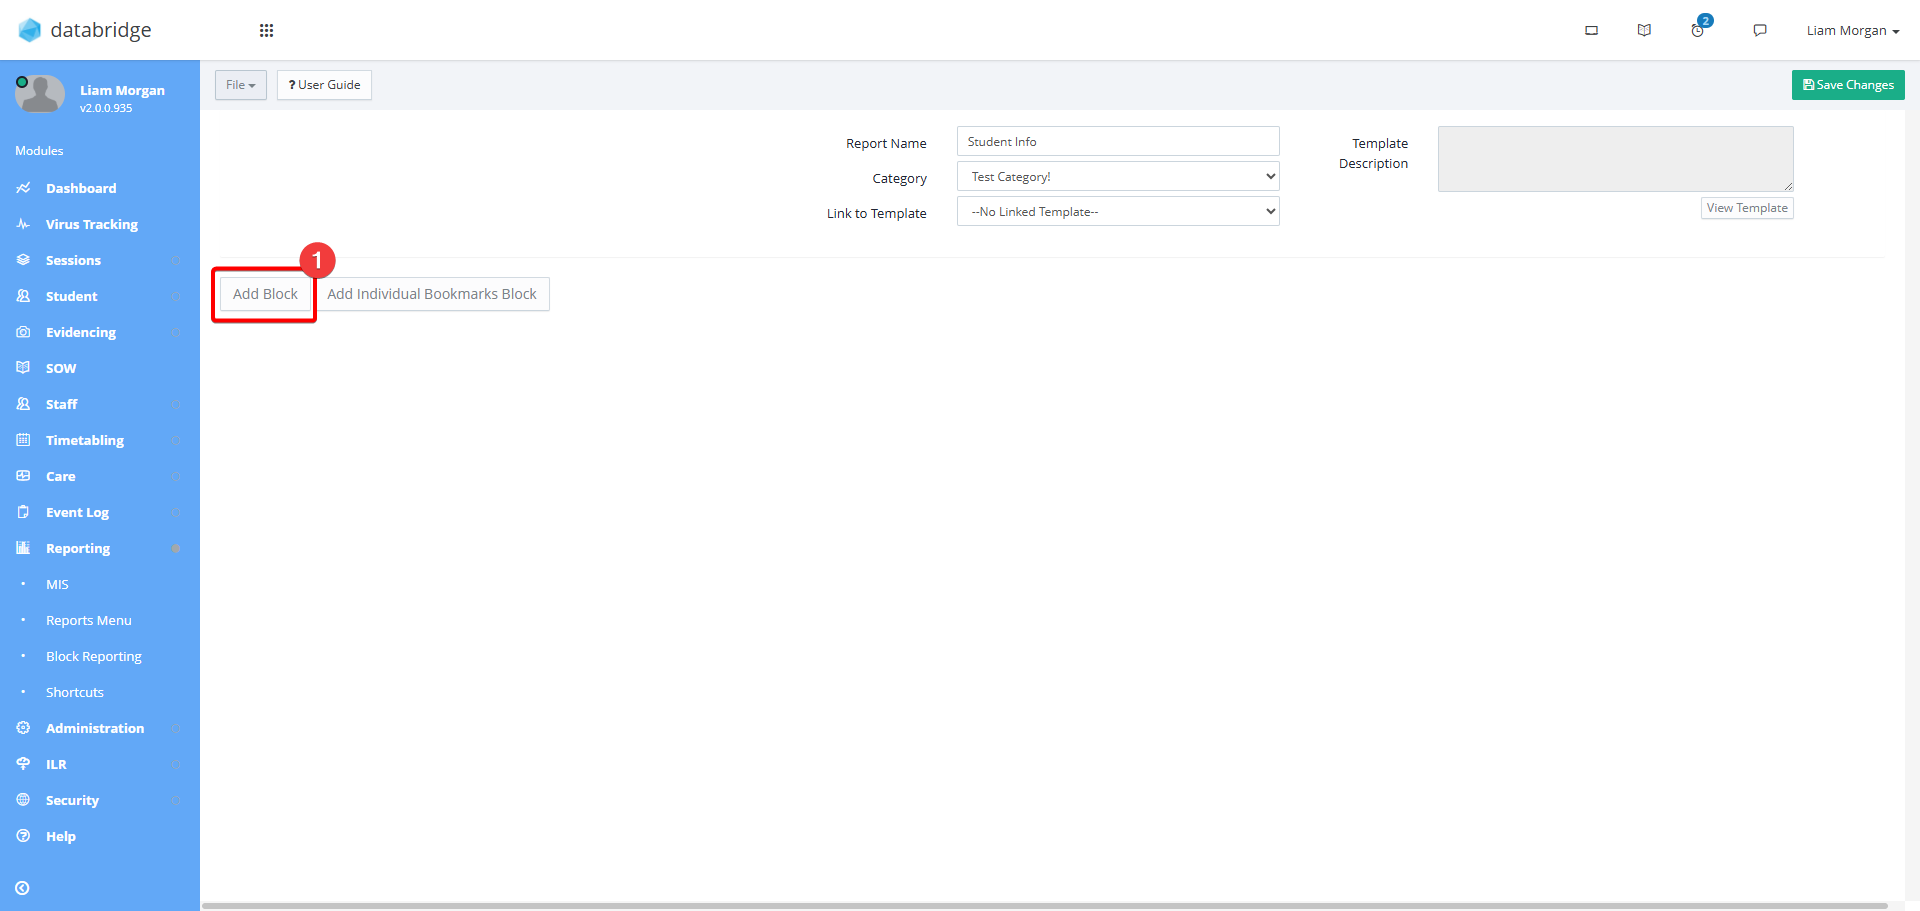
7. Click Add Block. The term 'Block' refers to the general area where information will be pulled from, such as Students, Staff, or Buildings, for example.
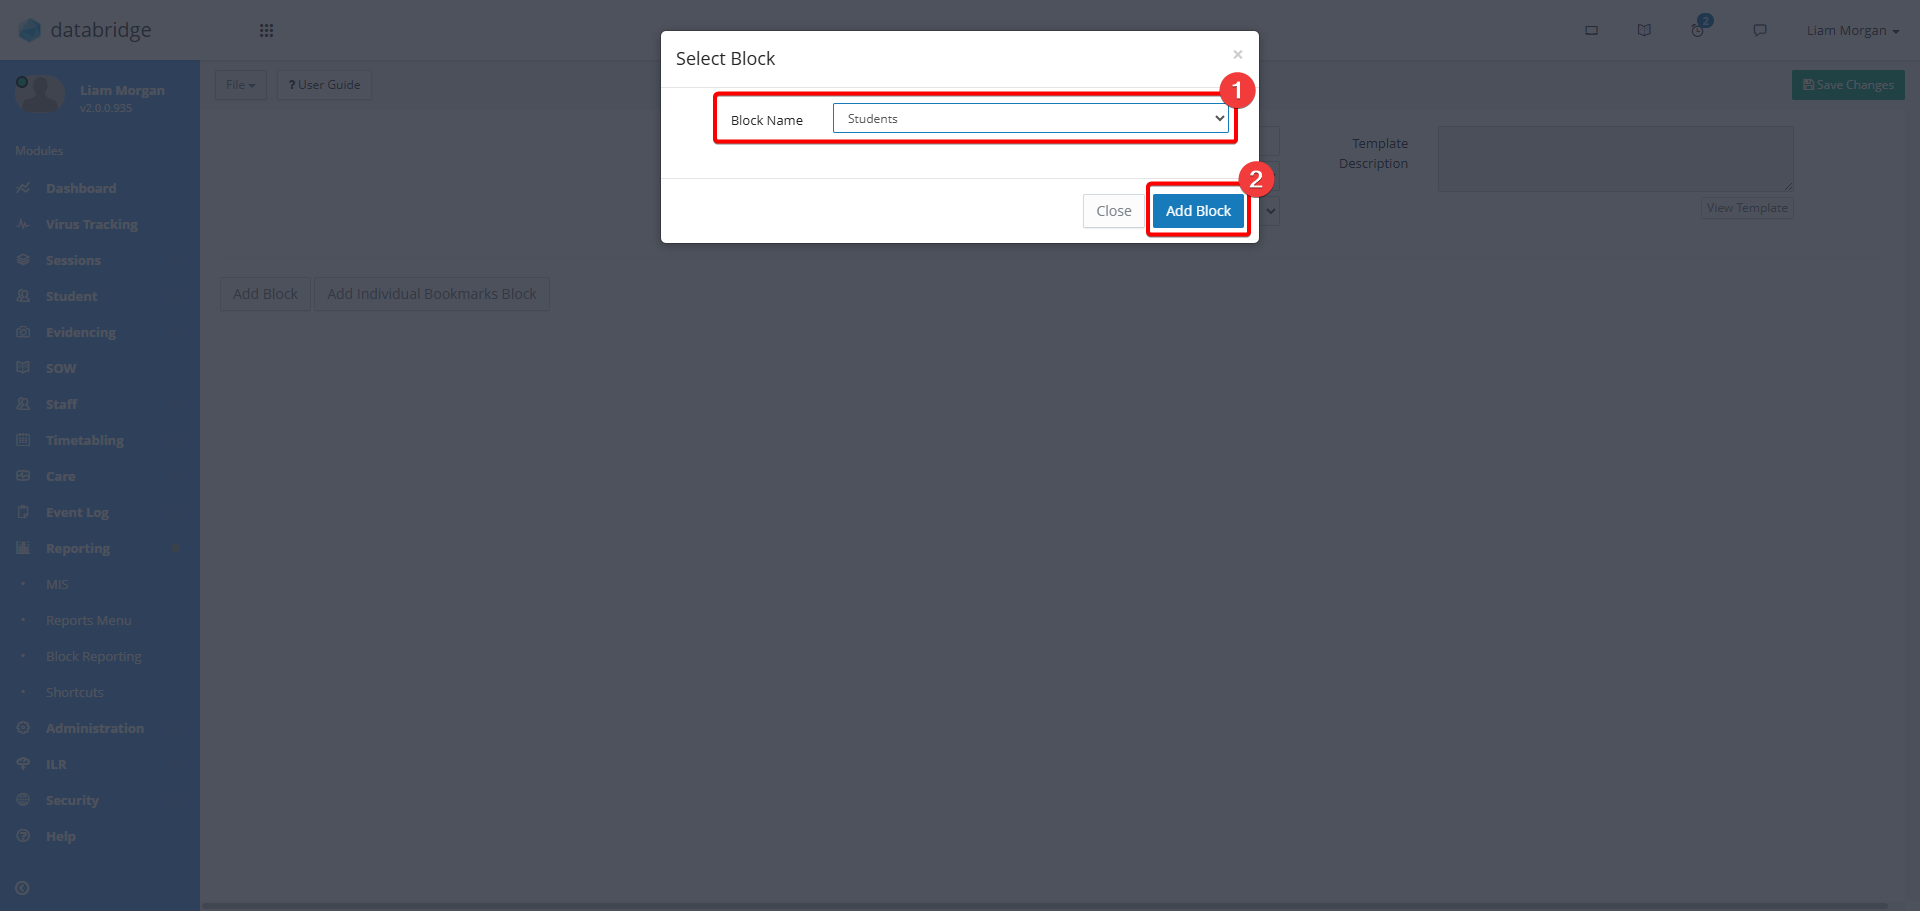
8. Select a block from the Block Name Dropdown Menu, then click Add Block.
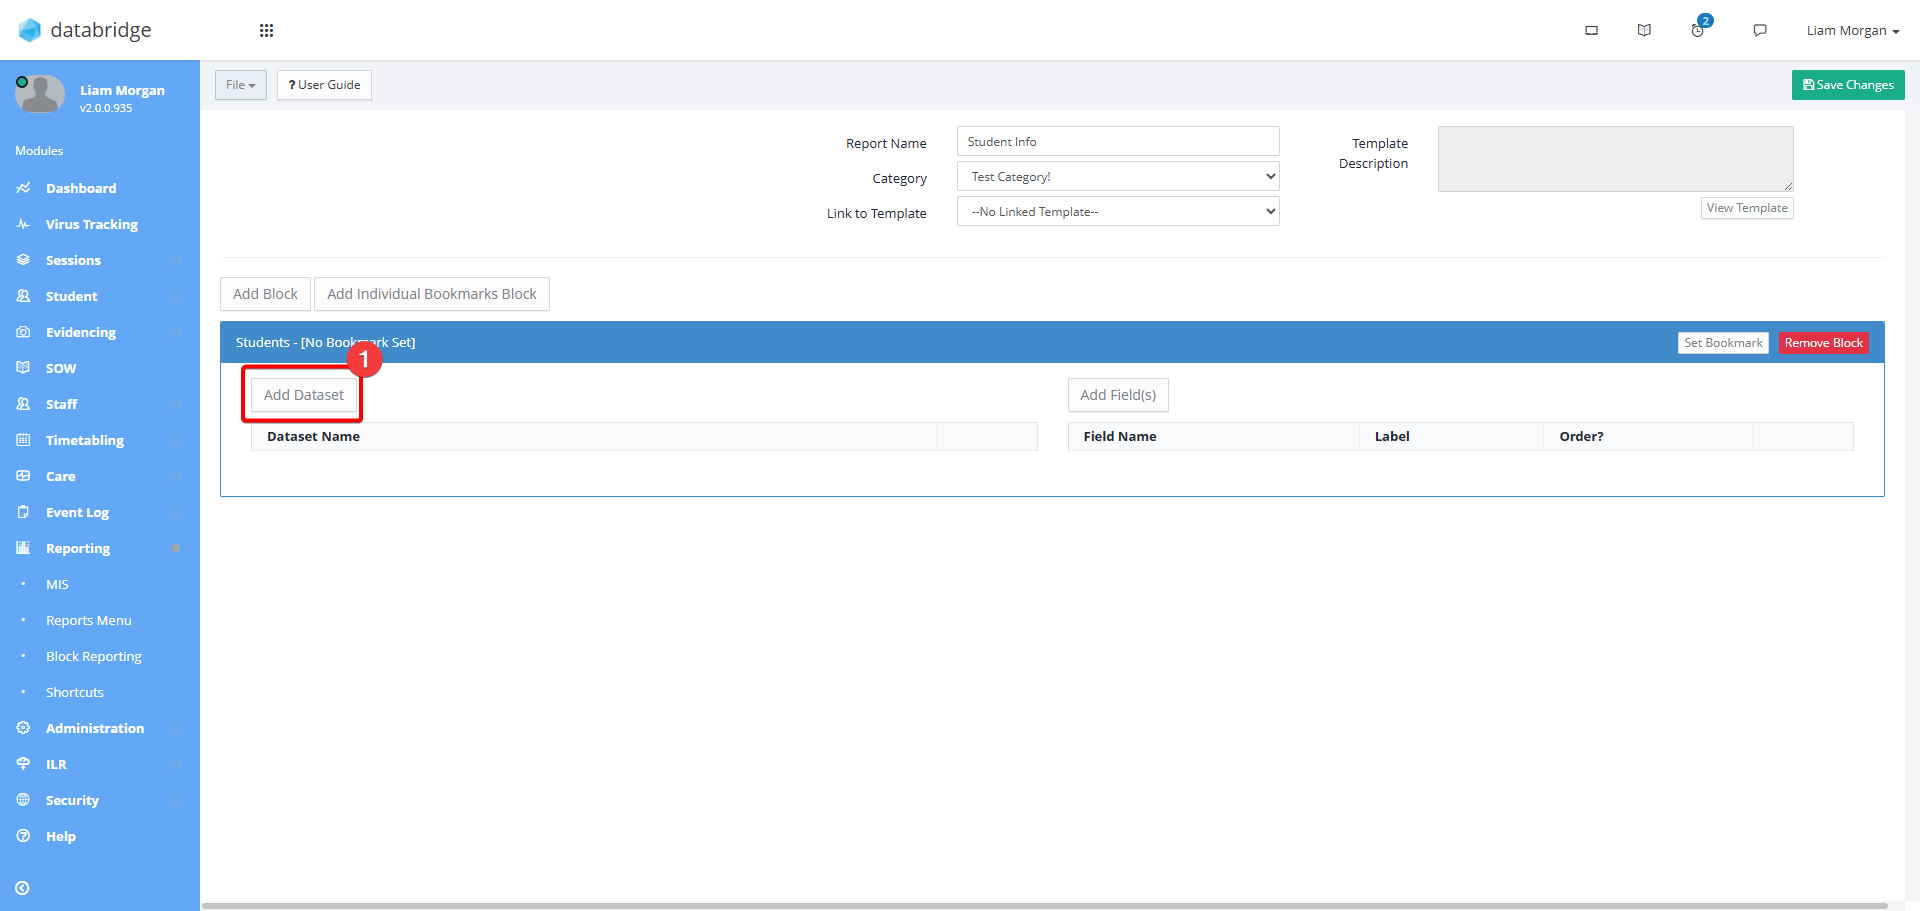
9. The selected Block will now appear on screen, with the option to Add Dataset, and Add Field.
- A Dataset acts as a filter, allowing you to be more specific on what data you are reporting on. For example, if Students is the Block, then the Dataset will include filters such as their Status, or Start Date.
- Fields are the specific bits of information that you want to appear on the report. Continuing on the example of Students, examples of fields would be, Name, Age, Address.
To add a Dataset, click Add Dataset.
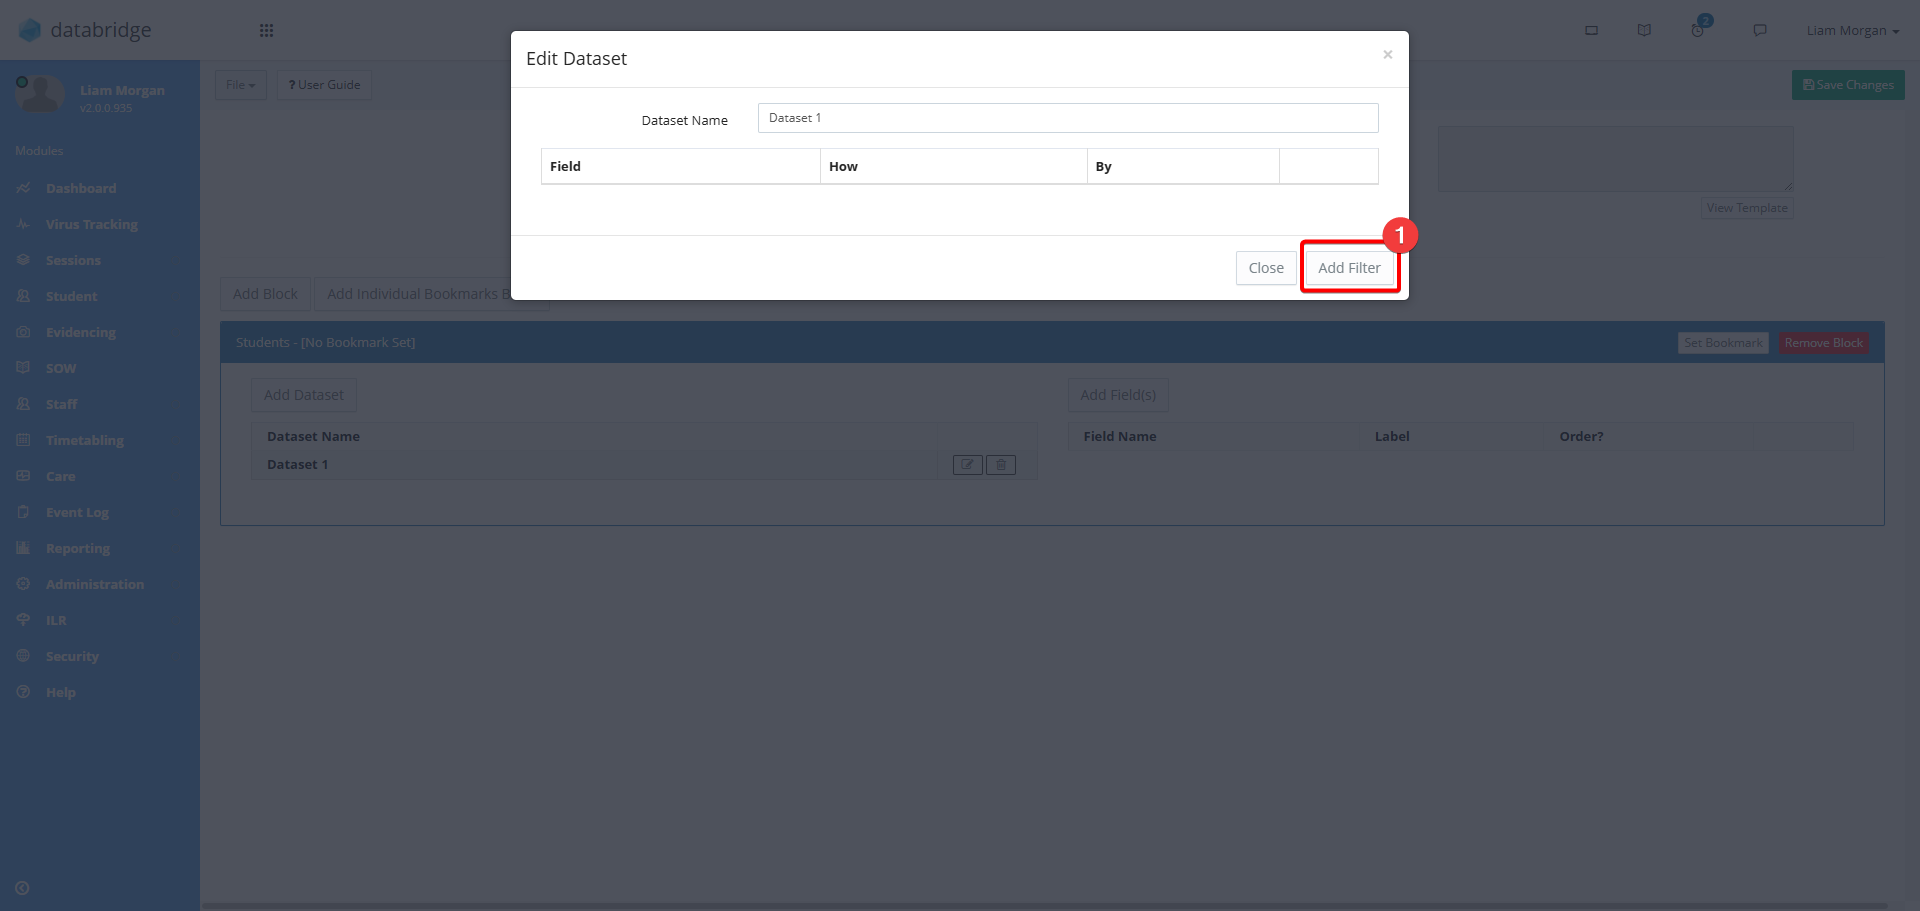
10. Click the Add Filter button to then bring up a window where you can then use the dropdown to select the specific criteria you want the report to check for. For example if you wanted to look at Current Students that started after September 2023 you would need to add two filters:
- One filter to specify the Current Learner Status. To add this, in the field window, select 'Status', the 'Filter How' field to 'Equal To', and the 'Criteria' field to 'Education Current'. Click Update to add the filter.
- Another filter to specify the Start Date. To add this, in the field window, select 'Start Date', the 'Filter How' field to 'Greater Than or Equal To', and the 'Criteria' field to '01-09-2023'. Click Update to add the filter. With these settings applied, we are asking for a report that is looking at all students that started on or after the 1st of September 2023.
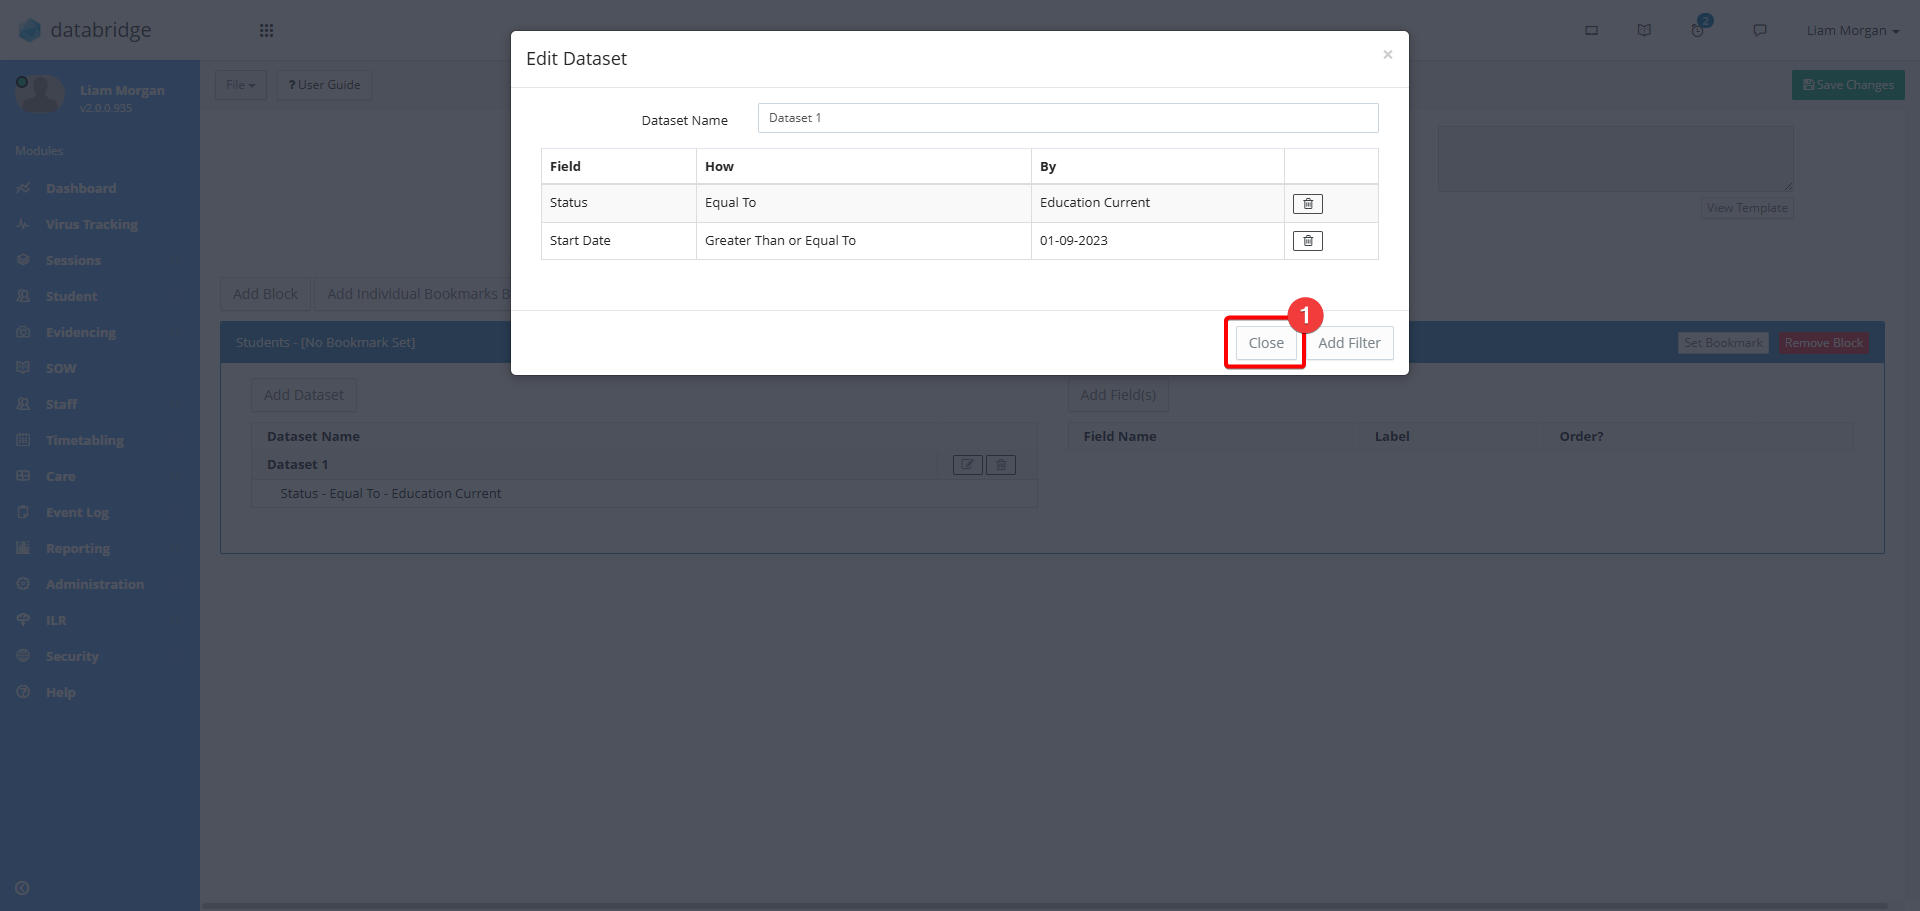
11. Once these filters have been applied, you will have something similar to the screenshot below. If you need to delete any of these filters, click the corresponding Trashcan Icon. Once all filters have been added, click Close.
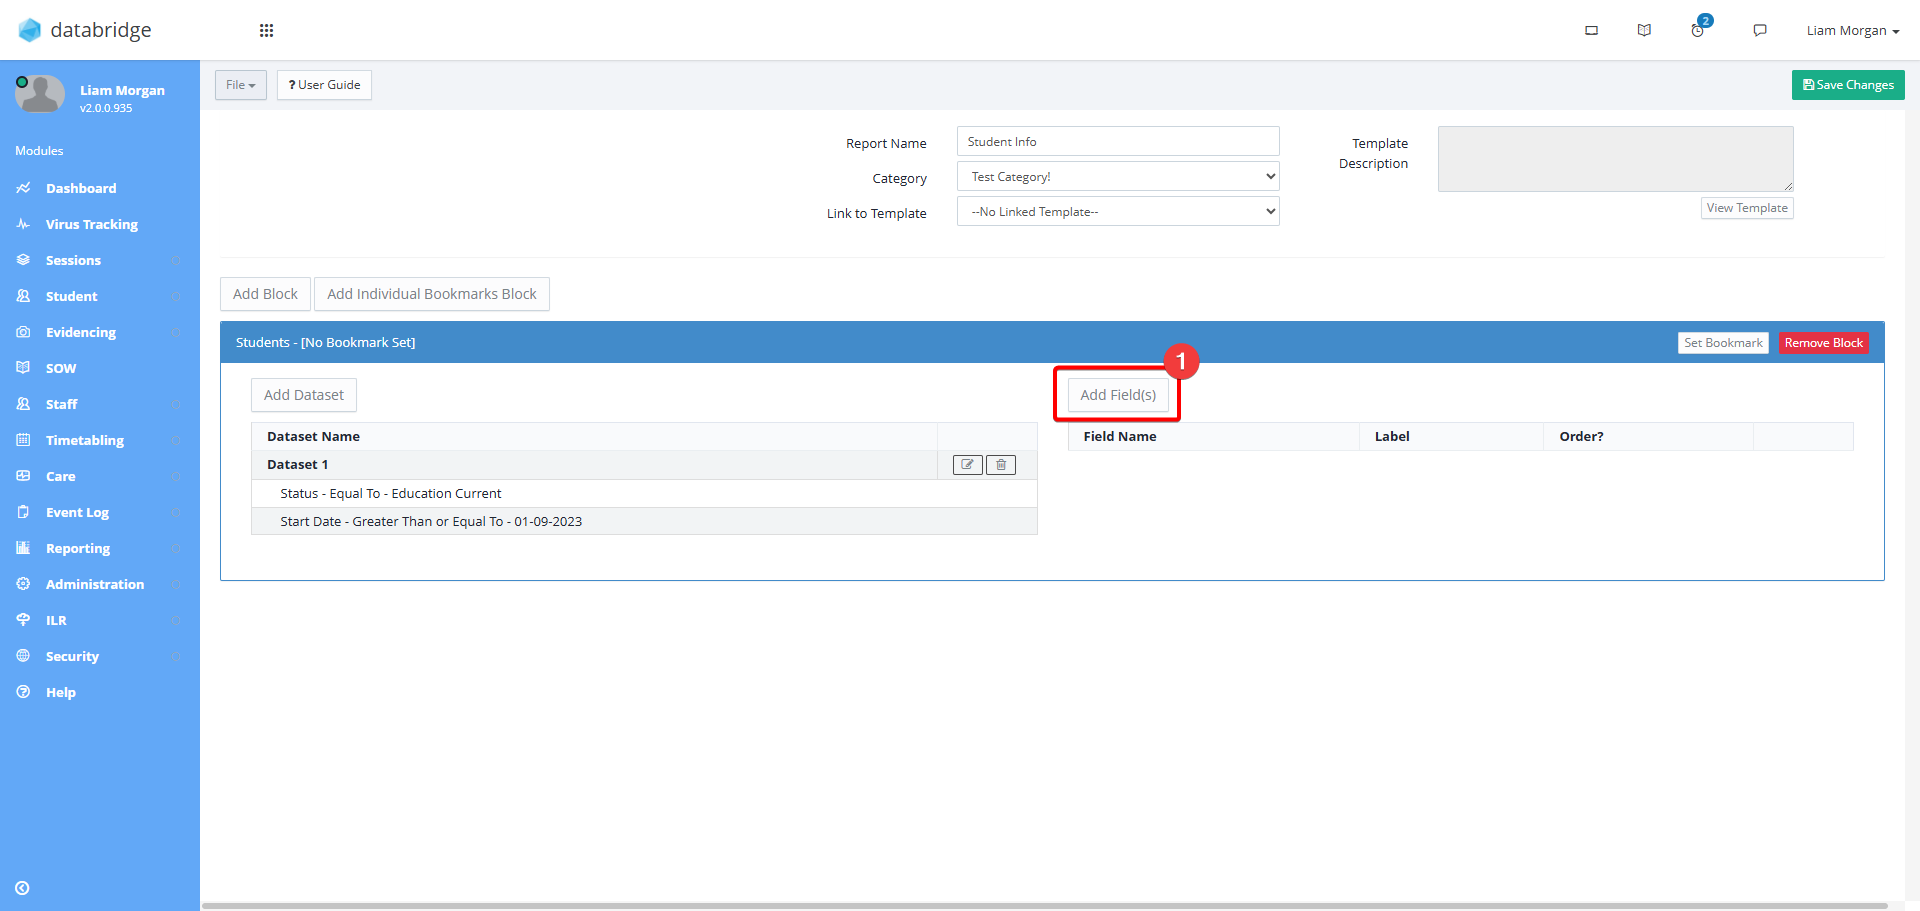
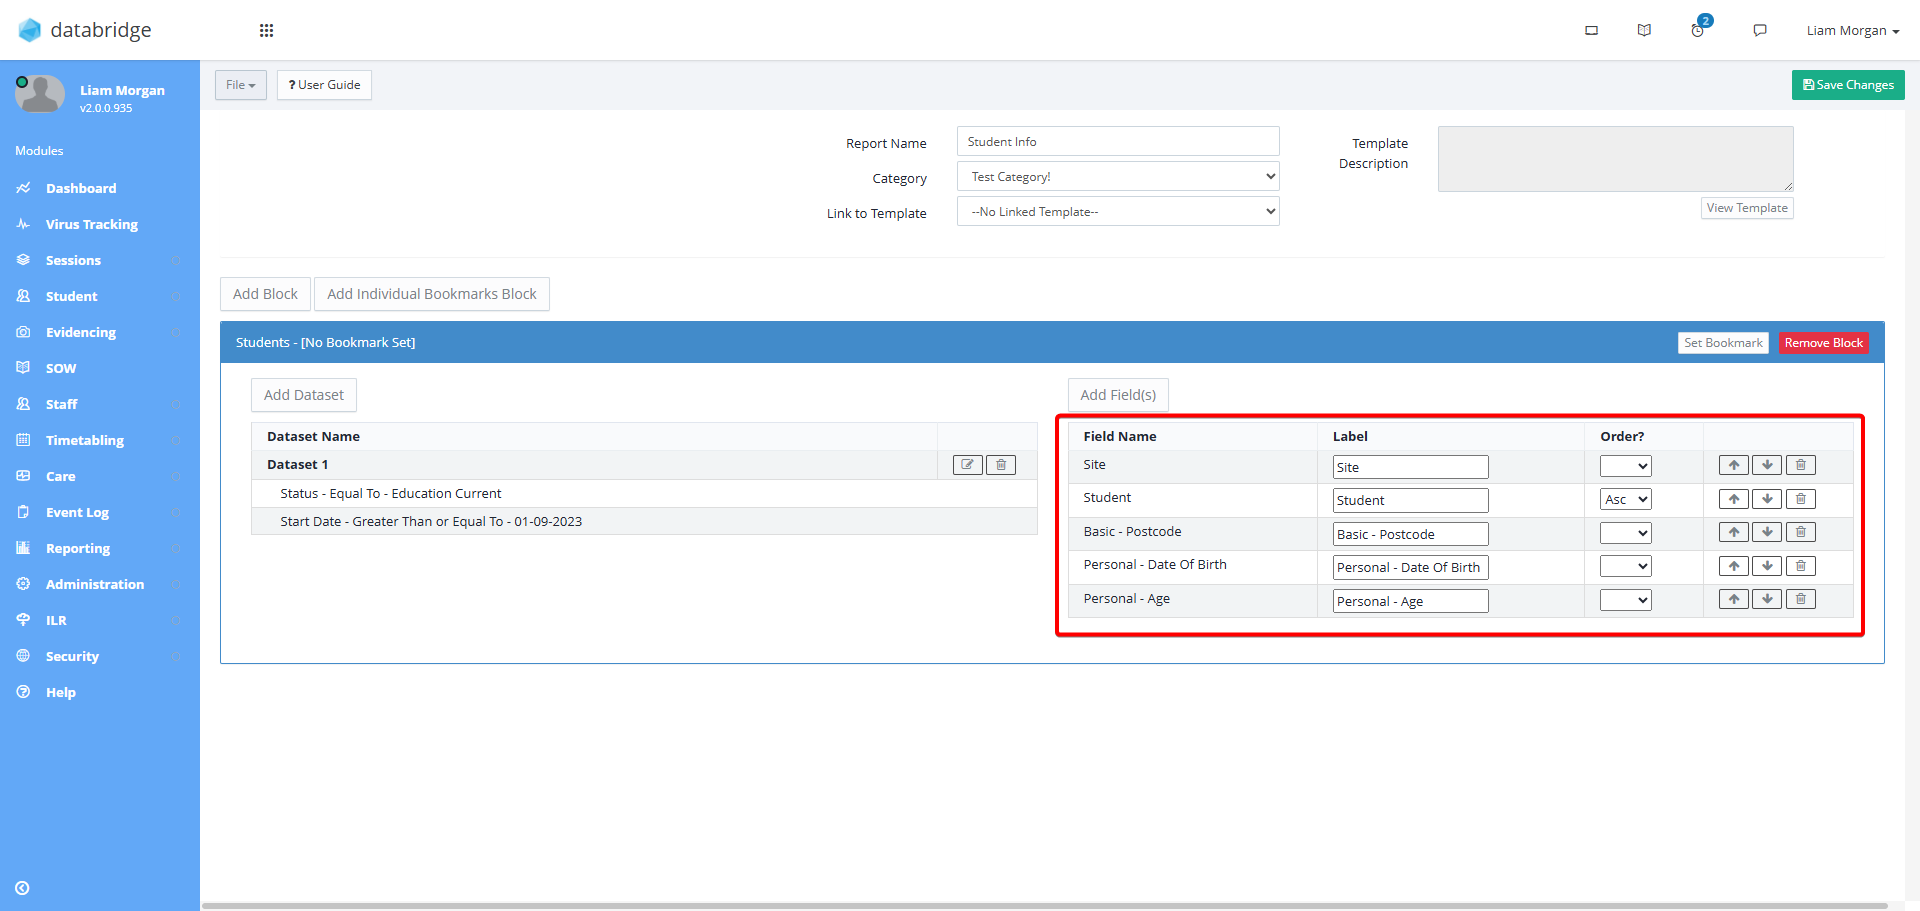
12. Next, you need to add the Fields to specify information that you want to appear on the report. Click Add Fields.
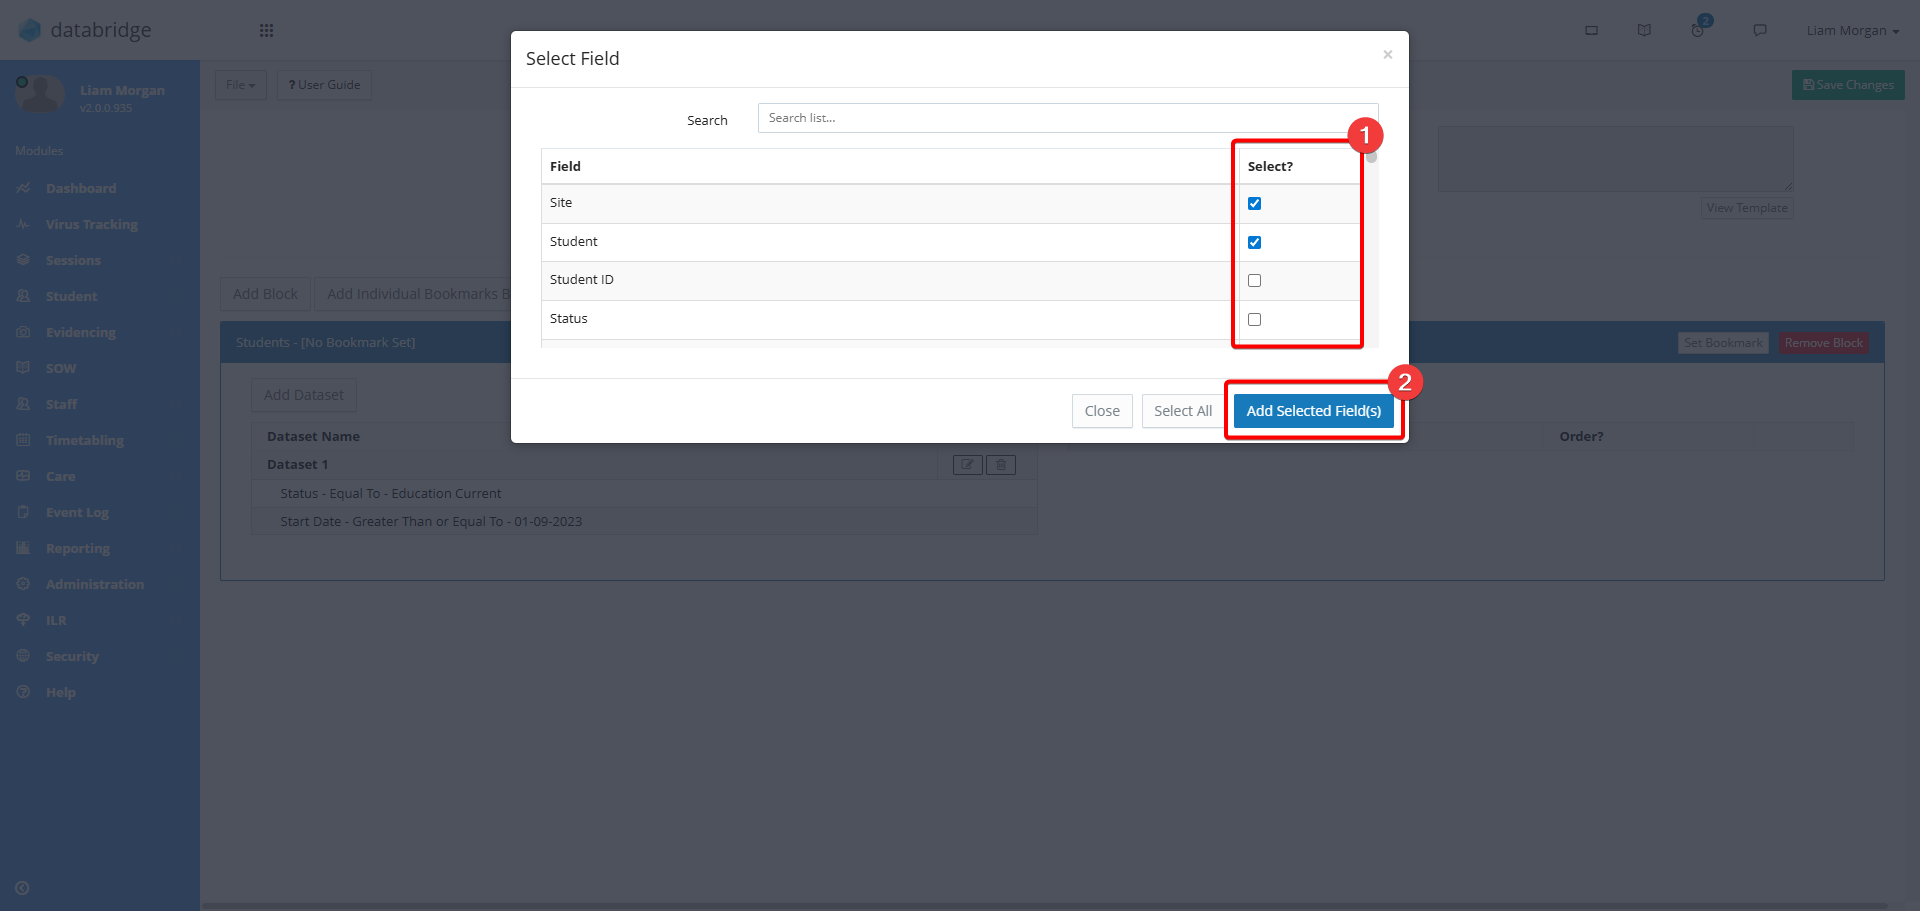
13. This will bring up a window with a list of the different fields that you can include on the report. Use the checkboxes to select the fields you require. Once selected, click on the Add Selected Field(s) button.
14. These fields will now appear on the right hand side of the screen, and there are multiple things you can do here before you finish making your report:
- Label allows you to change the title of each Field.
- Order Allows you to specify the order that the data for each Field appears in.
- Use the arrow icons to move the fields up and down the list - this will set the order that the fields appear on the report. Use the trashcan icon to delete the field from the report
Creating Custom Reports - Adding Individual Bookmark Blocks
Individual Bookmark Blocks allow you to add Bookmarks to your Custom Report, signposting where you would like different fields of information to appear on your printout.
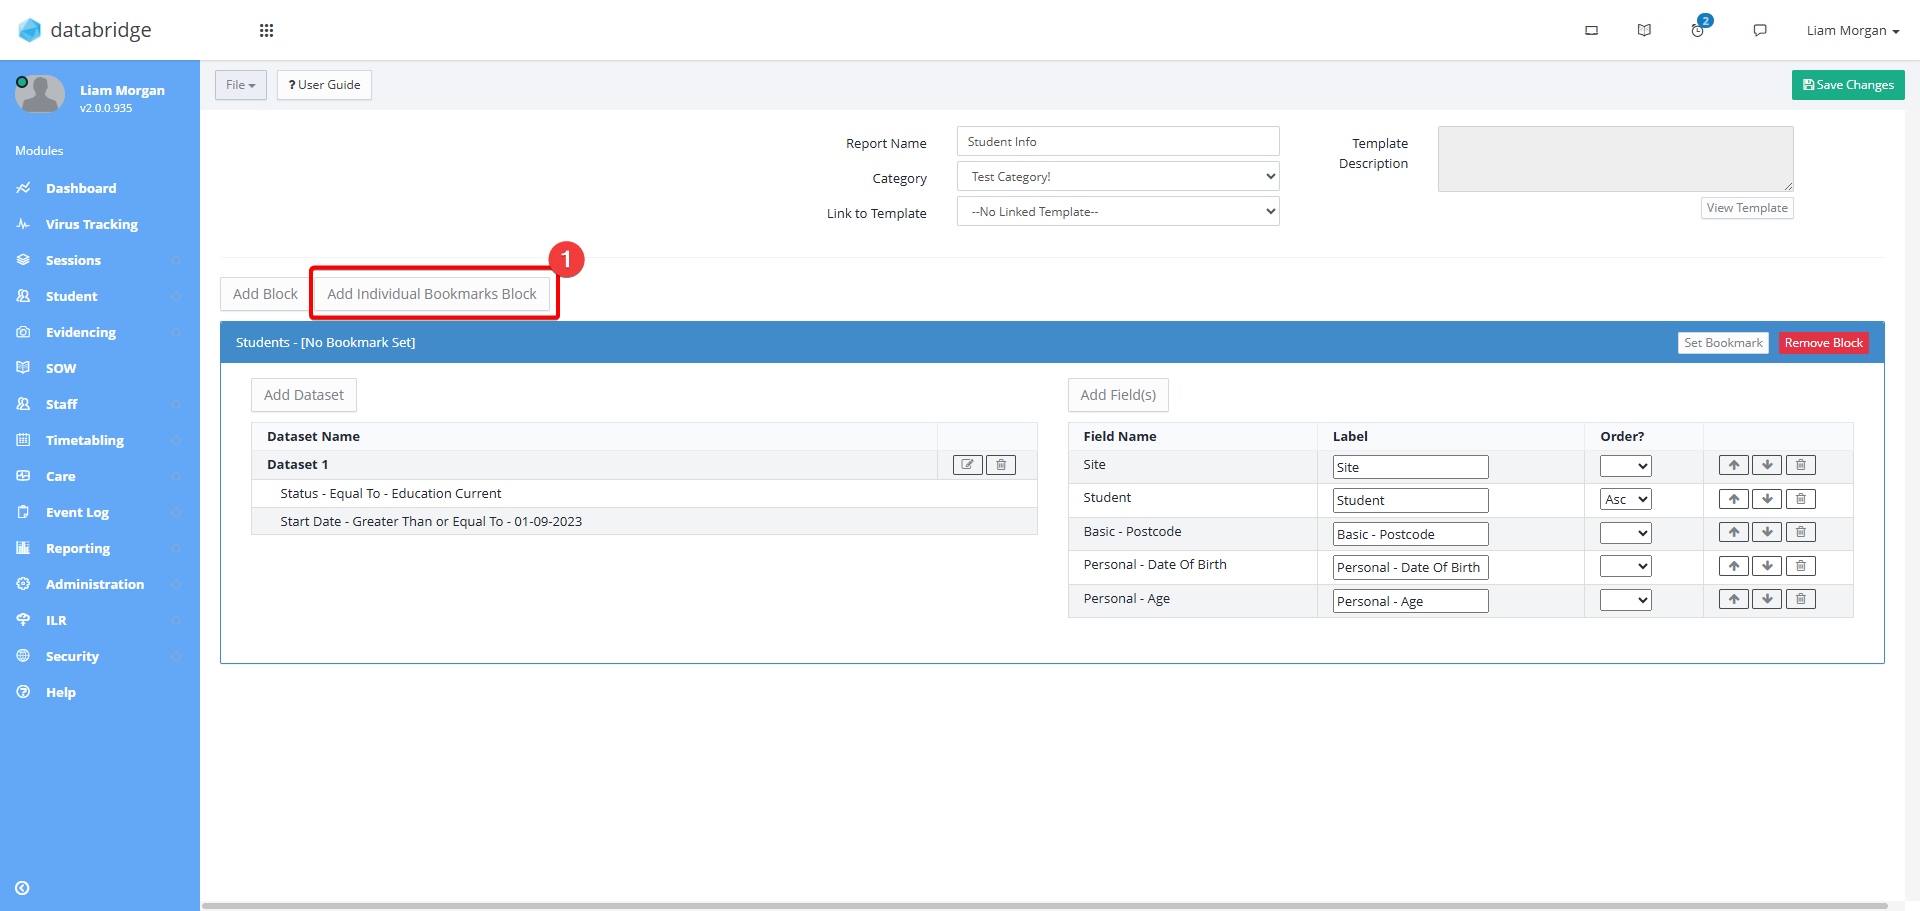
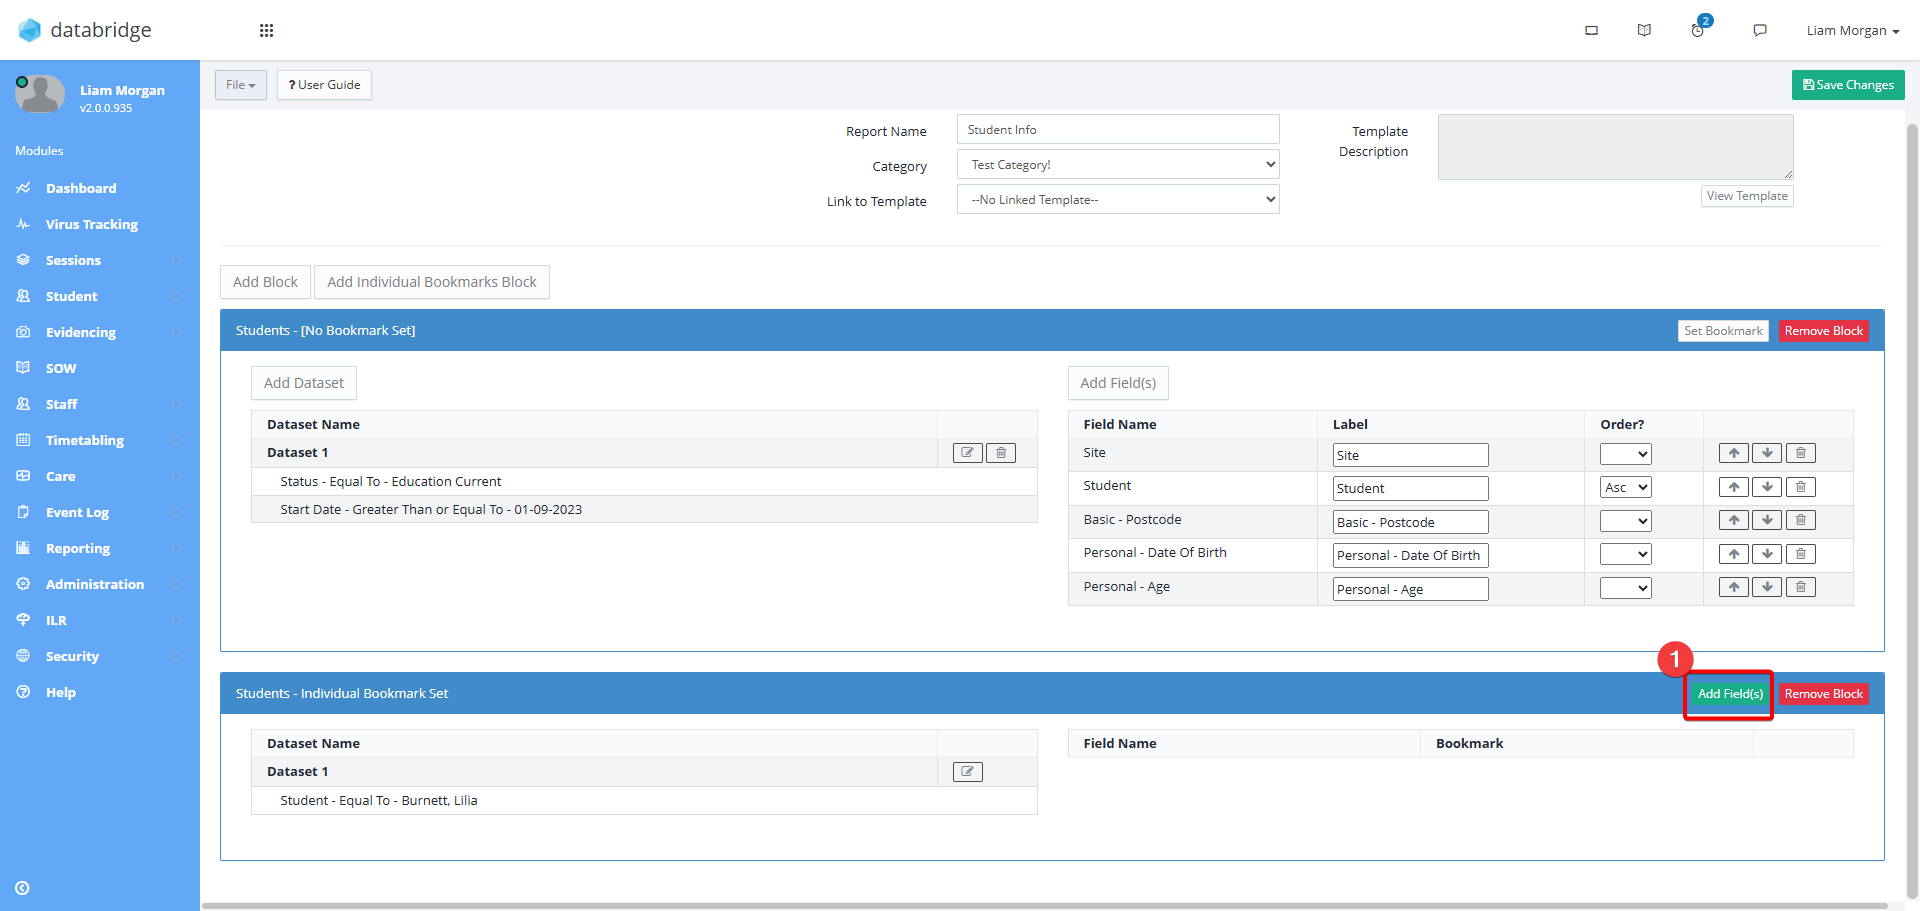
15. First, click Add Individual Bookmarks Block.
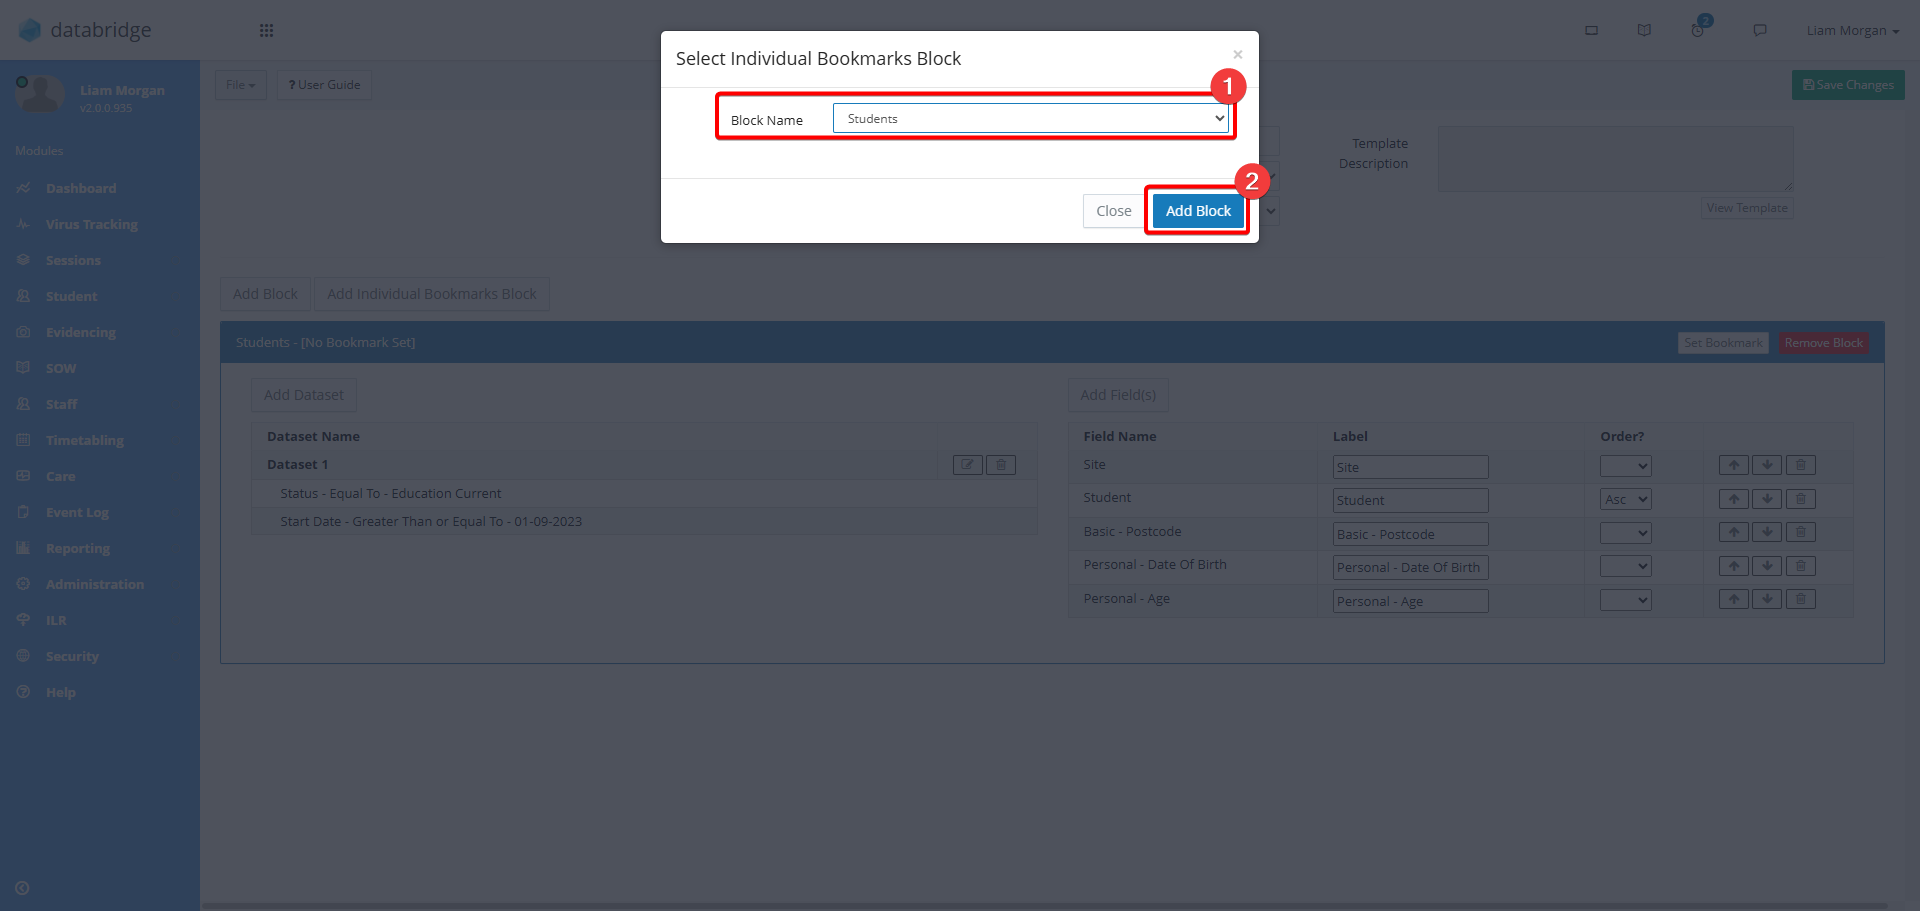
16. Within the window that appears, select either Student or Staff from the dropdown and then Add Block.
17. Use the dropdowns on screen to select the individual Student or Staff member, then click Update.

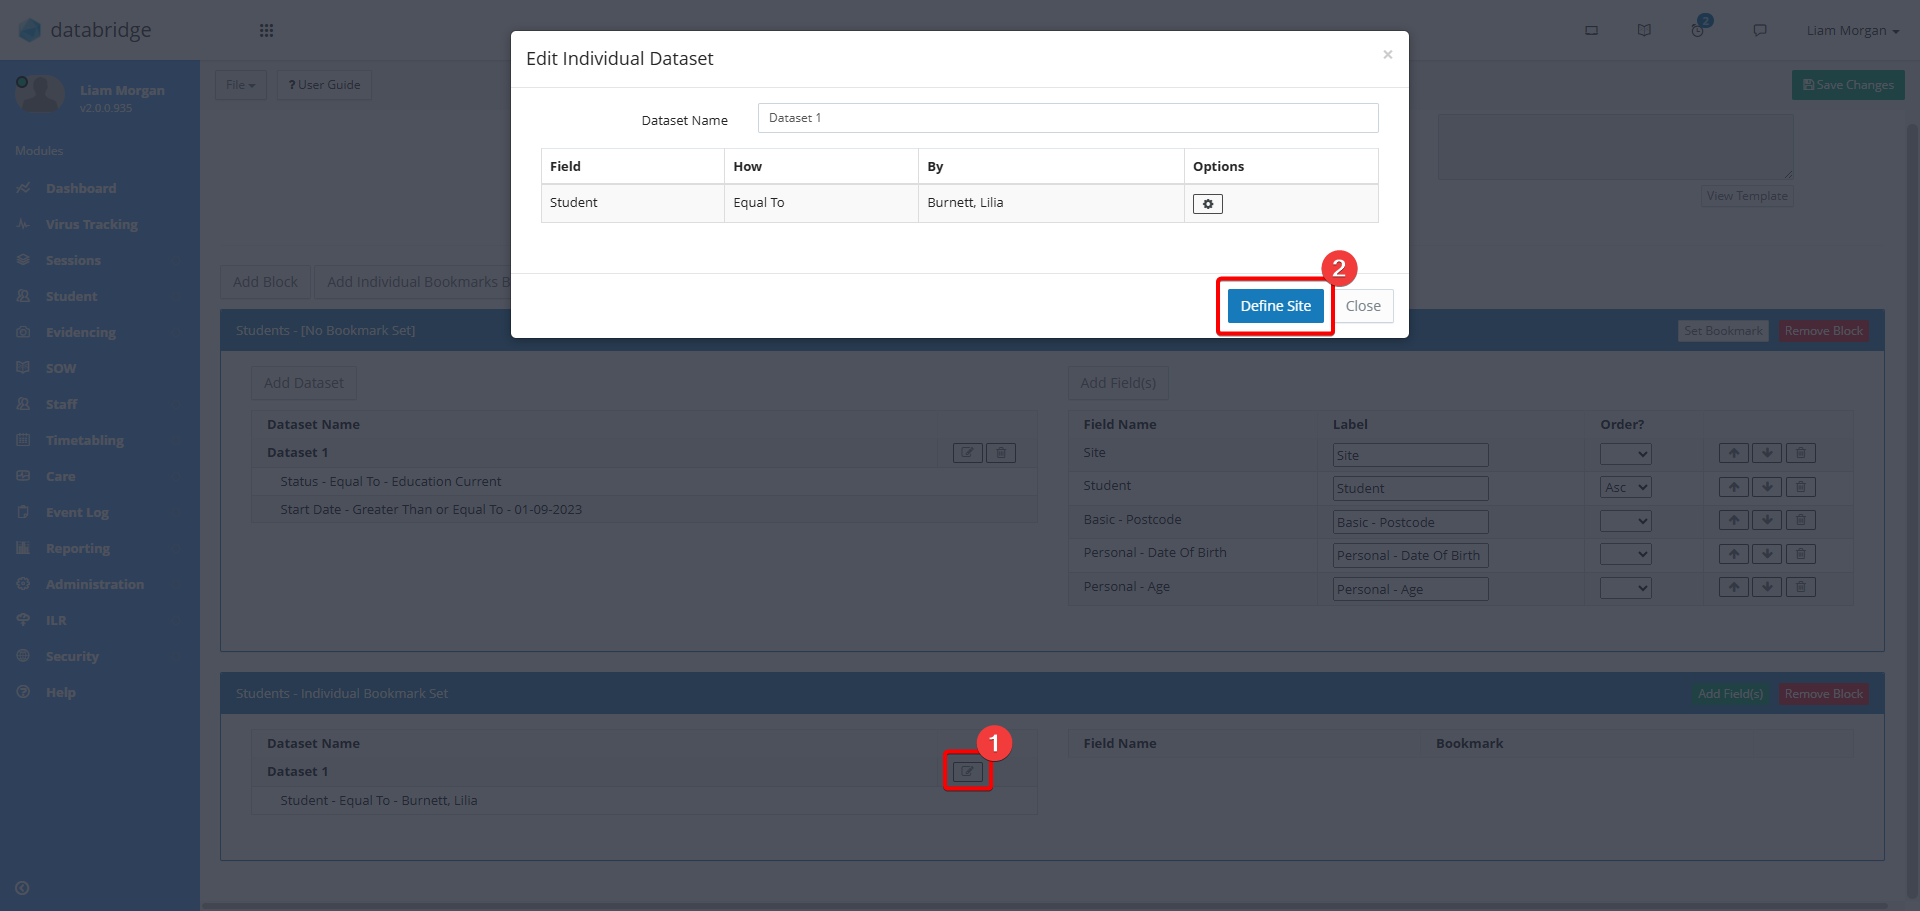
18. They will now appear in the Block on the lefthand side. If the learner is in multiple different Sites and you wish to only report on one site, you can define which site you wish to report on by clicking on the notepad icon for the Dataset, and then the Define Site button.
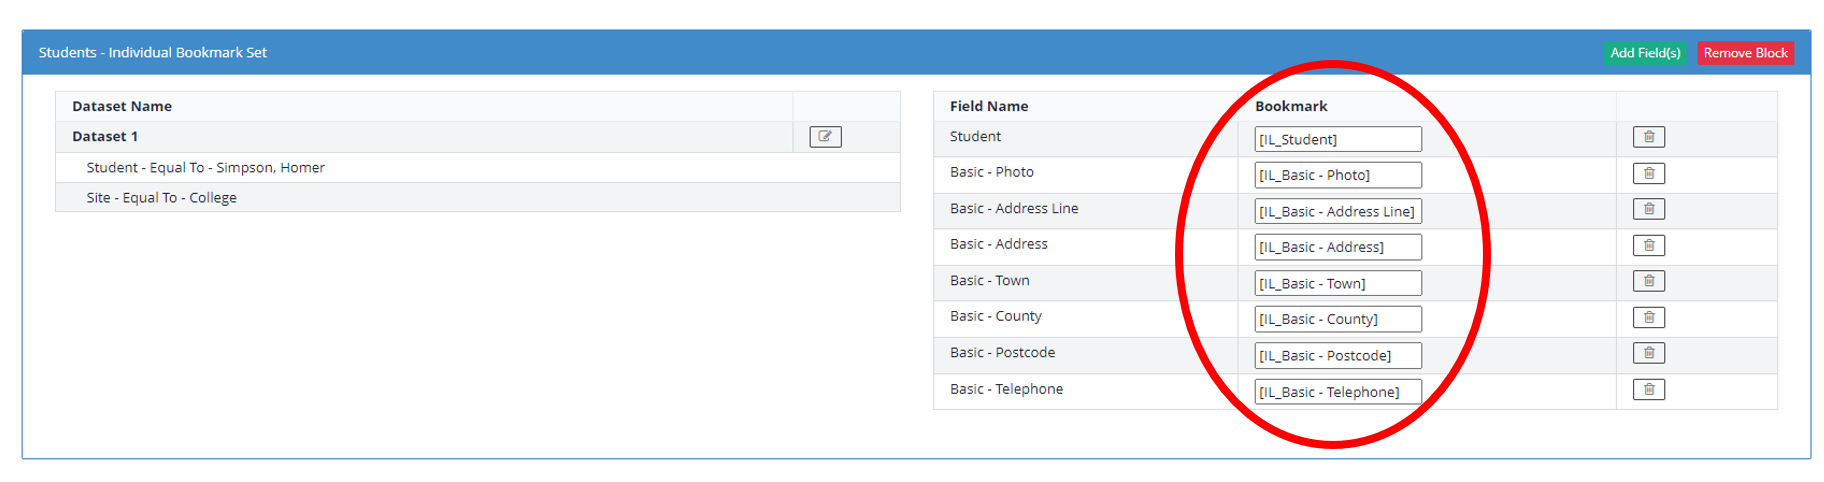
19. Next, to add the fields that you wish to create Bookmarks for, click on the green Add Field(s) button on the right of the Block.
20. Use the checkboxes to select your desired fields. Click Add Selected Field(s) to save. The fields will now appear in the Block.
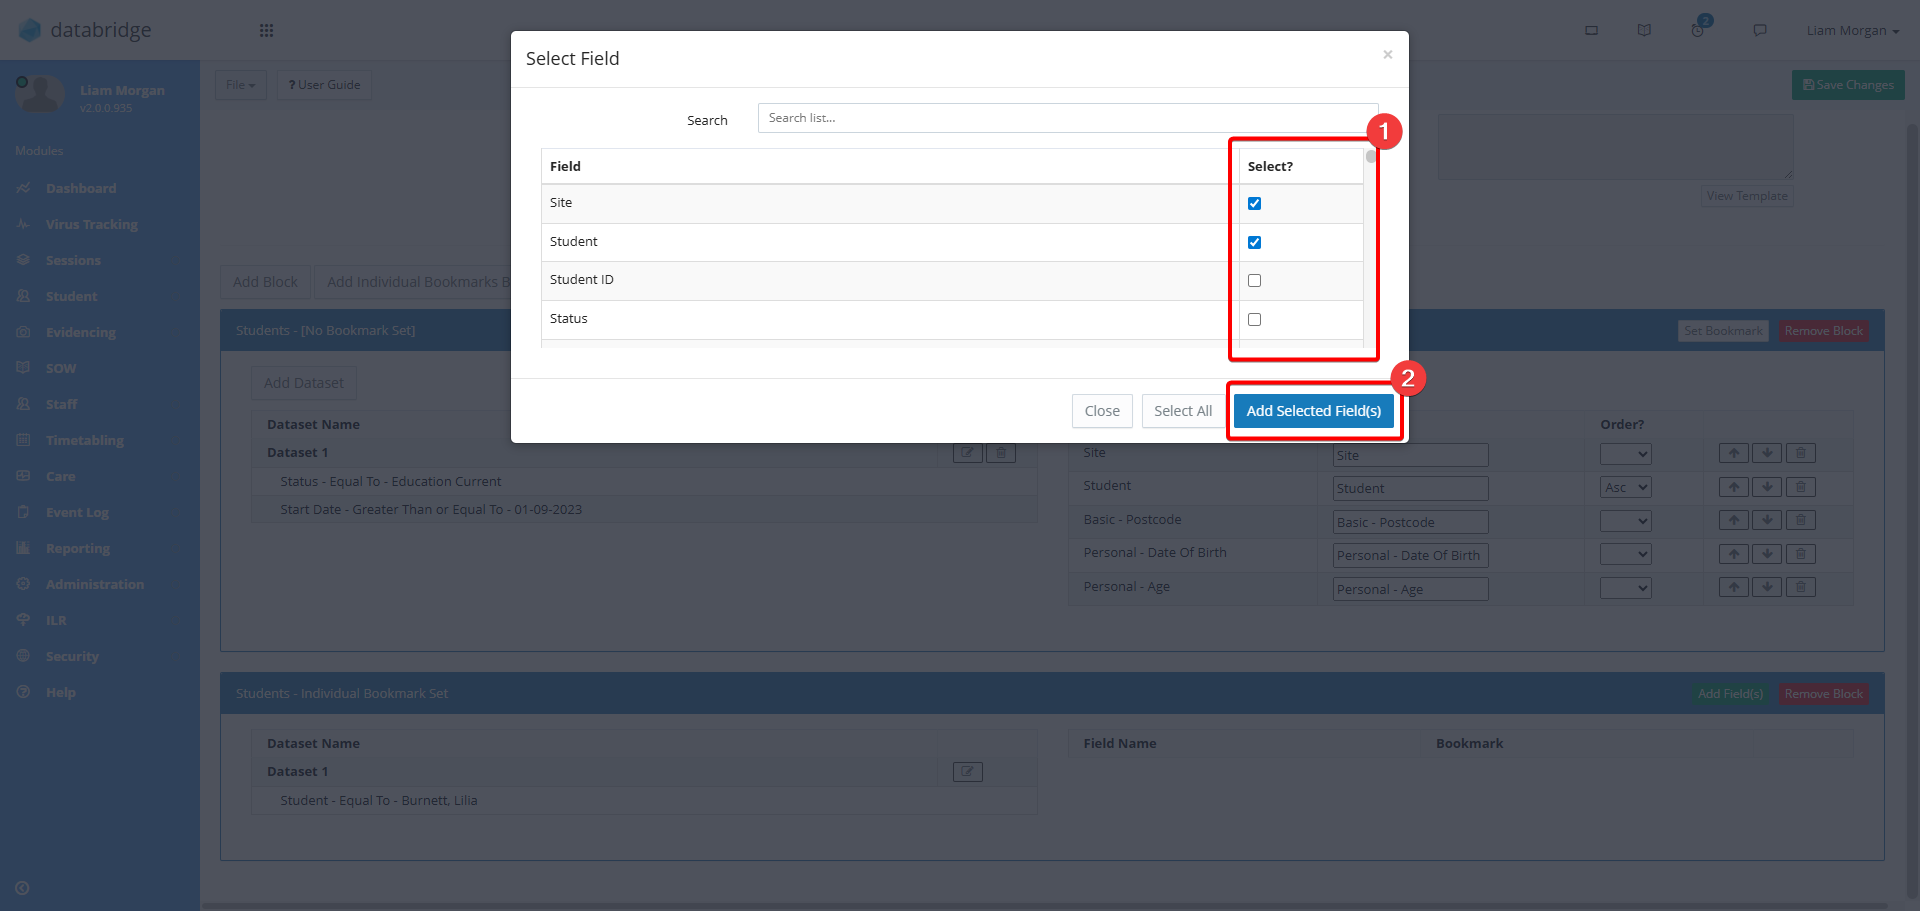
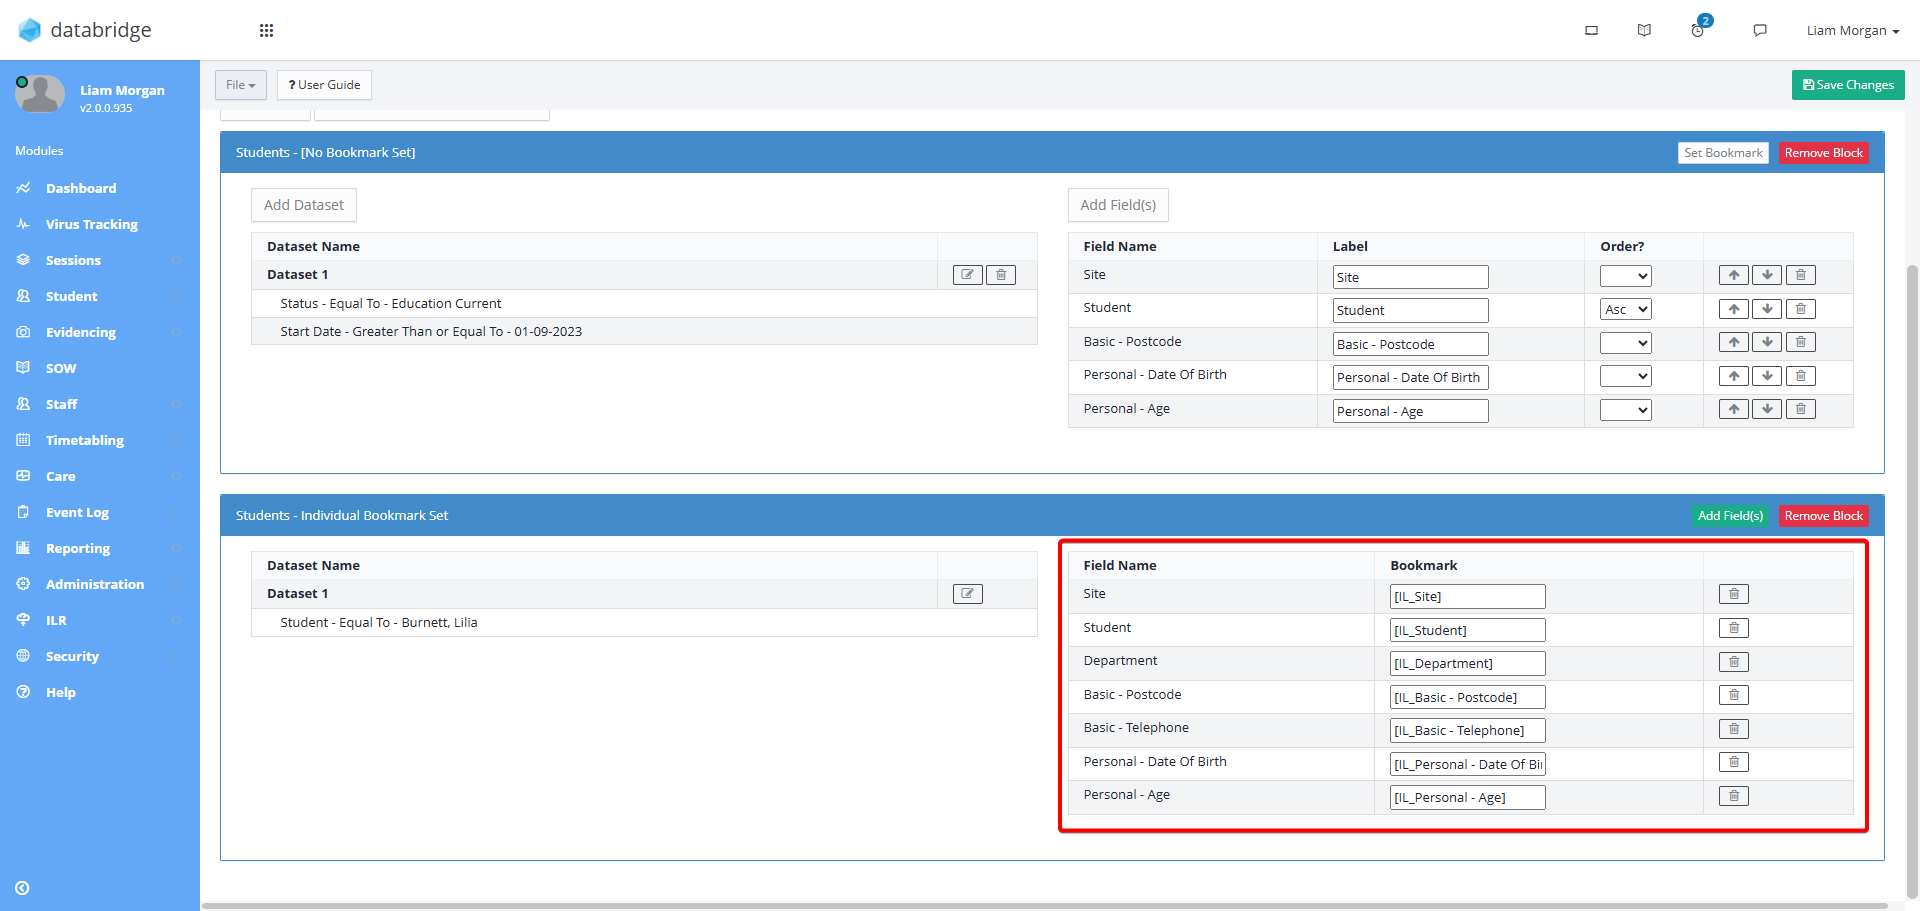
20. Adding fields to an Individual Bookmarks Block differs from adding a regular Block. There are 3 columns, one displaying the Field you have selected, one with a textbox field where you can create a Bookmark, and a delete option.
In the column labelled Bookmark a default Bookmark will have been created for you - you can edit this if preferred.
These are the Bookmarks that we will add to our Template before printing. See the chapters "Creating Templates" and "Using the Template Manager" for more information on this.
Creating Templates
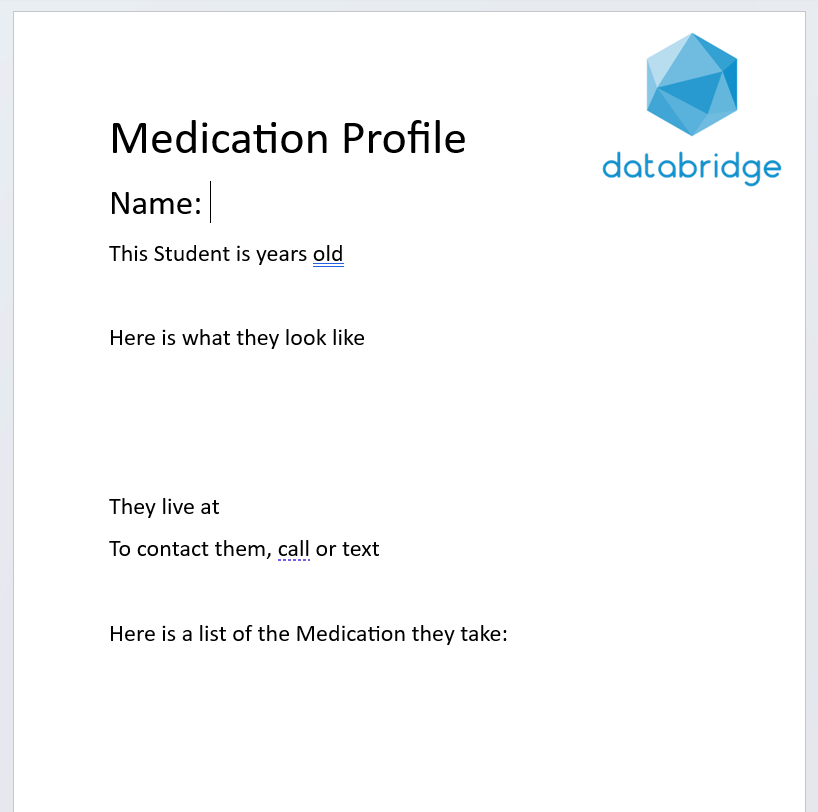
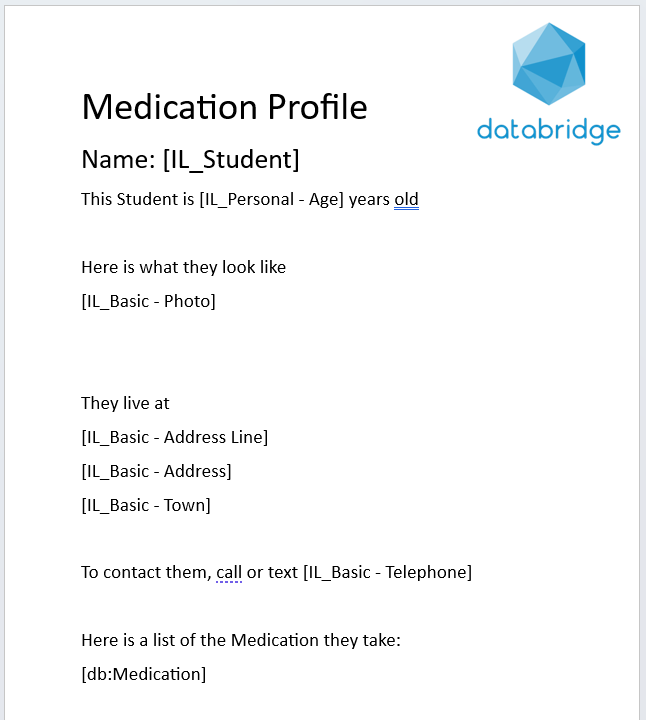
21. You have total freedom when it comes to creating your Template, and can add as much context around the Bookmarks that you are using as you wish, as well as change the look of your report to include your School or College logo, as an example.
For this example, I am trying to create a Custom Report that shows me what medication a learner is prescribed, and a breakdown of their information.
Here is the first draft of the Template that I wish to create:
22. Next, add in the relevant Bookmarks, signposting where I want information on Databridge to appear on my printout.
To do this, I can copy and paste from the column labelled Bookmark on the Individual Bookmark Block.
Using the Template Manager
23. To upload your Template to Databridge, first navigate to the Template Block Report Menu via Reporting > Block Reporting.

24. Click the Report Type dropdown and select Template Block Report.

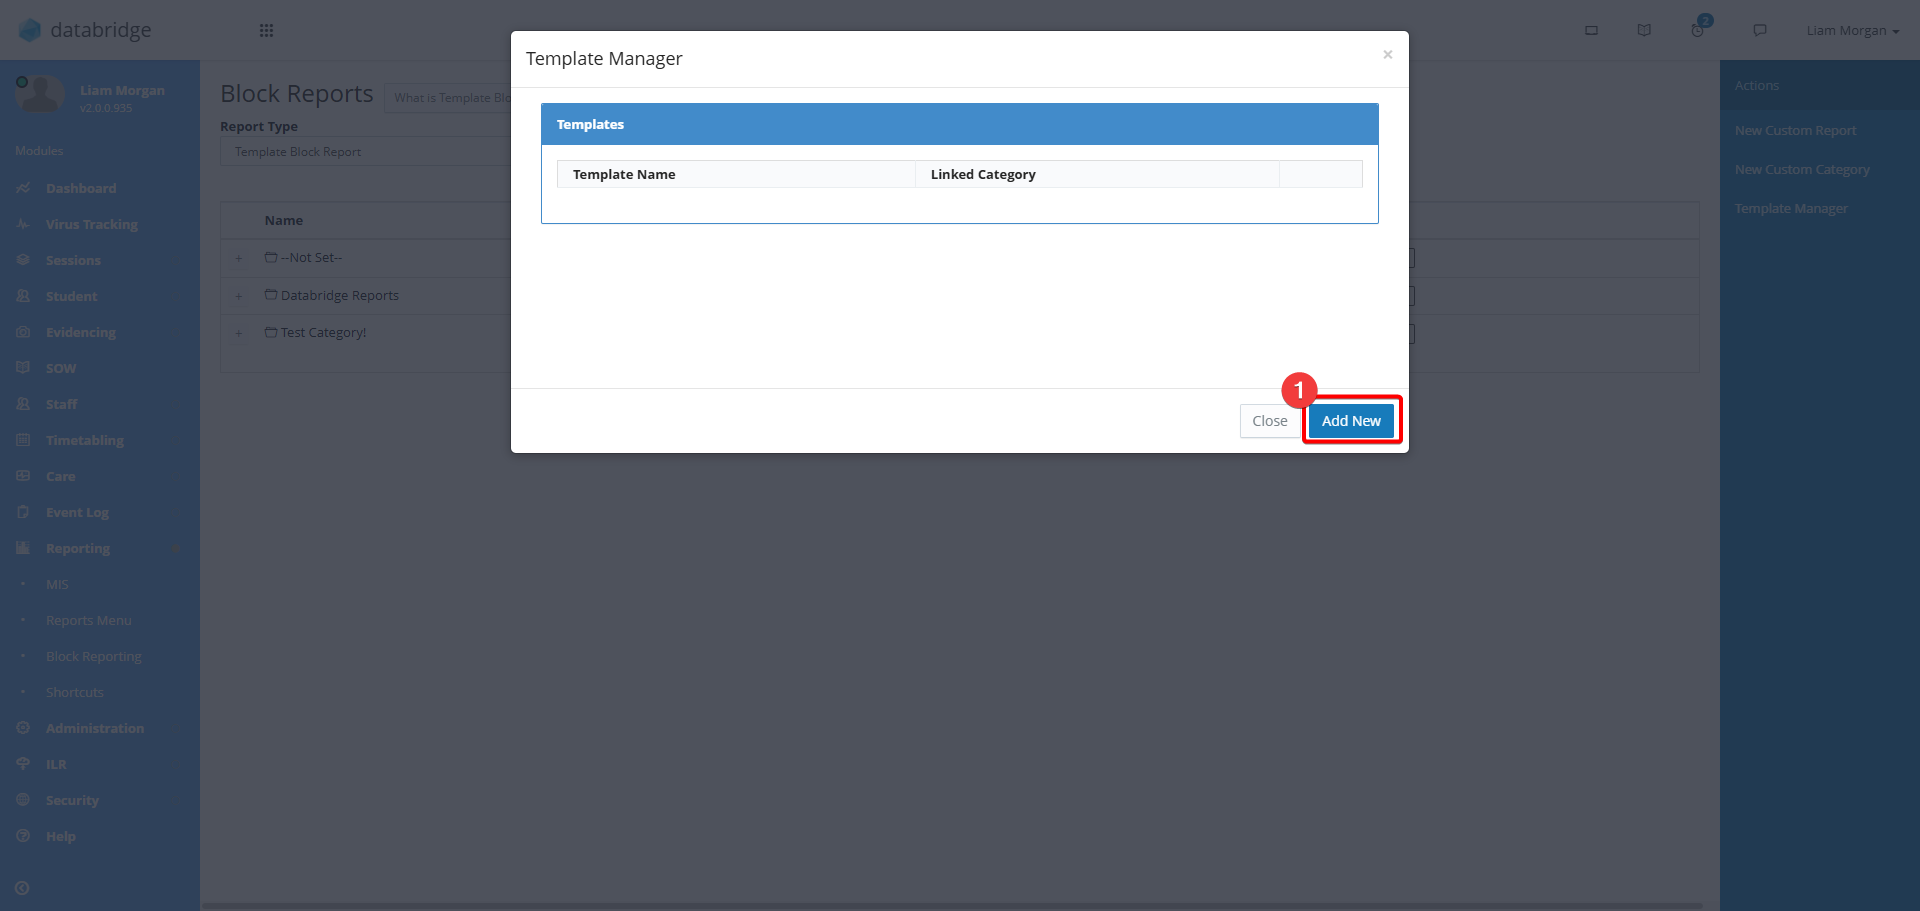
25. Click Template Manager.

26. Click Add New.
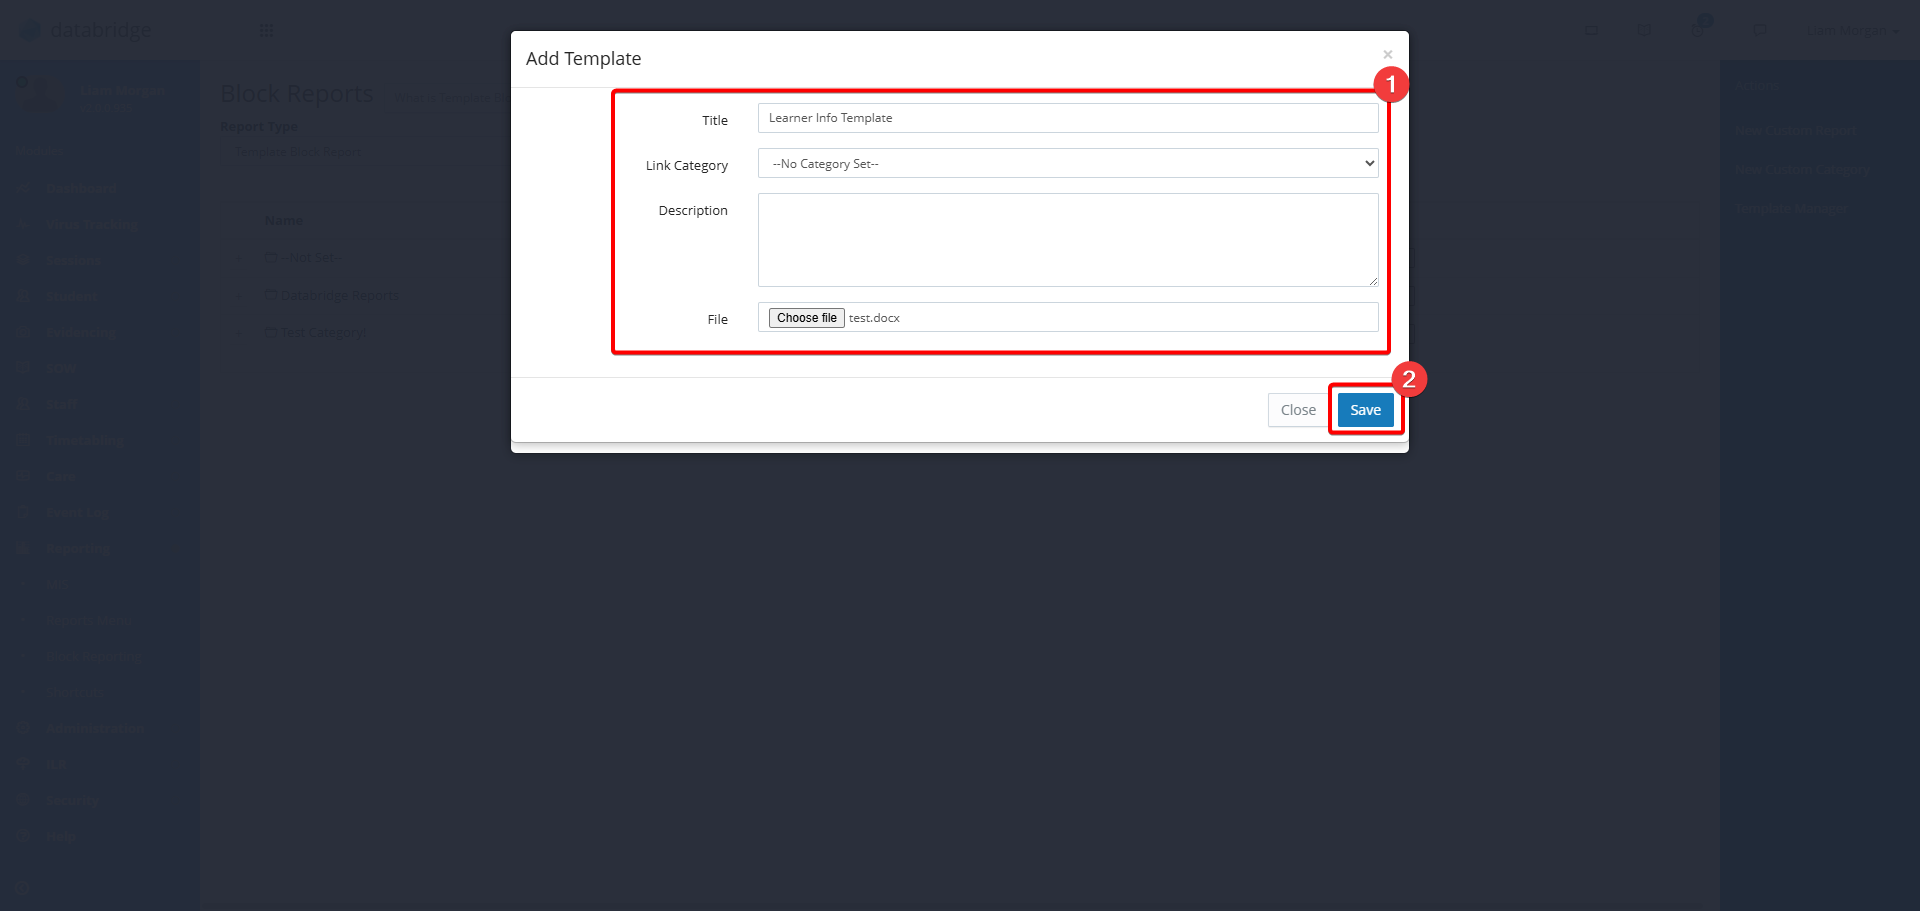
27. In the window that appears, fill in the details and click Choose File to upload your Template. Then click Save.
28. Lastly, you just need to link the Template to your report. From the Template Block Report menu, click the Notepad Icon next to your report.

29. Select your Template from the Link to Template dropdown menu.
30. Click Save Changes. 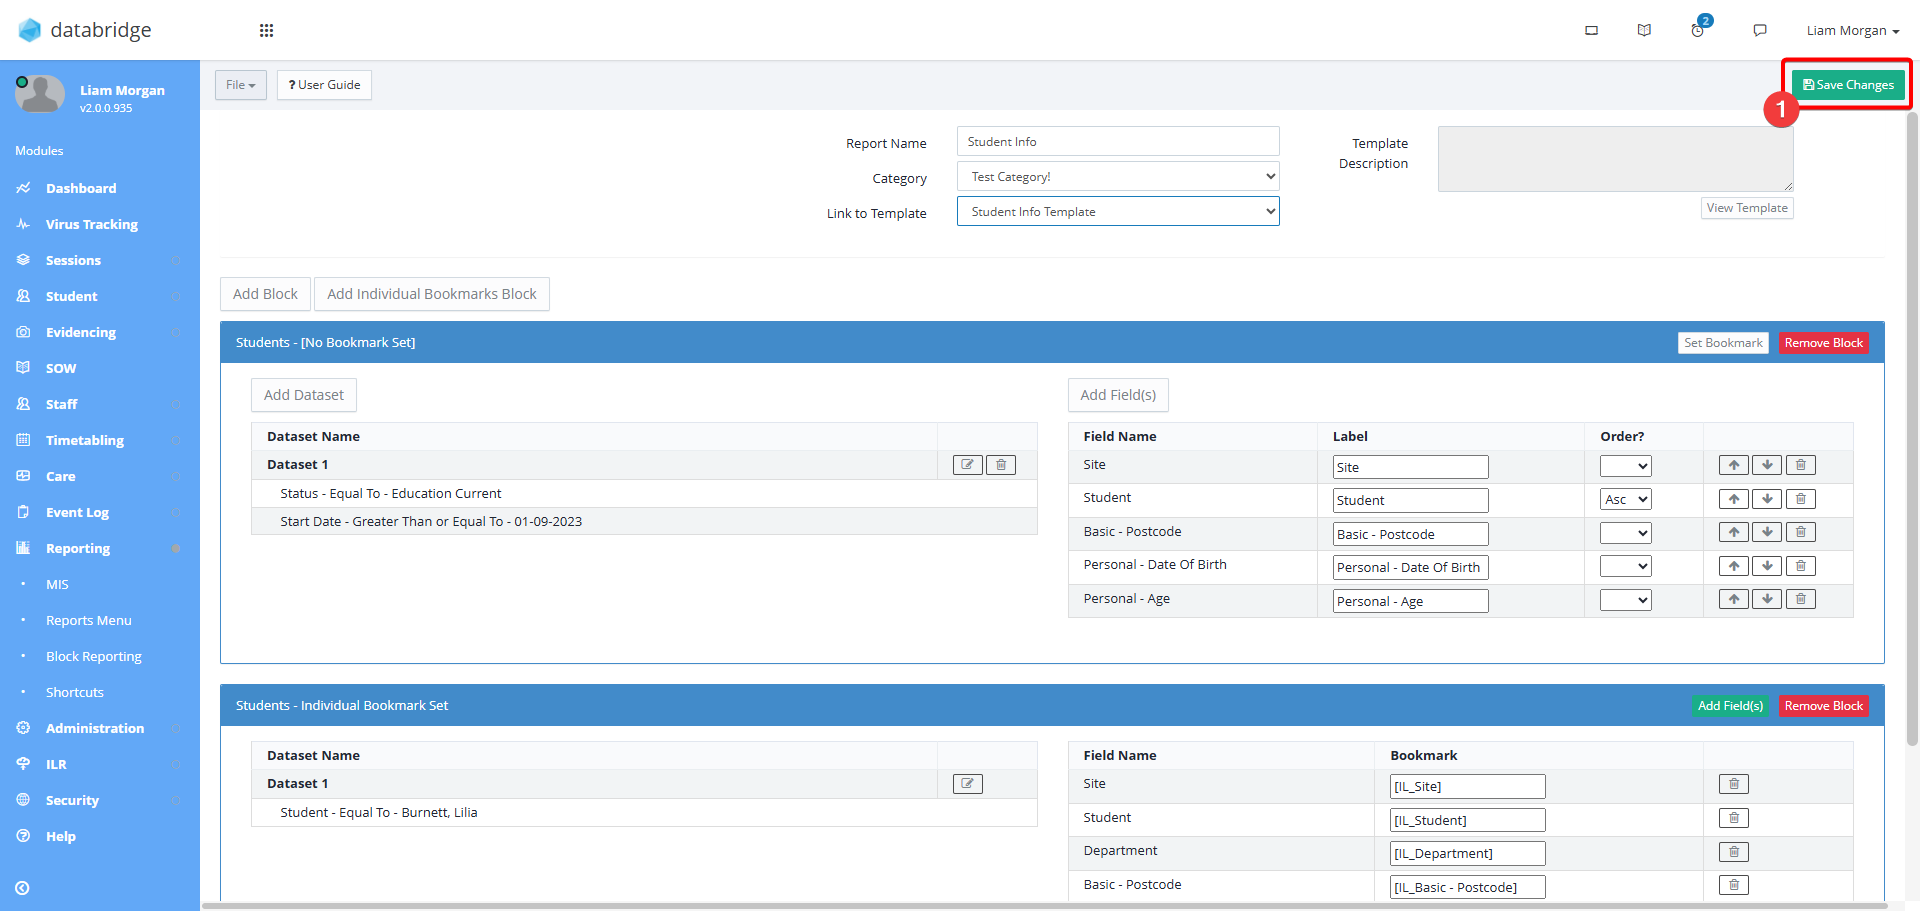
Was this article helpful?
That’s Great!
Thank you for your feedback
Sorry! We couldn't be helpful
Thank you for your feedback
Feedback sent
We appreciate your effort and will try to fix the article